Search the Community
Showing results for tags 'blender', 'tips', 'addon', 'tutorial' or 'advices'.
-
Hello everyone, It's my turn to provide some tips for new players on how to become powerful in the game. I hope you've already read "From Nub to OP" and @Mentula's advices, which are both awesome guides to reach level 1400 and more. I'm not the most powerful player, but I'm proud of where I am today, considering that less than just a year ago, I was begging OP players to let me play with them in TG. The tips I'm about to share are my personal strategies, but remember that you don't have to follow them strictly since every game is different, opponents react differently, and resources are always varied. Also, feel free to share your own tips in the comments. I only use two mods, Autociv and Quick Start, although I don't always use everything that Quick Start offers. Here are my tips, listed in no particular order: Aim for 10 fields to produce food, which requires 50 women. If you plan to create cavalry or elephants, make at least 12 fields (Hans recommends 17 to 20 fields). Produce 65 women until P2. You may kill 15 of them at 200 population to replace them with 15 soldiers who will harvest wood more quickly. Rushes usually do this for me. Research eco tech before advancing to the next phase. Every minute spent gathering resources without eco tech is a waste of resources. Going to P2 at min 10 is okay. Build your first barracks around min 3. Aim for 3 barracks until P3. Once you have your first barracks, train units 2 by 2 using autoqueue. Do the same at each barracks and at your CC once you reach 65 women. When I'm not too busy, I stop using autoqueue around P2 and train units in batches as much as possible. Whenever you see an incredible move in a game, like someone booming rapidly, watch the replay and focus on that player's moves. Have a plan. Look at the resources around you, your closest enemies, whether they rush or boom, and who your pocket is or whose pocket you are. Then, decide on your strategy, whether it's booming, turtling, rushing, going on champs, elephants, etc. For non-slinger civs, send the first 5 women to berries and the rest to wood until you have 20 workers on wood. By that time, you should have a barracks producing units 2 by 2 on wood. A minimum of 50 workers on wood is necessary to advance to P2 (non-slinger eco). When you begin P2, you'll need a lot of wood to build P2 buildings (I usually build 3 forges), fields, and eco research. Don't worry if you're floating a bit in wood at the end of P1. Also, don't hesitate to use women to gather wood to have extra wood you'll need if you want to go through P2 as quickly as possible. I often select 25 women on fields and send them to gather 10-15 trees (using the "do that order first" hotkey) so that when they're done, they'll return to the field without worrying about it. Master using hotkeys such as giving orders to one person in a selected group, doing an order before or after another. I have all those commands in shift, <, and alt. For example, if you want your women to spread evenly on berries after building a farmstead, select four women, make them build the farmstead, then press shift + alt and click on each berry bush one after the Use three women to build houses, and try to spread them evenly on the construction of each house. This method is faster than having the same three women build three houses one by one. I hope these tips are helpful. See you in TG! Vrayer
-
 Hello everyone, I recently had a few conversations with players on the lobby about "how to improve". When I am being asked, I usually reply with: 1. watch replays 2. watch ValihrAnt videos 3. read this file. This file is what I am presenting in this thread: it's a collection of tips & tricks I initially shared with my friends and then made it public on my GitLab page. It might be incomplete, it might be wrong in some of its parts, it might give importance to aspects that are not or viceversa, etc... I am not in the position of claiming this is a manual to become a good player. However, it might be useful to somebody and I'm happy to share if it helps. The file is divided into three sections: 1. Interface, 2. Logistics, 3. Fighting. Each section contains a list of tips & tricks in sparse order; each tip comes with an extra tip. Cheers Source: https://gitlab.com/mentula0ad/0ad-tips-and-tricks
 -
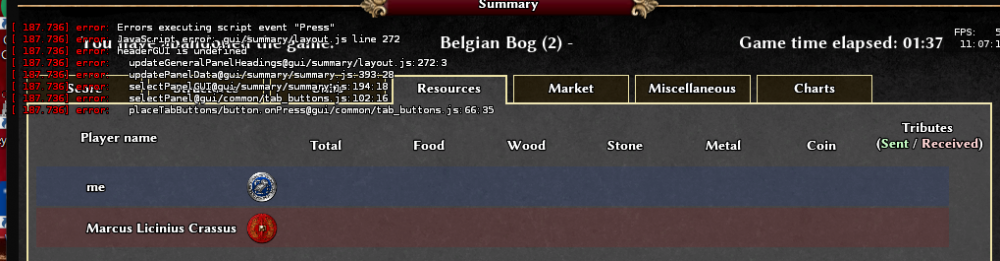
I tried the ModdingResources tutorial on Trac and find that there is no information on how to edit Summary screen at the end of the battle to show the newly created resource. So now after adding new resource, opening Summary screen shows error message like this: Anyone knows how to solve this? I tried to look at other mods with new resources (DE and 0abc) and found the same error.
-
Perhaps backward normals or just plain old missing faces.
-
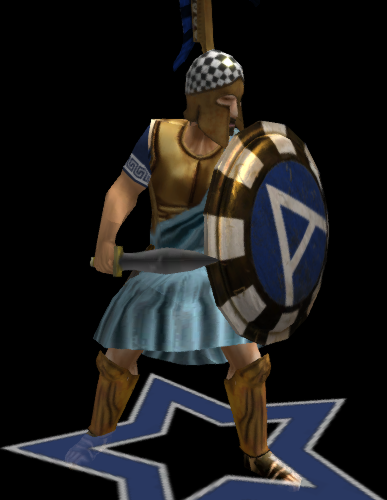
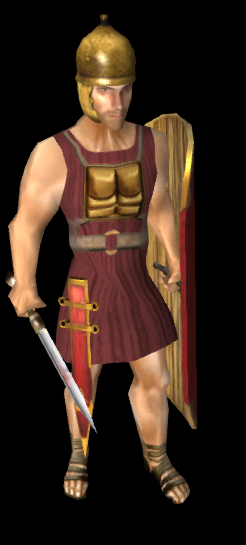
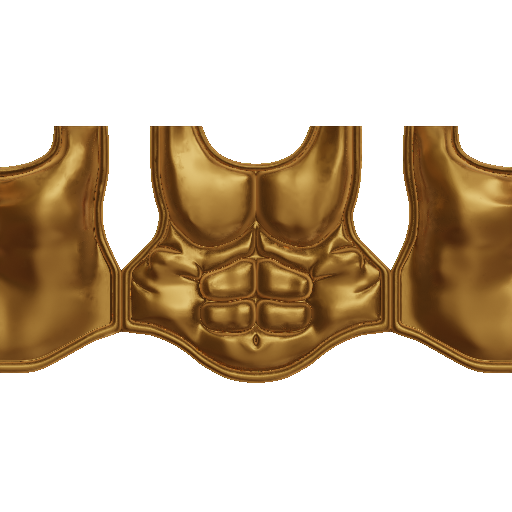
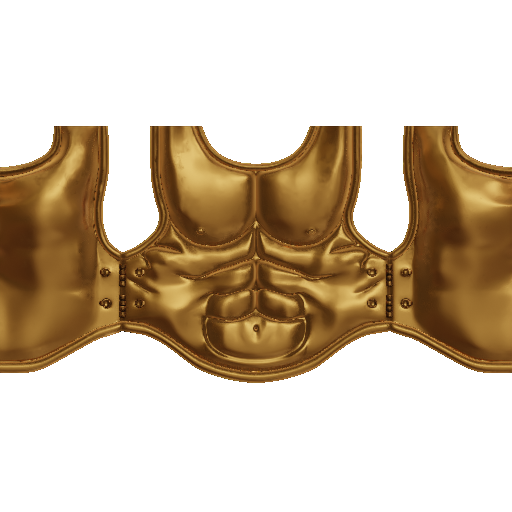
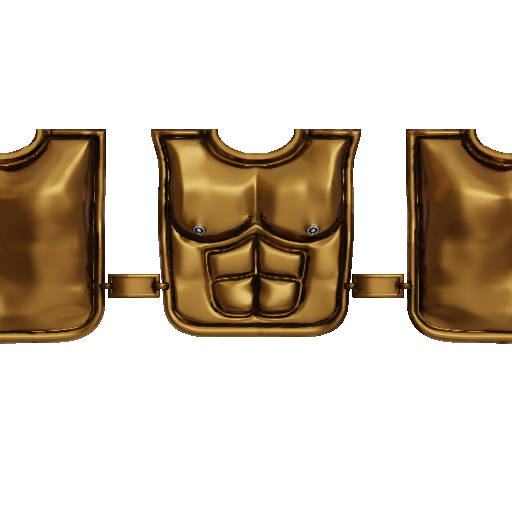
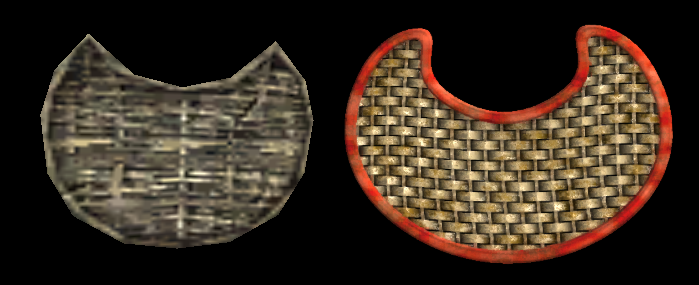
Hello all! i've made this topic to show some cuirasses i've done once when i had proper internet connection but didn't had a chance to post it. This are textures (cuirasses) done procedurally with blender. So we can have them with normal and specular maps included in any possible color whitout too much effort. Some are recreations of actual textures with specular, normal map. While others are new additions following a few references i could get. Everything was done using Blender and some meshes and procedural materials. Scratches could be included in case is needed but every texture ingame of cuirasses didn't had a single scratch so i guess not. In the current state, i could upload every texture seen in the screenshots if its necessary or if it has a good visual quality to be introduced, and post here the alpha layers. Texture Preview: Ingame screenshots:


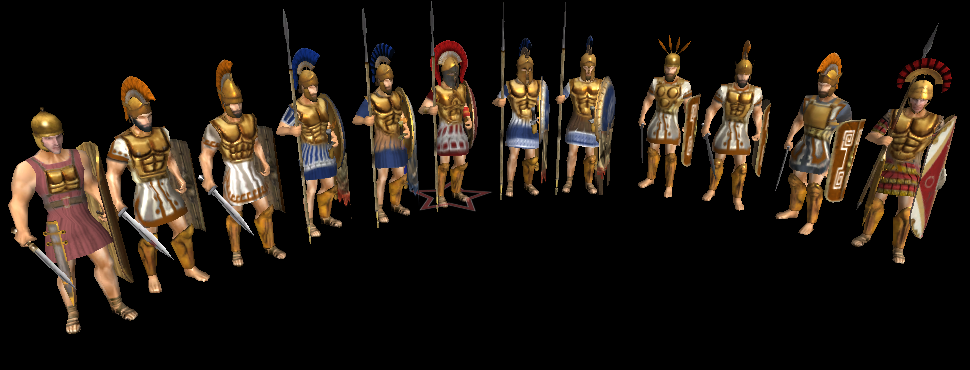


- 33 replies
-
- 11
-

-

-
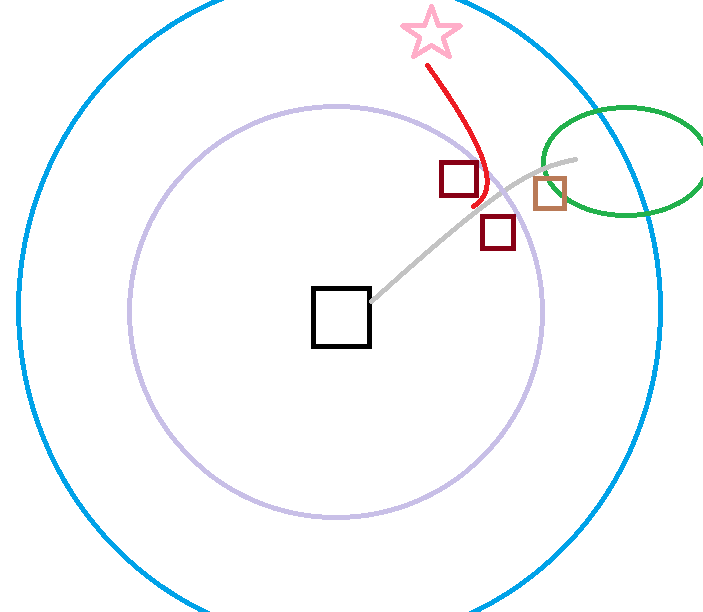
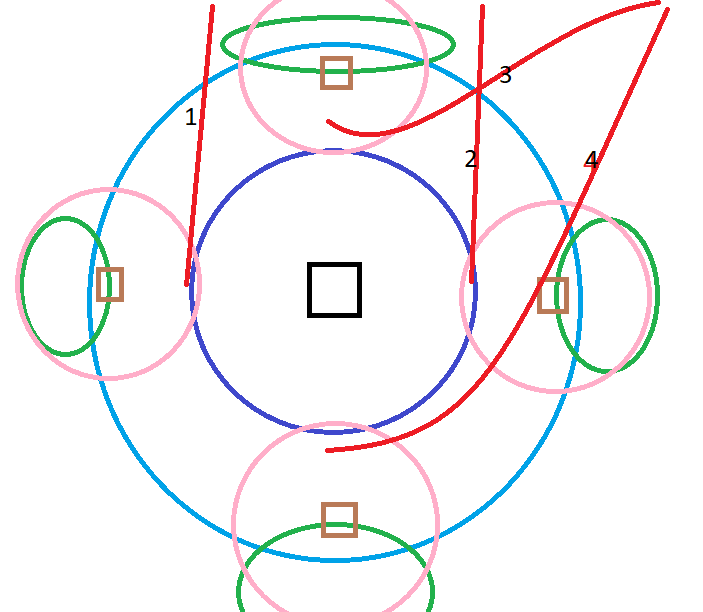
 picking a proper starting woodline and properly positioning storehouses and other buildings is vital for optimal economy growth and security. proper woodline(s) management is vital for proper men and women positioning early,mid and late game. 1.everything about first 0-5 min. 2.middgame(after first few min) to till u reach p3. 3.endgame(after p3) 1.to start with your first woodline will significantly impact your economy and security. usually you will want to pick a patch of wood around the border instead of opting for placing your first storehouse near cc wood but exceptions apply.ill note thoes later. prioritize following factors listed from most important first: 1.how close the wood patch is to your cc 2.the size of the wood patch 3.the position of the wood patch 4.i forgot something while scrolling up to add hope i remember. 5.properly rotate and position the storehouse to be close to as many trees on the surface as possible. now of course you must pay attention to all 3 of these factors and alot of point 3 is better than a slight bit of point 1 but the significance based listing still applies. woodline.png shows several options. here based on 6 total options including the cc wood option 1 is the best as it is the closest to the cc and has a large amount of wood. its most important to pick a woodline that is as close to cc as possible.while these factors may not cause significant difference to less expirienced players its best to learn the most optimal ways from the begining.closer the woodline is to cc the less distance your units will have to walk to security if you get rushed and choose to retreat.many times if you pick the incorrect woodline you lose by default if you get cavrushed assuming both sides play without making any errors you just wont have the time to reach security. i recomend placing house(s) next to but not in the line the new spawned units have to walk form cc to the wood.if you were to place it on the line you would hurt your eco by hindering your units from quickly going to the woodline.also do place the houses within your cc arrow range so that if the enemy tries taking the houses your cc will damage their units.if this happens also consider trying to garrison the house under threat with women but only if enemy units are that of a low range type and only if your women can safely garrison.you place your houses like this so that you can do the garrisson>ungarrison trick with wood women if enemy rushes to decrease the distance you need to travel to cc and to increase the security.also the buildings will block the enemy from taking the shortest route to your women when he is rushing as you can see with the pink start representing enemy rush units and the red line representing the detour they have to take. for a barack you can use it as a blockade same as the upper house in that picture or you can place it above or around the woodline as barack can be a powerful defensive tool.it is quite difficult to take assuming you at least have a small part of the mencount of the enemy rush army.dont know the exact proportions but with barack garison>ungarison trick as a threat enemy will think twice before getting close to your baracks as you can quickly ungarison your units onto the enemy units gaining the advantage in certain scenarios. the size of the wood patch is self explanatory its value is that you can load it with more men and itll last longer before you have to switch lines compared to a smaller wood patch and by this it gives an economy advantage as you have to pay the toll of switching woodlines later than you would have otherwise. the positioning implies that you want to have the woodline as far away form the enemys potential line of travel as possible which basically means you want it at the back.the enemys line of travel is : assuming your enemy is competent:first he will know where your woodline is before atacking you.then he will engage inbetween your cc vision range(larger than attack range ccvision:blue) and your woodline mens vision range(pink) from either side of the 2 circles intercepting. this will allow the enemy to get as close as possible before you see him and to be as close to cutting off your wood units from security as possible. as the enemy will come from his cc the shortest route will be if you have your woodlines on the sides where he can intercept them by just taking a direct line and they are quite close as they are somewhat upfront. the front woodline is slightly better but pretty much the same as enemy has to go around it and to the side which wastes slightly more time as they have to walk around a circle that is slightly larger than your potential vision so they wont get spotted by the rule of thumb of not seeing any of the wood on that line>you cant see them.still these 2 options are near identical. the best one is the back wood as it takes the enemy far longer as the distance is longer and every second counts in 0ad especially in higher level games. last bit for the early positioning is the cc wood.if conditions are abysmal and you have no close woodlines(lets say overlaping the teritory by atleast the width of one 10 pop house) and your cc wood is large enough(atleast 5 trees (1k wood) or more) you might choose to place a storehouse at the start on the cc wood but this is horrible as your cc wood is your lifeline in case you get rushed of secure wood to cut and if you deplete it form the start and get rushed you will have nothing.just remember to keep scouting and stay vigilant if you use up ur cc wood as if you get rushed youll be in a bad position.otherwise as well cc wood storehouse hurts eco as youll ahve to get an another storehosue quite quickly in few min after the few trees near ur cc run out. 2.midgame woodlines. this is where youll most likely start to need second,third and maybe even fourth (if you are really unlucky) patches of wood utilized by your woodcutters. basically you shouldnt overcrowd a woodline as units will need to walk to a single storehouse and if overcrowded will be bumping into eachother ruining efficiency.optimal limit depends on specific civ storehosue size,woodline size and specific wood layout. a good rule of thumb is to literally never put more than 30 units on a single woodline or atleast depositing on a single storehouse. its best to start a new woodline after 20-25 units are on the first one.this may vary mainly depending on woodline size but also on storehouse size. when picking a second woodline make sure to place it with a path in mind. both woodliners must as game progresses emigrate to the front slowly but surely as you want your units as close to the enemy as possible during the late game for a variety of reasons.for example in this case: if your first woodline 1 is at the back you wanna imagine future migration paths forboth woodlines.had you placed your second storehosue closest to the first one the first line would have to walk longer to a nearest lone and this is especially bad if your first woodline isnt at the back and you block the front adjacent line forcing ur first line to move back upon exausting the wood patch.but i wont draw that i just wanna finish at this point. also make sure to have proper map awareness and secure the awareness of the p3 woodlines by patrolling and placing watch towers not to get denied proper woodline positionging late game (see the late game section for more) this is especially important against colony civs as they can very quickly build leaving you little time to prevent and this is one of the reasons you must have front placed men even during a large part of the middle game so they reach intime to defend you phase 3 reachable woodlines,place baracks at the front not the back at this stage. also dont be afraid ot get baskets if you have overcrowded woodlines and no better options. 600 res is often worth it to reduce the walktime.im gonna guess that you can place proportionally more units so if max was 30 and u boosted capacity by 50% u can place 45. 3.endgame at this point the relevance of mapcontroll skyrockets as you are going through woodlines like one of thoes advanced deforestation machines.you have alot of woodcutters and the 50% efficiency upgrade so you can easily run out of not only properly positioned wood(where placing men is good as if enemy atacks you an respond well where your men arent out of line of defending your key points cc,baracks,caslte ect/) anyway at this point you wanan make sure that you will have proper woodlines by also patroll and outposts so enemy wont palce a civic building or tower your woodlines.you can ofcourse do these thigns to hurt your opponent as well.here its a good idea to have some units preferably largely women for total eco viability as back then it wouldve cost far less to get women and now you can send most of your men to atack instead of having men cut wood while other men fight or having to move women from farms.anyway its a good idea to have a group of units cutting wood from the back,out of position as this boosts your total wood avalibility by you spending less of the well positioned wood and as this little group consisting partly of women being out of position wont hurt your security in any significant manner. if you see that in the future you wont have optimal woodlines either reach for some by palcing buildings on the edge and building to the woodline over time or place a civic building if you think thats the right move.most importantly you must decide and notice in advance as if you run out when the time comes withotu any prep you will be in a bad position disadvantaged by having either no woodline or a bad one at the back.and when enemey atacks your units wont make it in time and youll lose :p. hope this helps heres my donation adresses bitcoin- bc1qhp8xa956p2veyd0mmf328tp2rmmuuvez5cnxlz monero - 84iSSAx1H6mWG7z49sgcBe7ZWfLHoQp4TCMcpnq94KZpGPKqRehMZ8LeKMpADRaiCEMSJKmcueLU1HLtPTqu6nDQRQDNU9o
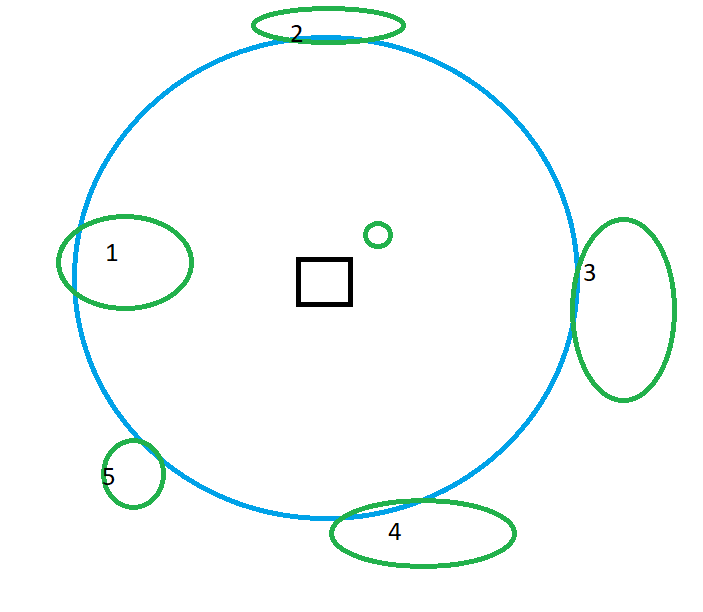
-
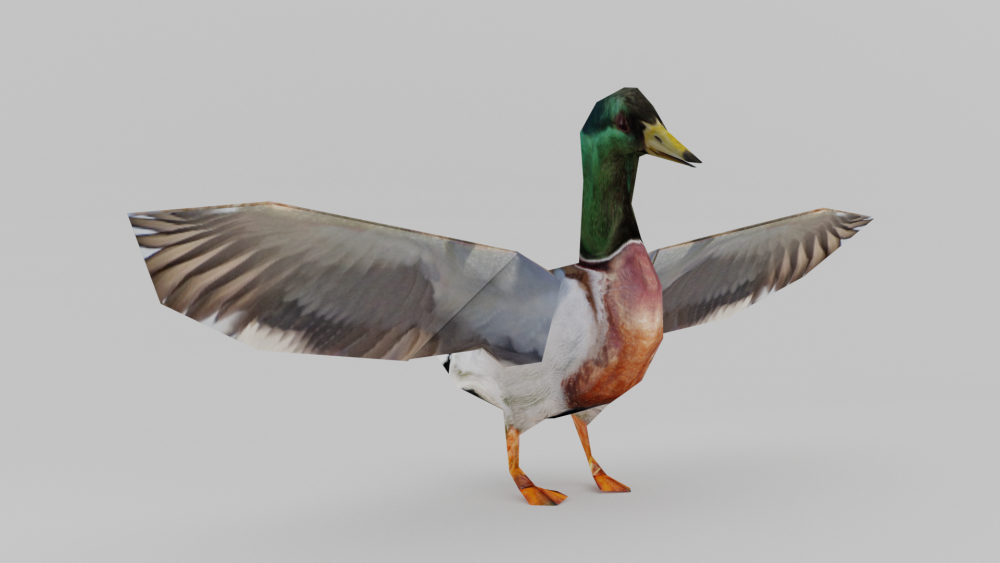
Hey folks, There is the contribution for today. Way harder than I though it would be. The result in low poly up close is really funky. But at distance I seems fine. Added a proof of concept animation as I had that idea of using span pose and use a deform bones to make the swimming/walking/chilling pose. Happy that it seems to work, maybe add a third wing 'layer' that would scale during closed wings poses so that it would be invisible the rest of the time. Kinda of out of the box idea, don't know if it'll work. What a odd little bird. The animation is bad mind you, a lot of the weight painting is to be tweaked. I was mostly interested about the idea of using that technique to have the same model walking and flying or if it's not necessary because it will never happen in game? Also I learn that the males change their colors during something called eclipse, and look a lot like the female (texture is next by the way). Soooo... I saw that there will a season system that could be implemented, I got some ideas to add texture season specific to the animals that have low variation in general. Using the alpha as a mask for snow for example (there were a lot of bisons like that). I digress. As always feedback and critique are welcome. https://streamable.com/jmuluh The files: Note: It's late and i saw that the texture has the artefacts of before topology cleanup in the low poly version. It doesn't affect the texture because it's out of the uv zone but I'll see to bake something more clean.
-
 Need better, primary sources from our resident historians.
 -
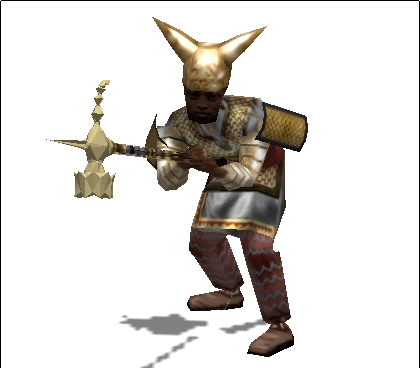
https://trac.wildfiregames.com/changeset/23903 This fix here corrects an error in the rock/ore gathering animation. It repositions the pickax into the correct hand, but now makes the pickax look too short when they are swinging it at the rock face. It would be nice for the pickax handle to be elongated (~25%) to regain that length.
-
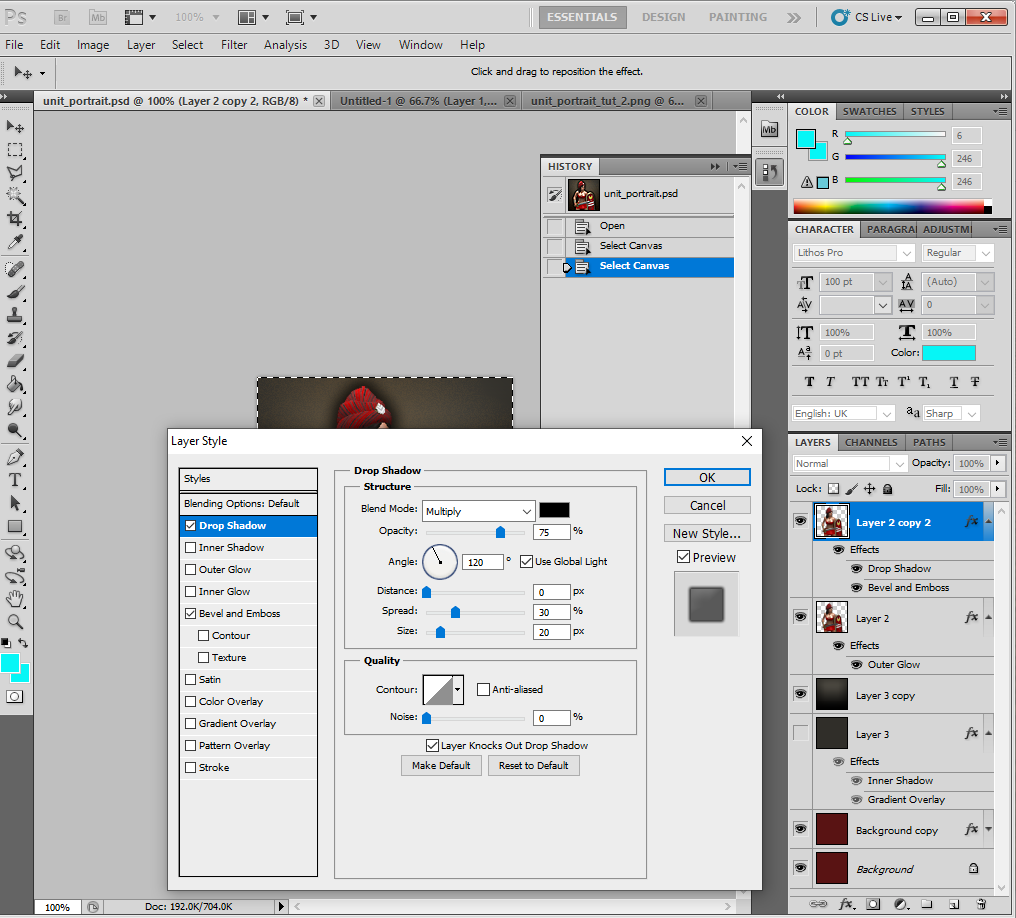
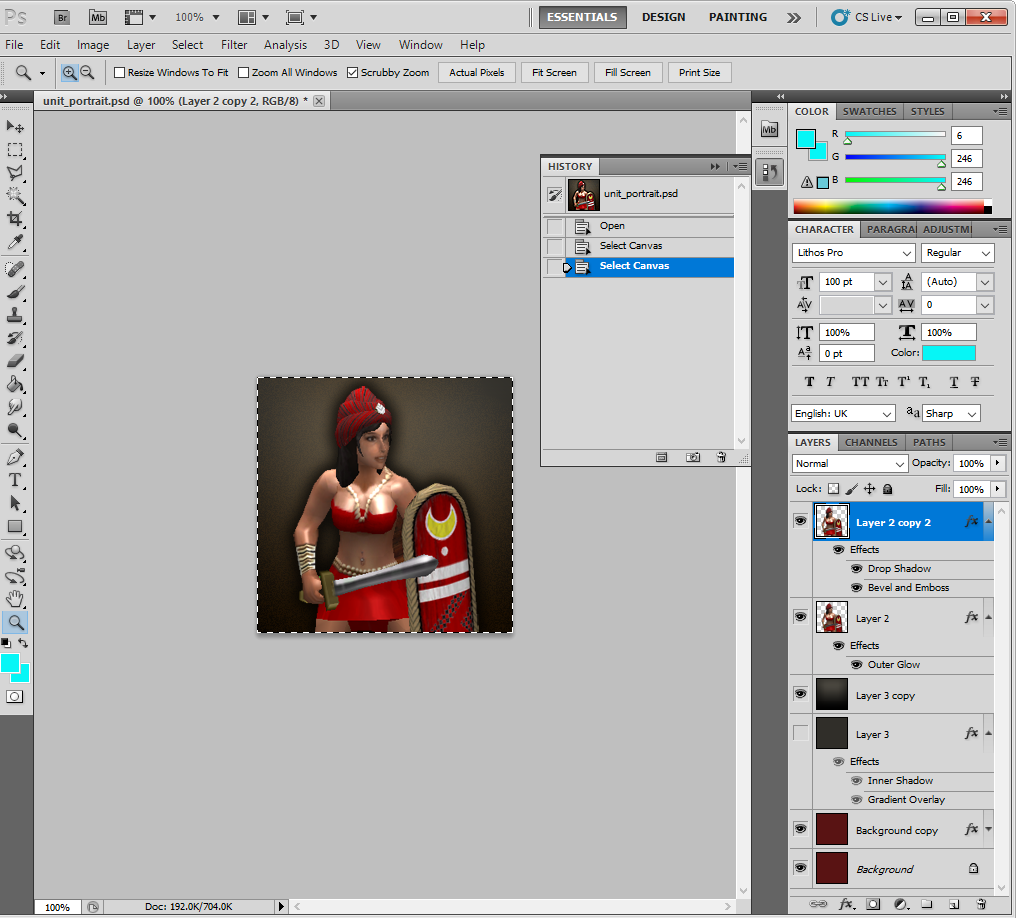
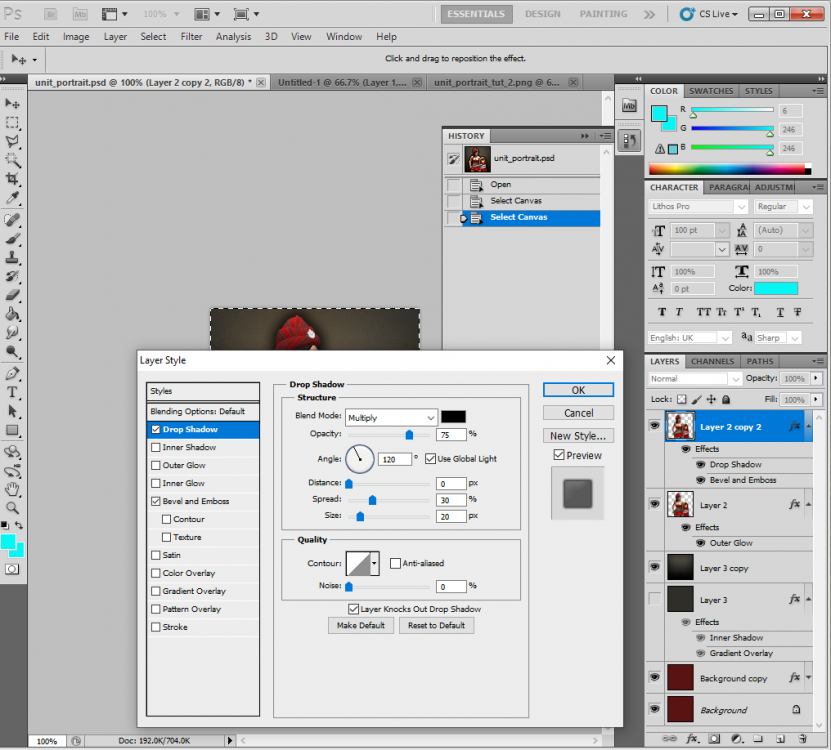
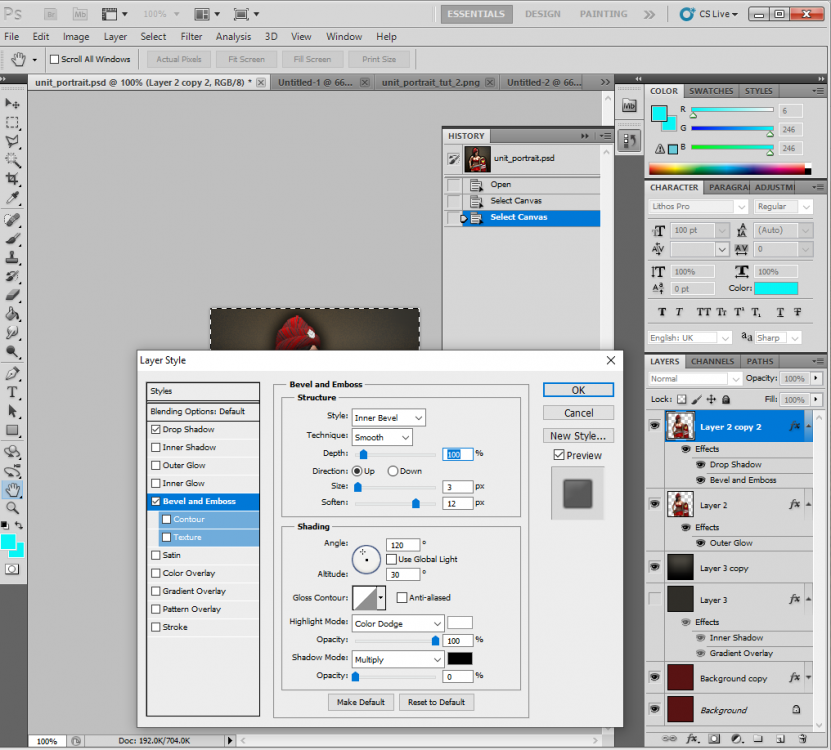
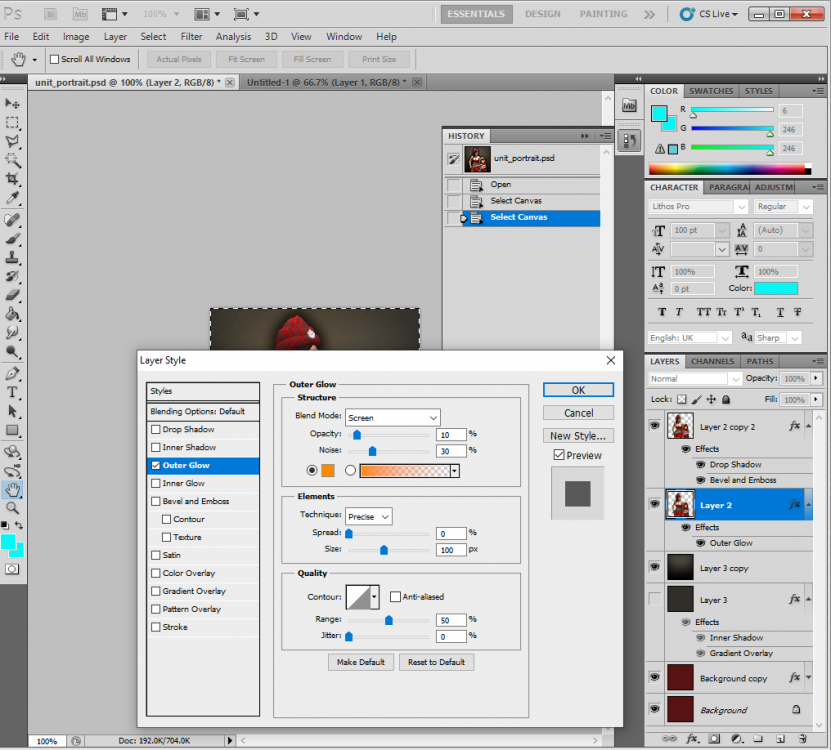
1. Here is the standard background I use: 2. Taking a screenshot of the unit in Atlas with the "Big Screenshot" option, it looks like this (note, I use a custom scenario map with a bright ground texture for ease of cutting in Photoshop) 3. A. I cut the unit out of the background, B. copy the unit into a 2nd layer (this is important), C. resize it to 256x256, D. then add the background texture at the top of this tutorial. E. From there I adjust the Layer Styles (effects) of each of the unit layers to give the final product. This is what the file looks like for me: 4. These are the layer settings I use. First, to get that nice brownish background glow (THIS IS WHAT IS MISSING FROM MANY OF THE NEWER PORTRAITS IN THE GAME): 5. Here, I create the drop shadow effect: 6. Sometimes I add a subtle Bevel and Emboss to help the unit stand out a bit from the background. THIS IS SUBTLE, and usually used on a unit with dark edges, like dark hair or a dark horse. Sometimes I don't even use it. As an example, I used this effect to make the Balearic Slinger's head stand out a bit more, otherwise it would have blended into the drop shadow. 5. Here is the final product: Further Examples: unit_portrait.psd


-
Te vas al disco C y creas una carpeta llamada 0ADSVN. @Obskiuras Sección 2: Haciendo tu primer “Checkout” Ahora necesitamos verificar la URL y hacer un “checkout” de la actual SVN en el directorio principal de tu disco duro. El acceso para anónimos es: http://svn.wildfiregames.com/public/ps/trunk Usa el directorio que prefieras. Aunque sugiero usar la carpeta C:ADsvn Trata de no usar carpetas con espacios tales como:, C:Mis DocumentosAD puede causar problemas. Ahora, sigue estos pasos. Haz “checkout” en el directorio del SVN. 1 en Windows Explorer, navega al directorio que has elegido para usar como Directorio raíz SVN. 2 Click derecho. Selecciona 'Checkout...' en la parte del SVN: 3 pon la 'Url del repositorio'. Y deja lo demas igual:
-
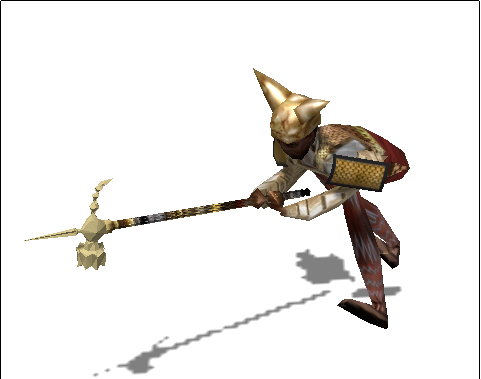
Moved to its own topic for start the peltast shield Update.
-
 We talked with @elexis about constant references and I gave an example why passing by value may be better than passing by constant reference. During todays refactoring I met another important things that you need to know about constant references. Aliasing Take a look at the following code. Do you see a problem? (It's our code from ps/Shapes.h). // Interface class CSize { public: // ... void operator/=(const float& a); // ... public: float cx, cy; } // Implementation void CSize::operator/=(const float& a) { cx /= a; cy /= a; } If not, would the following usage example help you? CSize size(2560, 1440); // Normalize the size. if (size.cx) size /= size.cx; debug_printf("%f %f", size.cx, size.cy); You'll get: 1.0 1440.0 Because the a references to cx, and the first line of the operator modifies the cx. And in the next we just divide the cy by 1. It may happen in each case where we get the same class. I fixed the problem in D1809. Lifetime Another important thing is a lifetime. Let's take another look at another example (fictional, because I didn't find more detailed example in our code yet): std::vector<Node> nodes; // ... duplicate(nodes[0], 10); // ... void duplicate(const Node& node, size_t times) { for (size_t i = 0; i < times; ++i) nodes.push_back(node); } From first look it seems ok. But, if you know how std::vector works then you know, that on each push_back std::vector can reallocate array to extend it. And then all iterators and raw pointers are invalid, including our constant reference. So after few duplication calls it may contain a trash. So, you need to be careful with such cases.
 -
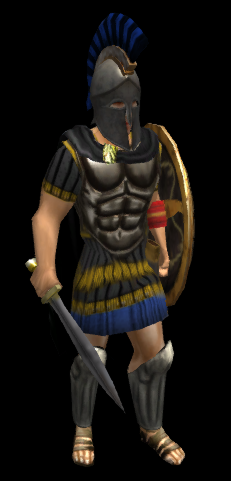
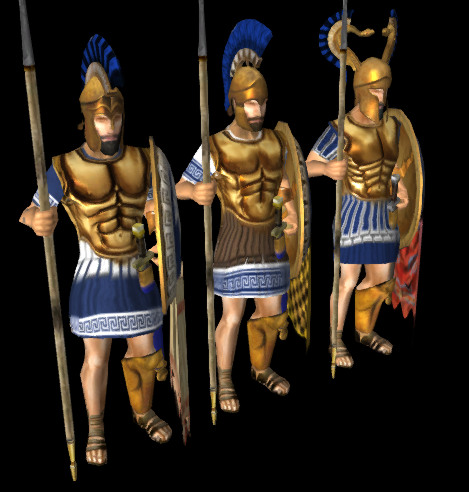
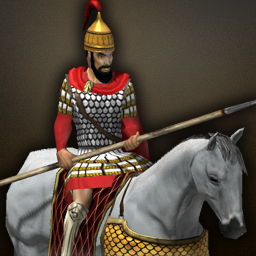
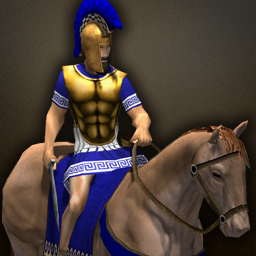
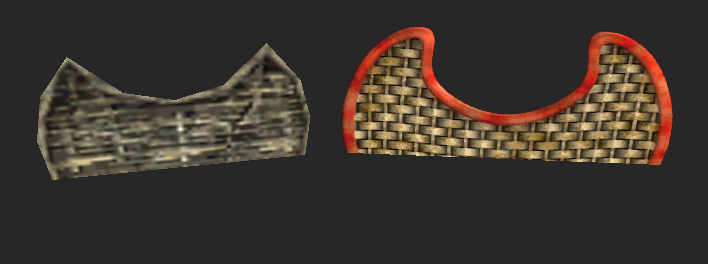
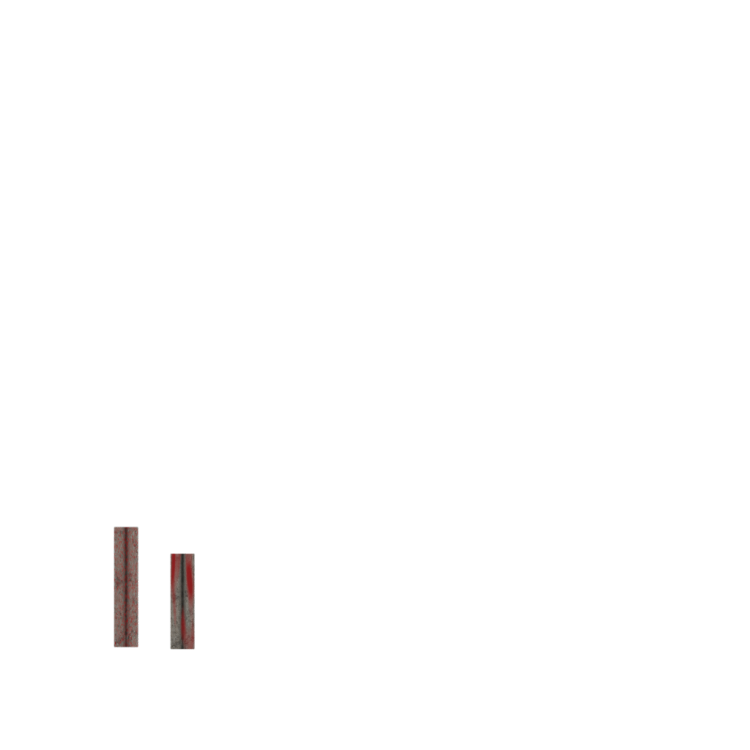
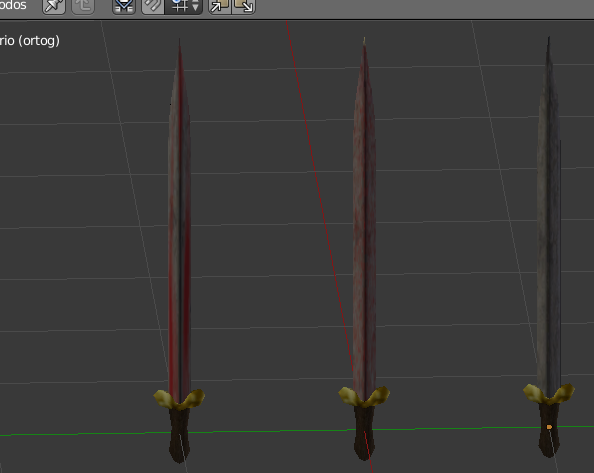
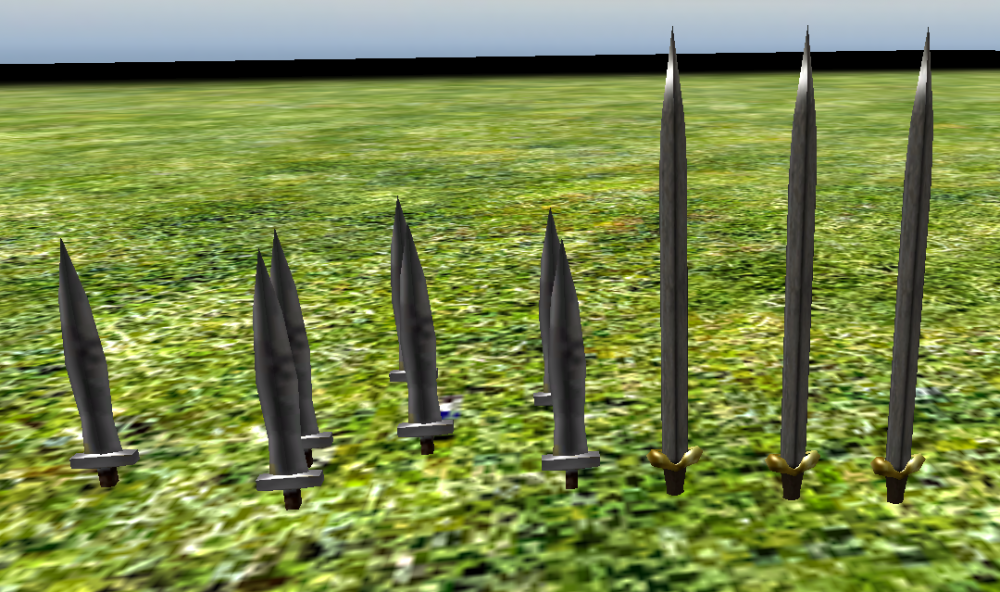
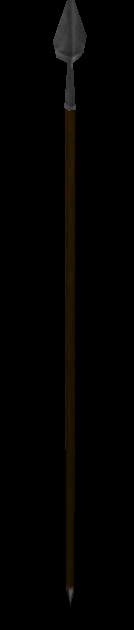
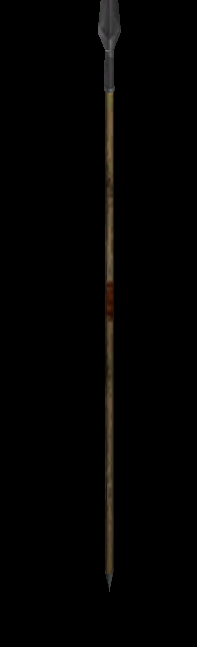
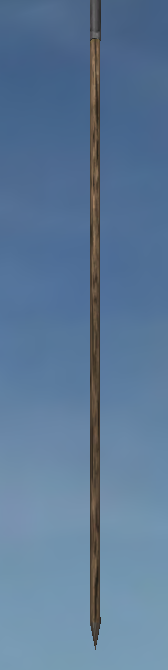
Today i was making the celtic unit props update, so when we talk about the spears i realized that everything is getting updated but the Weapons texture is still outdate and very low resolution wich make some weapons like swords like rubber toys so here are a few testing (Specially the bloodie weapons). Wildfire Art department: @LordGood @stanislas69 @wackyserious First textures were baked following the prop.weap.dds uv but i will change that to a better space usage and less repeated staffs or blades (Maybe include Aged weapons) Here the testings on celt sword: Comparisson with the spartan sword: Maybe with this merge the gladius posted in 2017. Spear test: A little preview of 2k textures because i don't want to burn my pc yet. Probably new uv usage: Right side: Poles Middle: Swords Handles Or ornamentations (Specially if possible the gladius weapon handle) Left Side: Blades (Rusted, Blood Half, Bloodie, Iron, Gold?) @wowgetoffyourcellphone any weapon/blade/shape you have in mind before filling the space ?


-
 While I was modding my FCI mod I decided to make one of the minor factions look more like they actually looked in the gaming clan war the mod was based off of, I was trying to edit the 3d model of another unit but found I cannot as they are all in pmd files, I do not want to have to download the entire svn version of 0ad (it is massive in file size) to get the raw pmd files. How would I either convert the pmd files or get the raw dae files for the default 3d models ingame?
 -
Hello everyone, I didn't see any totorial to explain how to change the GUI. So, I will try to write one. I'm not English, so if they are mistakes, moderators could edit this. I will update this tutorial when I will found new things (I learn from analysing the source code). Customize your Gui 0.Create a mod 1. Add a new panel 2. Coming soon ... 0.Create a mod Go in the folder where you install 0ad : "0 A.D. alpha" then into "0 A.D. alpha\binaries\data\mods" Create a new folder with the name of you mod (replace space by _) Go in "0 A.D. alpha\binaries\data\mods\public" ; copy "mod.json" in your own mod directory Edit the file with Notepad++ : after "label :" delete "0 A.D. Empires Ascendant" and enter the name of your own mod ; you can also change the description Congratulations ! Now your mod appears in the mod selection of 0ad ! 1. Add a new panel In the directory of your mod, create these folders : "\gui\session" Go into the public mod folder (0 A.D. alpha\binaries\data\mods\public) open the zip file and then go in gui\session. Copy session.xml and sprites.xml in your own session folder. Edit session.xml with Notepad++ : line 103 add "<include file="gui/session/the_name_of_your_panel.xml"/>" Edit sprites.xml : after "<!-- Panel Backgrounds -->" (line 27) add : <sprite name="the_name_of_your_sprite"> <image texture="session/folder_of_my_pictures/name_of_my_background_picture.png" texture_size="0 0 100% 100%" size="0 0 100% 100%" /> </sprite> 5. Create in the folder session a file named the_name_of_your_panel.xml , then edit it : <?xml version="1.0" encoding="utf-8"?> <object name="the_name_of_your_panel" type="image" sprite="the_name_of_your_sprite" size="coordinateX1 coordinateY1 coordinateX2 coordinateY2" tooltip_style="sessionToolTip"> </object> You must define the placement of your panel with its coordinates. 6. Place the background picture of your panel in name_of_your_mod\art\textures\ui\session\folder_of_my_picture\name_of_my_background_picture.png Launch 0ad and activate your mod. Your panel is now present during your game !
-
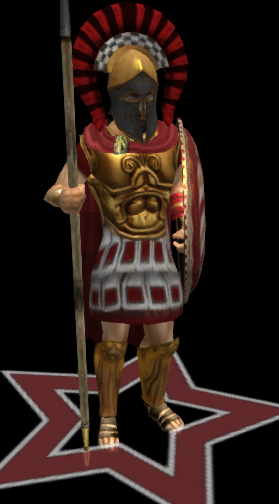
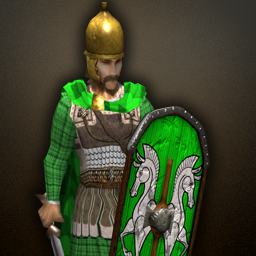
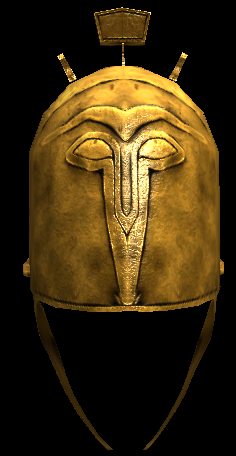
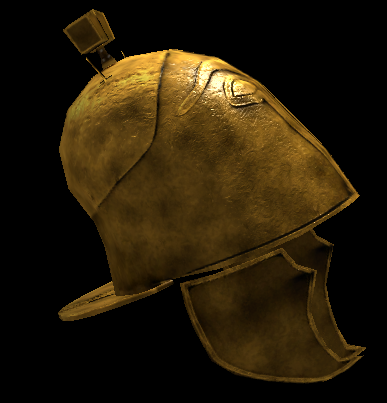
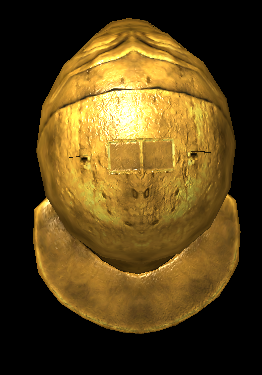
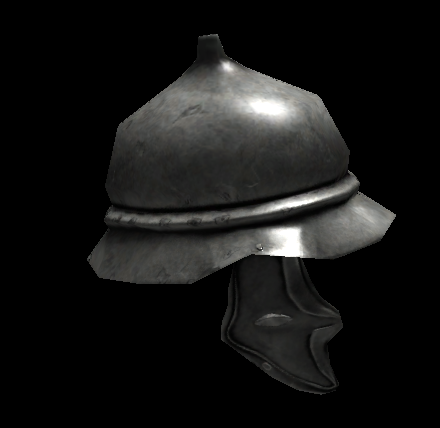
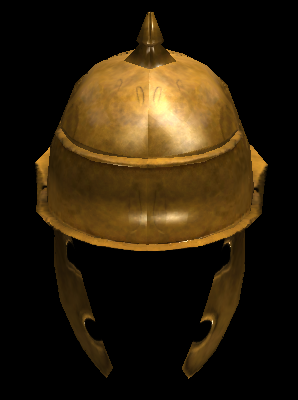
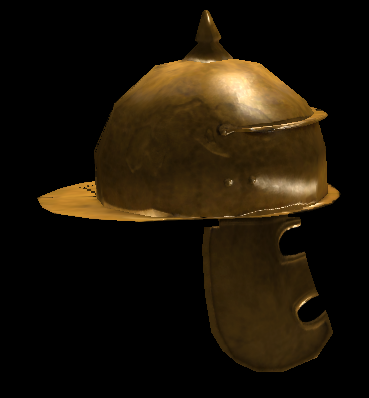
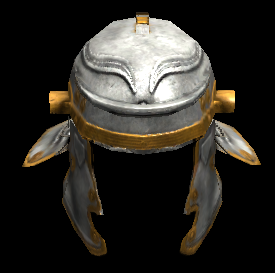
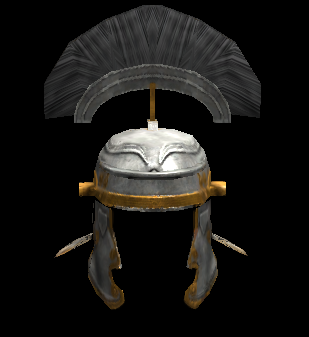
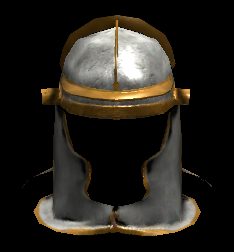
Another topic for helmets, for now i have this: From other topics i have this: The first helmet its recorded but says its damaged because my secondary hard drive is damaged so i used VLC to fix the video now its only visible through that program, i'll see if YouTube could handle the video later.rome_helmets.7z
-
 Here are some tutorials for making procedural materials (Materials that doesn't exactly need a texture image for looks good) Have fun. Eyes making https://en.wikibooks.org/wiki/Blender_3D:_Noob_to_Pro/Advanced_Tutorials/Procedural_Eyeball_in_Cycles Marble/Stone like materials and Cracks/veins https://cgmasters.net/free-tutorials/blender-cycles-tutorial-stonemarble-how-to-make-any-texture/ Letters animations (Maybe for making introduction videos).
 -
.thumb.png.0d87fc71cb8a644c5d862ceabac1e0d5.png) Dice musical pero se puede hacer con sonidos.
Dice musical pero se puede hacer con sonidos. -
Share Simulating Real-world Film Lighting Techniques in 3D Updated September 9, 2011 By Lucy Burton Source: https://software.intel.com/en-us/articles/simulating-real-world-film-lighting-techniques-in-3d With all the advances in modeling and animation, an often overlooked but absolutely critical area of 3D scene creation is the proper use of lighting and rendering techniques. Good lighting and rendering can make even a simple 3D model look extraordinary, and poor lighting can make even the best model look bland. This series of tutorials cover not just the mechanics of lighting within the Autodesk* Softimage*|XSI* software package but also how to incorporate the language of light used in fine art, theater, and film into your 3D scenes to create truly cinematic views that are compelling for your audience. I'll explore the basics of real-world lighting scenarios and how to implement them in 3D, and because rendering is inseparable from lighting, I'll also discuss various rendering techniques such as Global Illumination, Final Gather (FG), Ambient Occlusion, and of course, high dynamic range imagery (HDRI) lighting. Light and Shadow In music, the silence between notes is as important as the notes themselves for creating emotion within a composition. Similarly, in lighting, shadows-their placement, direction, intensity, softness, and so on-are just as important as light in creating meaning and mood within a scene, as Figure 1 shows. Figure 1.This still life demonstrates the importance of not just light but shading to a scene. Notice that although the image on the left is well lit with Global Illumination and FG rendering, it is still relatively flat. But with the addition of the directional shadows in the right image, cast courtesy of the Physical Sky shader in Autodesk* Softimage*|XSI*, light passes through a window, a curtain, and shadows from the leaves outside, and the scene gains additional visual interest and realism. More often than not, beginners take one of two approaches: either flooding the scene with flat light as if merely seeing the objects is enough for the viewer (or worse, simply bumping up the ambience to fill in poorly lit areas) or not lighting it enough in order to hide shortcomings in modeling. When used properly, however, both light and shadow can actually enhance a model or animated character, providing an additional layer of drama or suspense to the scene. Obtaining an understanding of these basics is critical to realizing your vision. Three-point Lighting Three-point lighting is derived from a technique originally developed for theater by Stanley McCandless, who is widely considered the premiere developer of lighting design in the United States. The variation used in film, television, and commercial product promotion uses three lights: a key light, a fill light, and a back light, each with a specific purpose. The key light (Figure 2a) is the main directional light on the object or character and is typically the brightest light source in the scene. The fill light (Figure 2b) is used to simulate the light bounced from objects and sources on the opposite side of the frame from the key light. Finally, the back light (Figure 2c) is used mainly to separate the character or object from the background by providing a slight halo effect off the back edges of the character, such as a hint of light at the rim of their shoulder or off the edge of its hair. Back light is not the same as background lighting, however. Three-point lighting is about illuminating the main subject, whether that's a character or the model of a product a company hopes to sell. Therefore, back lighting points toward that subject, not the objects behind that subject. Figure 2.These images show a standard three-point lighting set-up. Note how the rays are cast to light the figure and to differentiate the subject from its background; (a) key light; (b) fill light, and (c) back light. Autodesk* Softimage*|XSI* provides another handy tool for positioning your lights. By clicking the drop-down arrow of any 3D viewport, you can select Spot Lights, then choose any of the listed spot lights within your scene. The view will change to the perspective of the light itself (Figure 3) as if you were looking through it, directly at the object it is lighting. From here, you can see precisely how much of the object is receiving light and where the umbra begins. You can also interactively adjust the spotlight by pressing the B hotkey to display the light's manipulators, and then pressing the Tab key to reveal the manipulators for the cone and spread angle of the light. The white exterior cone controls the Cone Angle value; the inner yellow cone determines the Cone Spread value. Simply click and drag the cone you with to adjust, or Shift-click and drag the edge of the cone to manipulate both cones simultaneously. Figure 3.Autodesk* Softimage*|XSI*'s Spot view Key-to-Fill Ratios The main thing that key-to-fill ratios (Figure 4) determine within a scene is how "contrasty" your final image will be. Low key-to-fill ratios are excellent for creating desaturated looks, such as those of a cloudy day where the sky is overcast and muting any harsh directional light from the sun, or in places where there is a lot of bounce light from the surrounding environment, such as a hospital room or the white tile of a kitchen. Low key-to-fill ratios are also used for any atmosphere in which you want to create the impression of happiness, such as in a child's room. In this sort of lighting scheme, there is a great deal of fill light, nearly matching that of the key light. Figure 4.This series of images demonstrates a range of lighting possibilities. The first image (a) presents a standard lighting scheme; (b) shows a low key-to-fill ratio, and (c) a more dramatic high key-to-fill-ratio. The last image (d) demonstrates how a change of angle can alter the emotional character of the subject, making him look quite ominous, and even change the structure of the face. Examples of high key-to-fill ratios include scenes with deep shadows and bright highlights, such as the stark lighting of film noir classics like Touch of Evil, scary films like Les Diaboliques, or in the paintings of Rembrandt. In this kind of lighting, the key light is often set at a very high angle, producing sharp shadows and a triangle of light below the eye of a character on the opposite side of the face from the key light position. It is highly directional, and there is virtually no fill light on that side. Color Temperature Color can modify form and is a powerful visual and emotional stimulus within a design that can cause objects or characters to appear to change dimension, reverse directions, and alter the interval between forms. It can even seem to generate motion within a scene independent of object animation. The colors you choose within your lighting establish overall mood and reinforce the theme of the overall work. Color temperature (measured in degrees Kelvin [K]) varies depending on the light source in question. All objects emit light when sufficiently heated. The degree of brightness is a function of temperature. Through a device called a spectrophotometer, any color can be equated with the amount of temperature being applied to a blackbody, which results in a Kelvin measurement (Figure 5). Candlelight is very warm in color and varies between 1850° and 1950° K, whereas a typical household incandescent light is about 3000° K, producing a color ranging between orange and yellow. Fluorescent lights give off cooler color tones ranging from green to blue and are between 3200° K and 7000° K. Daylight ranges between 5500° and 7500° K. Figure 5.Color temperature chart in degrees Kelvin Your color choices in lighting are also important when trying to composite 3D objects or characters with live-action backgrounds. In addition, films are registered to certain color temperatures: Daylight-balanced film is 5500° K, and tungsten-balanced film is 3200° K. Even today's digital cameras use filters to achieve the same sort of effects, and on-set lights use specific gels to tint light sources. So, if you're working with photographers or cinematographers, you're going to need to get the shooting data from them if you're going to mesh your scene well with their work. Additionally, postproduction color timing used by film processors can change the scenic color balance. Adjusting Gamma Correction and Contrast Gamma measures the degree of brightness and contrast within the midrange luminance values of an image (Figure 6), either in a photograph or via a video or computer device. When video is encoded and decoded, variations in the contrast values of the image occur. In a typical cathode ray television, the gamma value is 2.2 darker than the original 1.0 gamma value of the video compression that a camera records. Additionally, there are differences between Windows and Mac systems, with Windows gamma encoding being 0.45 and the gamma decoding being 2.2. Mac OS X and later versions encode gamma values at 0.55 and decode gamma at 1.8. A Nintendo Game Boy displays images with a gamma value ranging between 3.0 and 4.0. Figure 6.This series of images of a blue frog demonstrates how gamma affects an image. The second image from the left should be ideal for most devices. What all this means in practical terms for the 3D artist is that you will need to adjust the output gamma values of your project depending upon what sort of display your project is likely to be viewed on. Within Autodesk* Softimage*|XSI*, you can adjust the gamma values for a render pass by opening the Render Manager in the Render toolbar, and then clicking Pass > Edit > Edit Current Pass or Render > Render > Pass Options. Within the Pass Gamma Correction option, you can select Apply Display Gamma Correction. You can also edit the gamma of an image clip used as a material, light, or environment texture simply by selecting the geometry or light in question, clicking Modify > Texture, and selecting the relevant image clip from the submenu listings or by double-clicking the image clip you want to alter from within Autodesk* Softimage*|XSI*'s RenderTree. From there, you can alter the HDRI or OpenEXR Display Gamma settings for your particular display as well as alter the Color Profile Gamma as an sRGB preset or with your own user-defined gamma settings. OpenEXR images and HDRIs have linear color profiles; Cineon and DPX images are logarithmic and, therefore, are automatically converted to a linear profile. Any 8-bit image is regarded as sRGB. Notice that within this window, you can also control F-stop; exposure; and color correct for hue, saturation, gain, and brightness with value sliders. Additionally, you can animate all parameters by setting keys via the green animation curve marker to the left of each option. Alternately, you can correct gamma values globally during the compositing phase via a Color Adjust Operator with Autodesk* Softimage*|XSI*'s custom compositing application, the FXTree. This integrated system is based on the Avid Media Illusion toolset and has become increasingly powerful as versions have progressed. Inverse Square Law: Light Intensity Attenuation/Falloff The Inverse Square Law of light states that as light waves radiate outward from their source, the intensity of that light decreases in inverse proportion to the square of the distance from the source. In other words, an object twice as far away from a light receives only one-quarter the intensity of that light as exists at its origin. Light attenuation, or disambiguation/falloff, describes the gradual diminishing intensity as light moves through any medium-be it air, water, glass, or a subsurface scattering such as that found in porous surfaces like marble or skin. Such light scattering can be simulated in 3D using lights and material shaders. Some light shaders use a linear falloff value. However, linear falloff tends to look less realistic, and visible noise results if you input the wrong value, because doing so actually makes the computer violate a natural law-namely, conservation of energy-and ends up producing hot spots of intense light in random places within the scene. It is far better to use Light Exponent Falloff mode, manipulate the inverse square falloff of the light source, and fine-tune the exponent values from there, as the examples in Figure 7 show. Figure 7.In these two images, the physical distance between the light and the object has not changed: Only the light exponent start/end falloff values have been altered. Therefore, the light's brightness in the first image diminishes before it can cast a full oval of light onto the table. Additionally, note that in the top image, the shadow cast by the pottery is much sharper, because in that image, the shadow was generated via ray tracing, whereas in the bottom image, the soft shadow is achieved by creating a shadow map. Depth of Field The human eye, unlike a computer, cannot focus all objects to infinity. So to add more realism to a scene, adding depth of field is an important option. Depth of field settings simulate a plane of maximum sharpness and corresponding areas surrounding that plane that are also in focus (commonly referred to as the circle of confusion) while increasingly blurring objects beyond this area. By varying the combination of aperture size/F-stop and shutter speed, cinematographers control the depth of field in an image. A high F-stop/small aperture combined with a slow shutter speed yield a wide area of prime focus, or a large circle of confusion. A low F-stop/wide aperture diameter combined with a fast shutter speed yields a narrow area of prime focus, or a small circle of confusion. A depth of field effect can be simulated in 3D with a lens shader applied to the camera (Figure 8). The settings work the same way as they do on a real camera when the aperture dilates to let in varying levels of light. This cityscape demonstrates how to achieve a common film technique known as a rack focus, where the area of prime sharpness moves from the foreground to the background or vice versa. You might use this method to keep a person in focus while walking through the cityscape towards the camera in order to keep the audience's attention on that character. Figure 8.In the top image, a lens with a focal length of 80 mm is used at f32, with a narrow circle of confusion (0.1) and a focal distance of 70. In the bottom image, the lens is still an 80 mm, but the F-stop setting has been changed to f2. In both cases, the depth of field strength is set at 0.07. To animate this effect, you would simply set keys on the focal distance and F-stop in frame 1 using the first values, and then advance the timeline to frame 60 and set another key with the second set of values, thereby creating a 2-second rack focus effect at 30 frames per second. However, effects executed using 3D shaders within scenes such as in Figure 8 can be extremely render intensive. A time-saving alternative is to use an output shader such as the Mental Ray 2D Depth of Field shader applied at the pass level, which uses z-depth information obtained during rendering to generate a global blurring effect in a postprocessing calculation within your composite (Figure 9). Figure 9.Postprocessing a depth of field effect through FXTree nodes. Once a separate depth pass has been rendered, an image is created that contains information regarding the relative z-depths of all the objects in your scene. With that, you can go into the FXTree and plug in the relative nodes to achieve the desired effect. The nice thing about this method within Autodesk* Softimage*|XSI* is that by simply passing your mouse over the composited image in the FX Viewer, the application will return a precise distance value to any object you point at, so that you can enter the corresponding focus values into the depth of field parameters. In terms of render time, the image in Figure 10 rendered basically in real time, virtually instantly, despite being a much more complex scene, with more geometry along with complex textures and displacement effects. So, this is something to consider when planning your production workflow. Figure 10.Final render of a composited depth of field effect. Summary Successfully working with complex 3D software packages like Autodesk* Softimage*|XSI* is largely about balance and selectivity, making conscious choices about which effects to apply where and what to leave off. 3D is ultimately about problem solving, case by case. This is why 3D is as much art as it is science and a challenge to both right-brain creative artists and left-brain technical specialists. That's also why it's so fun. In upcoming articles, I'll be demonstrating some specific techniques within the Autodesk* Softimage*|XSI* software package. Such items include how to use particular types of lights in combination with various shaders and textures, how to employ motion blur, a discussion of the complexities of glows and volumetrics, how to create light rigs and animate lights, and an exploration of how Autodesk* Softimage*|XSI* mimics the physics of light within a 3D scene to create realism. Finally, future articles will discuss the range of rendering strategies and optimization techniques that you can implement
-
Hello I thought it could be interesting for 3D artists and future 0AD contributors to get advices, tips, good links, interesting tutorials, etc. So why not sharing them here?
-
Hello. I have just discovered a nice blender add-on. I think it could be useful to create human models. Blenderartists forum: https://blenderartists.org/forum/showthread.php?391401-Addon-Manuel-Bastioni-Lab-turns-Blender-in-a-laboratory-for-3d-humanoids-creation Official website: http://www.manuelbastioni.com/index.php
-
 The tutorials are hidden away.
 -
I've successfully made some props in blender and exported to 0ad but I'm running into trouble with skeletal meshes. First I import a collada file (in this case it's "mods/public/art/meshes/skeletalf_tights.dae", which i renamed "humantest.dae" and it works fine). I check "import units" when I import. Then I export. I have tried checking different boxes, but I always get very grotesque deformities including backwards props. mostly the guy has extremely stretched out bones and sometime inverted joints (i can upload pictures). The animations still work. I'm sure this is a simple fix but I've read the tutorials and examined the .dae files and haven't yet noticed the thing that's causing the deformities. What am I missing? I appreciate any advice or resources y'all can offer. thanks Sean EDIT sorry if this belongs in another section. you may move it if thats better.