Leaderboard
Popular Content
Showing content with the highest reputation on 2018-11-02 in all areas
-
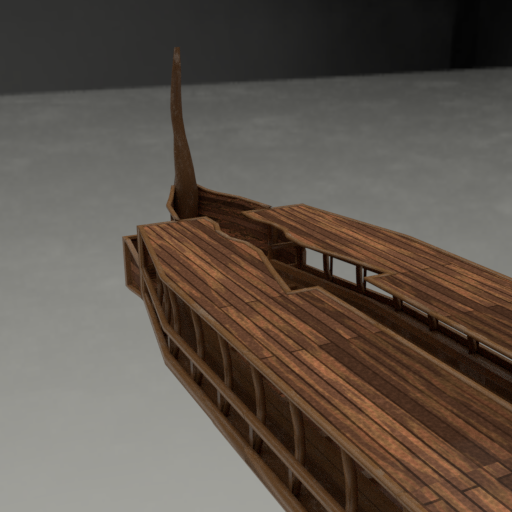
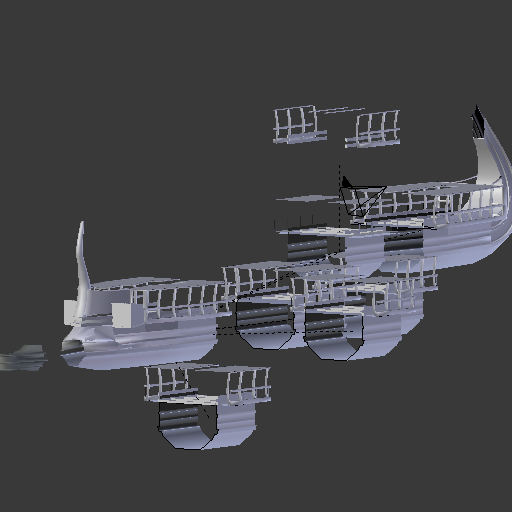
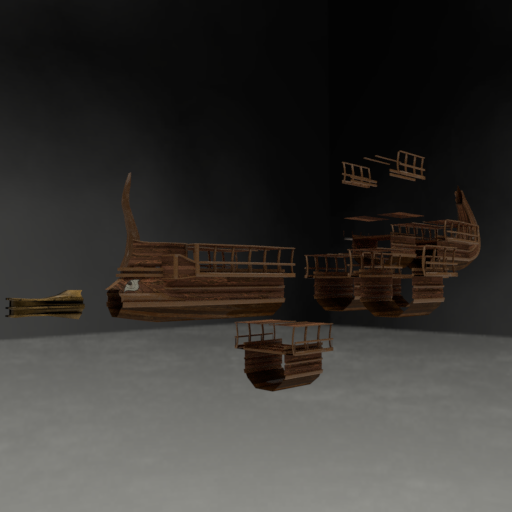
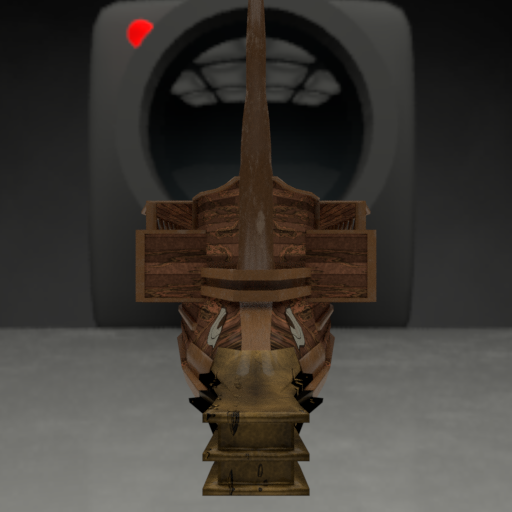
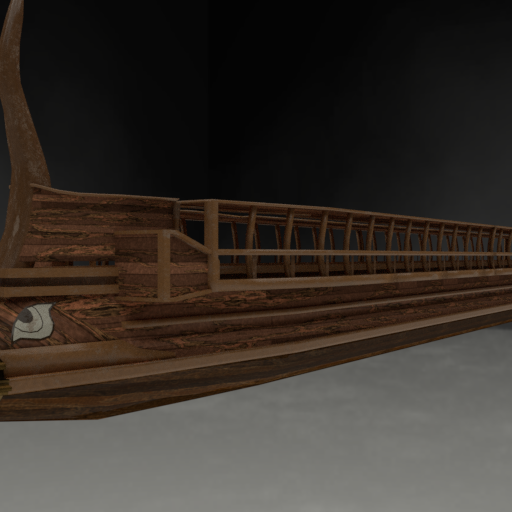
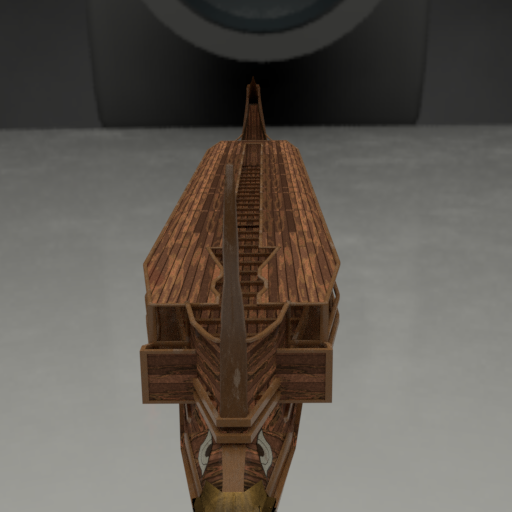
Hi!, i have been working on a high poly model of an athenian trireme based on "Olympias Trireme" for later bake on a low poly one and for fun. Here are some screenshots: Its also Modular for easy modyfing: Gonna be adding details and everything i can see on the references i have, and finaly leave the 3D model as a 3D Tour on Sketchfab in name of 0 A.D.8 points
-
6 points
-
3 points
-
3 points
-
2 points
-
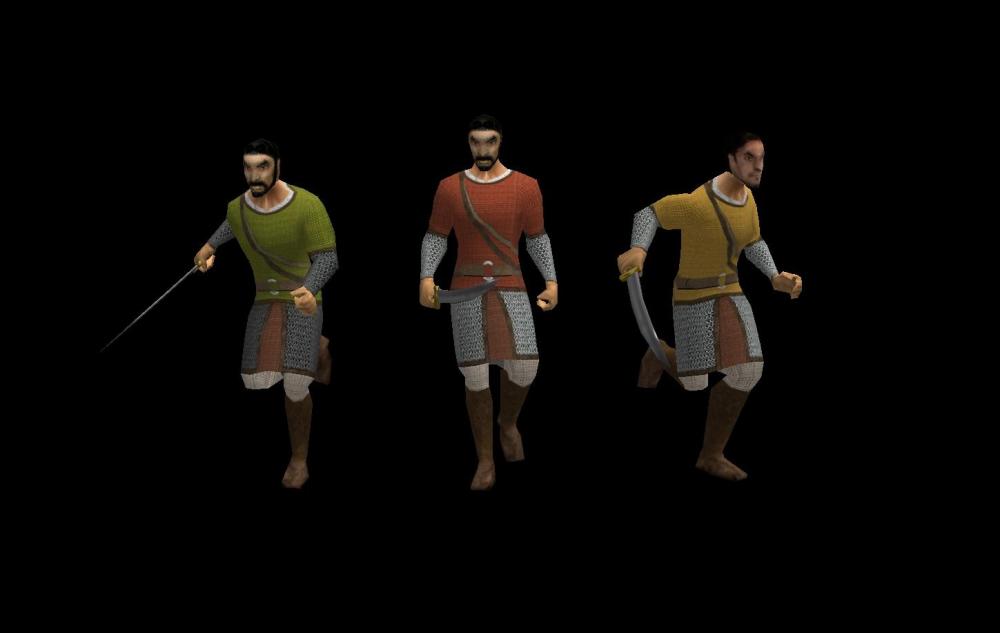
"While it is a common mistake to regard the scimitar as a weapon exclusive to the Middle Eastern world, scimitars and straight swords existed side by side in the region for millennia. In the 7th century, scimitars first appeared among the Turko- Mongol nomads of Central Asia. A notable exception was the sickle- sword of ancient Egypt, which appeared to be an outgrowth of a battle axe rather than a true sword. As successive waves of nomads spread through Asia, their curved swords were adapted by the Indians, Persians, Arabs, and Chinese. With the steppe warriors migrating farther west, the scimitar entered Eastern Europe by way of Russia and Ukraine. The spread of the scimitar into Central and Western Europe can be tracked linguistically. From sabala of the Turkic-speaking peoples of Central Asia, it became sablya in the Russian language, szabla in Hungarian and Polish, sabel in German, sabre in French, and saber in English." https://nationalinterest.org/blog/the-buzz/scimitar-how-one-sword-dominated-warfare-centuries-25033 "The name is thought to be derived from the Persian word shamshēr which literally means “paw claw,” due to its long, curved design. The word has been translated through many languages to end at scimitar. In the Early Middle Ages, the Turkic people of Central Asia came into contact with Middle Eastern civilizations through their shared Islamic faith. Turkic Ghilman mamelukes serving under the Umayyad and Abbasid Caliphates introduced "kilij" type sabers to all of the other Middle Eastern cultures. Previously, Arabs and Persians used straight-bladed swords such as the earlier types of the Arab saif, takoba and kaskara." https://en.wikipedia.org/wiki/Scimitar "The Central Asian Turks and their offshoots begun using curved cavalry swords beginning from the late Xiongnu period.[3] The earliest examples of curved, single edged Turkish swords can be found associated with the late Xiongnu and Kok Turk empires.[4] These swords were made of pattern welded high carbon crucible steel, generally with long slightly curved blades with one sharp edge. A sharp back edge on the distal third of the blade known as "yalman" or "yelman" was introduced during this period. In the Early Middle Ages, the Turkic people of Central Asia came into contact with Middle Eastern civilizations through their shared Islamic faith. Turkic Ghilman slave-soldiers serving under the Umayyad and Abbasid Caliphates introduced "kilij" type sabers to all of the other Middle Eastern cultures. Previously, Arabs and Persians used straight-bladed swords such as the earlier types of the Arab saif, takouba and kaskara. During Islamizaton of the Turks, the kilij became more and more popular in the İslamic armies. When the Seljuk Empire invaded Persia and became the first Turkic Muslim political power in Western Asia, kilij became the dominant sword form. The Iranian (Persian) shamshir was created during the Turkic Seljuk Empire period of Iran/Persia." https://en.wikipedia.org/wiki/Kilij Edit: a few pictures here: https://www.pinterest.ch/thomaslothar/swords-of-the-umayyad-caliphate-era/?lp=true2 points
-
Indeed, she a strong and independent Queen that don't need no King to rule...2 points
-
That's gonna be a pain, but that will be good for artist work. Cleaning up will be nice. Some models might get some fixes as well I count on @Alexandermb to make some anims, and I have a new boar ready, and enrique's fox to commit.2 points
-
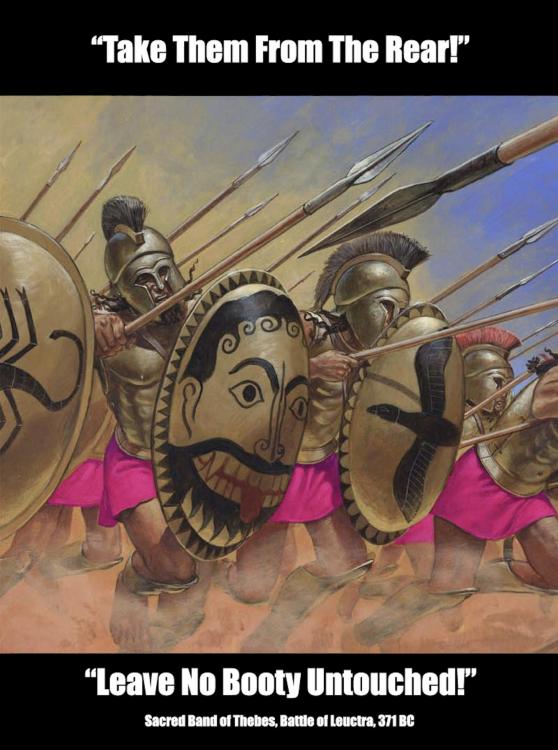
Unless I missed something, Pyrogenesis is still a 3D engine, isn't it? 2D art with missing-texture-colors still look like missing textures. I get your point but I don't know if that's a good reason either. Sure it is. The heroes in 0AD were among the most badass people to ever walk the earth. I'm pretty sure they weren't prancing around in fuchsia shawls. Well, maybe Alexander the Great was, but that's a different story. I'm not saying you have to do it, or that it needs to be done right now, or even over the next year. Even if it takes a few years, I'd just like it to be noted that it's the wrong color, and should at least be changed to Tyrian purple. Who knows, I might even give it a shot if I can actually find the portraits. If the Thebans ever make it into the game, they'd actually offer a sublime excuse to have some bright fuchsia/pink colors. The Sacred Band of Thebes in particular would look fabulous with some fuchsia shawls. The real 300... Ironic that they were the ones to finally break the back of the Spartans. "It is said that the prancing Thebans were able to flank the Spartan army, and take them from the rear, overwhelming them with many powerful thrusts from their spears, their long shafts becoming drenched in the blood of their now submissive adversaries, begging and moaning for mercy..." (I'm sorry... I'm going to be quiet now...) ...2 points
-
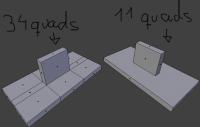
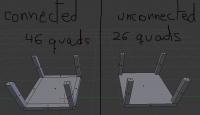
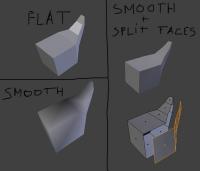
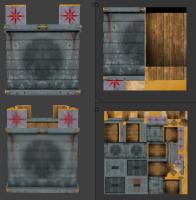
GENERAL LOWPOLY TIPS These are general tips when working with lowpoly assets, they're no software-specific. -Use unconnected geometry! This is the first and one of the most important tips. I’ve seen in a lot of models that people try to make the asset (smaller or big) all made from one mesh. This approach generates unnecessary geometry and makes the mesh more difficult to handle if you want to make changes. Here’s an example: Here we can see how many faces we’ve saved, and makes the mesh much more simple, which is good for make changes easier if required. -Split faces for hard-edge creases. Sometimes we want to create assets that contains both smooth curves and hard creases. Some 3D software lets you choose specifically which faces you want to set smooth shading and which ones set flat shading. However, in every single 3D software, you can “detach” the faces that you want to create the hard crease, this procedure will make the unconnected faces as hard creases. Left side are totally flat and totally smooth connected faces. Right side is the same smooth object, but with the faces where we want hard creases unconnected (the faces are split) -Double sided faces. 0AD’s engine does not render double-sided faces, if you want them to be shown in the game, you have to duplicate the face, and invert the normal. It is also good to move it a tiny bit, so they do not overlap for easier selection/modification or when baking AO. -Try to avoid Ngons use quads as much as possible. This one is not as important as other tips, but using always quads have more advantages than using Ngons and triangles. The main reason is that Ngons have sometimes unpredictable behaviors when triangulated (needed to export into any game engine) and not all 3D editing software supports them. Ngons, like triangles, doesn’t let you create clean loopcuts between loopfaces, which makes the mesh topology harder to modify/manipulate. -Animation loopcuts. When you are modelling meshes that are going to be animated, you must have in mind where the mesh is going to bend. To be able to maintain volume in the mesh on the points when is going to be deformed, you need to have some minimal geometry. This gif explains it visually: http://wiki.polycount.com/LimbTopology?action=AttachFile&do=get&target=BenMathis_limb_deformations.gif -Fake details with decals/textures Try to avoid geometry using textures to add detail. This can be further enhanced by the use of normalmaps. You can also use single faces, or simple geometry mapped to another part of the texture to use it as “fake” detail: several windows in 0AD’s buildings use a simple quad as a “decal” which removes the need of subdividing the geometry in the wall to make a “connected face” to map it to the window texture. (You can also make windows “insets” in the wall for more detailed windows, if the polycount permits) -Use as much texture space as possible, reuse as much texture space as possible too. This is a common mistake, and it’s one of the most important concepts of lowpoly texturing (wasting texture space). The best example to understand “reuse texture” expression is found in symmetric objects. Using only half of the mesh texture lets you make that texture portion bigger, which means more detail, at the expenses of having the exact same texture in both sides of the mesh. This is used in several things like helmets and… mainly symmetric objects. This is especially important when you are restricted to use fairly small resolution textures (like 0AD). Here are some examples of how to save texture space, increasing texture detail. Using a mirror modifier in your 3D software will make this process easier and automatic. In this example you can see the same asset mapped to different textures but both of them are 256x256. In the top example, there's heavy use of "reusing texture space" since the object is symmetrical in the Y and X axis. The bottom example is the same asset to another texture of 256x256, but each UV island has its unique space in the texture. You can clearly see the loss of detail, but in this case, you can make every face of the asset different/unique. You have to choose which assets/part of the asset are important enough to have its own texture space for unique details. -Add margin to your textures – texture bleeding Try to avoid seams showing up by texture bleeding (surrounding pixels close to the edge of the UV island gets “inside” of the UV and are displayed). You can avoid seams by texture bleeding simply giving some margin colour to your textures, and using a background of similar colour as your textures, which will minimize the seams effect. Here’s an example of texture bleeding making seams noticeable: http://www.ftc-creative.de/uploads/projects/FROG_Shading_01.jpg -Playercolor in textures. Playercolor is the term used to determine the unique colors of each player in a 0AD match. These colours help to differentiate the owner of the units/buildings even if there is other player in the match playing with the same civilization. Playercolor is shown in the parts of the texture that has not full opacity in them. Here’s a good explanation by team member quantumstate of how playercolor works in 0AD. (it’s an extract from this post: http://www.wildfiregames.com/forum/index.php?showtopic=18035) GIMP will work fine for textures as long as you understand what is happening. The issue is that the game does the player colour in an unusual way. What I think you are expecting to happen is to have a background of the player colour with the texture over the top so the player colour shows through in the alpha sections. It works slightly differently though. First with images you need to understand that each pixel in the image has 4 channels. 3 colours (red, green, blue) and the alpha or transparency channel. When you make part of the image transparent you only change the alpha channel, the colour components stay exactly the same. To see this in gimp you can use the layer mask as Enrique mentioned to show the alpha channel as a black and white image. You can disable the layer mask (from the right click menu of the layer) to see what the image looks like without the alpha channel. Now what 0 A.D. does with the player colour to create the final texture: 1. Multiply the texture by the player colour and discard the alpha channel. So if the player colour is white then the image will be left as it was (multiplying by 1 leaves things unchanged). If the player colour is black the whole image will become black, if it is blue then the image will become blueish. You can test the multiply in gimp using layer modes, just create a layer with the player colour and set the mode to multiply. 2. Take the original texture with the alpha channel and place it on top of the new multiplied image. Then the multiplied image will show through in the transparent regions giving the final texture. You can replicate this in gimp to preview what your texture will look like. 1. Open the texture, there should be a single layer. 2. Duplicate the layer. 3. Remove the alpha channel from the bottom layer. (Now you can see the colours "underneath" the transparent sections). 4. Create a new layer and put it in between the two existing layers. 5. Fill the new layer with the player colour (e.g. #0000FF for blue players). 6. Set the mode of the new layer to multiply. Now you should see an image which will look like the final texture in game. So it is important that you are aware of what the image is like "underneath" the transparent areas because it will affect what the texture looks like. This is why layer masks are useful so you can easily disable the transparency and see the colours in the transparent areas. (create the layer mask using the "Transfer layers alpha channel" option).1 point
-
1 point
-
I got the gate to work with attachment point ''root'', now im just finishing up the textures and the wall settings so its not clipping where it shouldn't be. The wall set is a pain to get right. Thanks for offering assistance. At this moment I think i got it handled.1 point
-
1 point
-
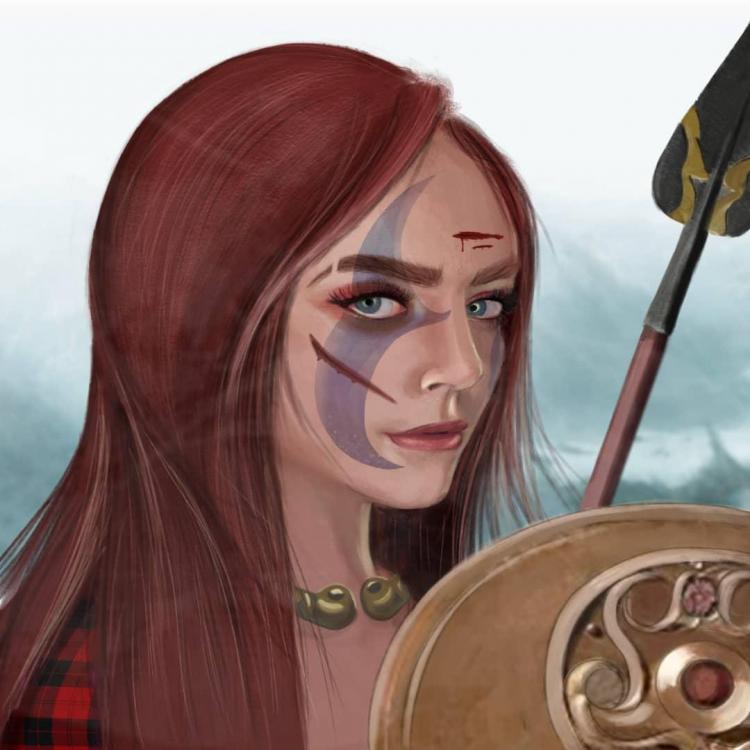
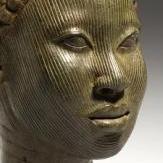
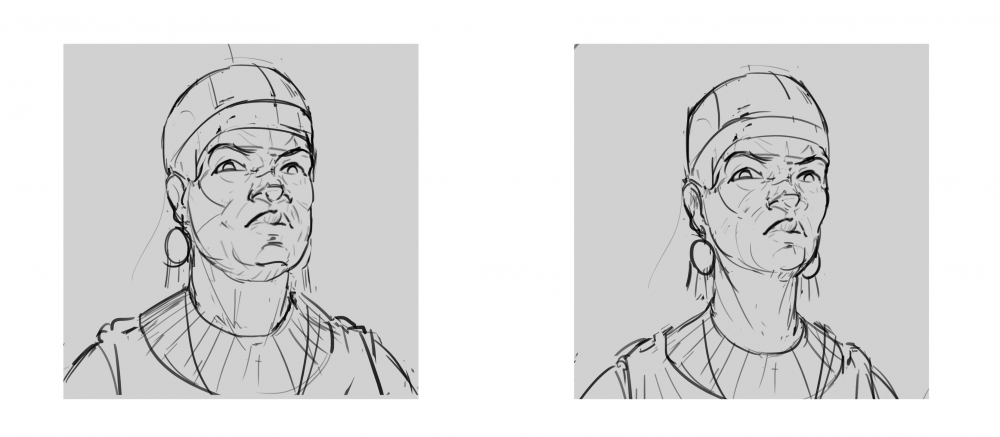
Thanks, I'm glad you liked it. I remember you said about making her a little chubby, and it actually gives a feeling of power to her, instead of just another pretty face. I did the second one just in case1 point
-
Thank you, there is still lots to learn but ill fix the textures once i get the walls functioning in game. At the moment im learning how the attachment point works for the gate, then onto final texture details.1 point
-
1 point
-
Wow, fantastic! Because the Kushite Queens of this era are always depicted as "big" women, I personally prefer the one on the left... Success!1 point
-
Each transaction you makes moves the price for everyone on the map. The only way the price will move in the opposite direction is if somebody on the map starts to sell metal for wood. Better to build two markets as far as possible from each other and send traders from one to the other. These traders will provide a constant income of resources. This income will be larger with larger distance between the two markets. You can also chose the resources they will provide, by default they will provide all four resources, which is probably not what you want as you said you have plenty of wood (and food I suppose). You should be able to build more town centers from phase 3 on. Maybe you didn't have the necessary resources? If your citizens can otherwise climb these hills then it is probably just a path-finding bug, of which there are plenty. In this case just send them to the hilltop manually and then make them work on the building. It is also possible to place foundations on genuinely inaccessible cliff-tops, if it has enough space. Of course you won't be able to actually build the building in this case.1 point
-
1 point
-
I can't remember but I think the rendering is like 20% of the frame time time. Pathfinder goes way higher than that. Doing instancing might help more than LODS. I was thinking of stripping every prop from the structures so that multiple meshes can be reused all over.1 point
-
1 point
-
1 point
-
Maybe heroes could have some sort of Tyrian purple halo behind them? This would keep the uniform signal to the player that it's a hero, while leaving more freedom for designing the hero's appearance.1 point
-
1 point
-
1 point
-
/me doesn't want to recolor every unit portrait That's not really a reason is it ? Portraits are 2D art and not used in the 3D part of the viewport Also I believe that's more of a 3D engine reason than a specific application. Red is for champs green for mercenaries and blue for common folks. I get your point but I don't know if that's a good reason either.1 point
-
I've got a few tracks almost ready, and several submissions from other composers to sort through! I'm moving right now, which is extremely consuming in L.A.... but I expect to be back into it in a couple of weeks. Will keep you all posted soon1 point
-
1 point
-
Thank you! The reason things are not on the Persian list is just because no one translated them yet, I think. So, thank you for going ahead and coming up with a translation! The IPA is just a guide on how to pronounce the words the way we think they were probably said in the ancient times. It is sort of designed for people who don't speak the language or a related language, so that they can also give lines. Here is a chart, there are many others online you can look up for various languages: https://en.wiktionary.org/wiki/Wiktionary:IPA_pronunciation_key That being said, some of the existing Latin and Greek lines in the game were not recorded all that accurately. Although we would definitely appreciate as much authenticity as possible, I think if you are familiar with a modern relative of the original language, that is probably at least close enough to get a good result. My only critique is that one or two of the lines sound like they were recorded with the microphone in a different location. Take a listen to No2 and No3 for the male voice and you will hear there is a strangely thin voice sound on No2, probably the microphone was obscured. If you don't mind to re-record No2, that would be appreciated. Also, if you want me to be able to remove noise from these takes, I need you to include some 'silence'. Just hold the microphone exactly how you hold it when recording the voices, press record, then be silent and do not move, after a few seconds press stop, then send me that clip. I can use that to remove the noise from all of your takes so it sounds like it was done in a fancy studio.1 point



.thumb.png.ce58cea22940c255f5b0a735d5abee36.png)
.thumb.jpg.b21ca1d0c15fb56b42c39b25a0a40815.jpg)

.thumb.jpg.9f49685e37f5d8022edf6b9a26fa503f.jpg)
