Enrique
-
Posts
2.338 -
Joined
-
Last visited
-
Days Won
96
Everything posted by Enrique
-
Aww man, I searched a lot and I didn't find anything. Although I remember working on some convoluted trunks for the olives BTW I love this approach you used: It is very clever polygon placement and helps a lot for the semi-top/down camera.
-
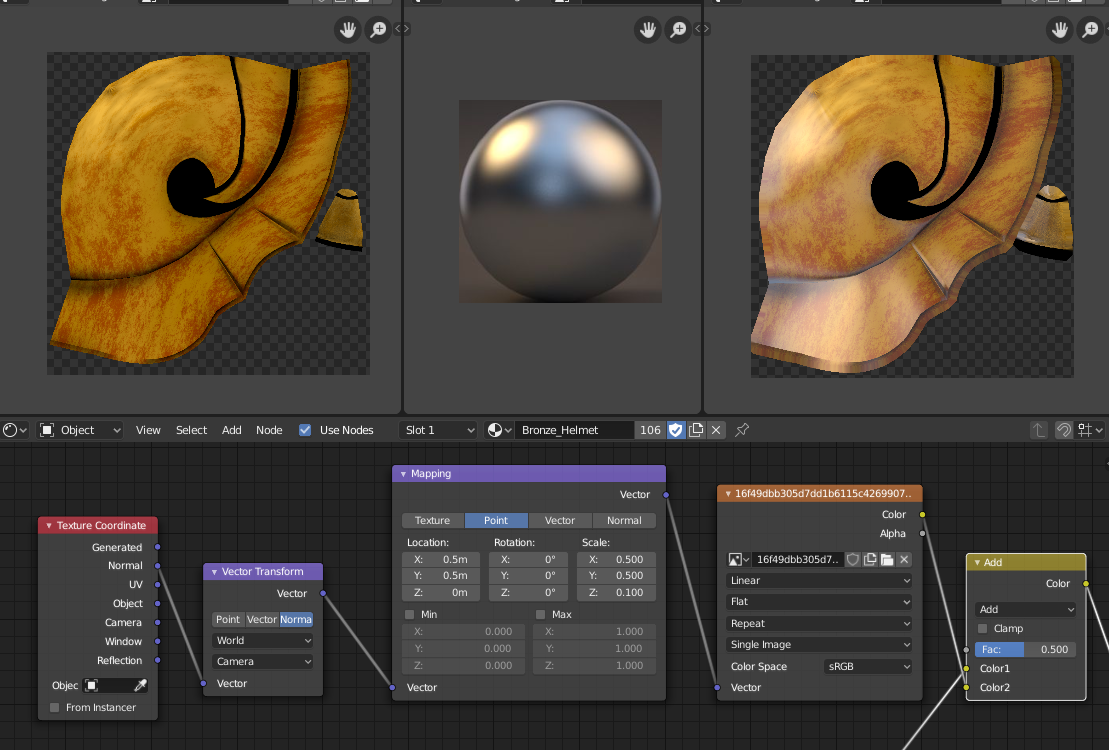
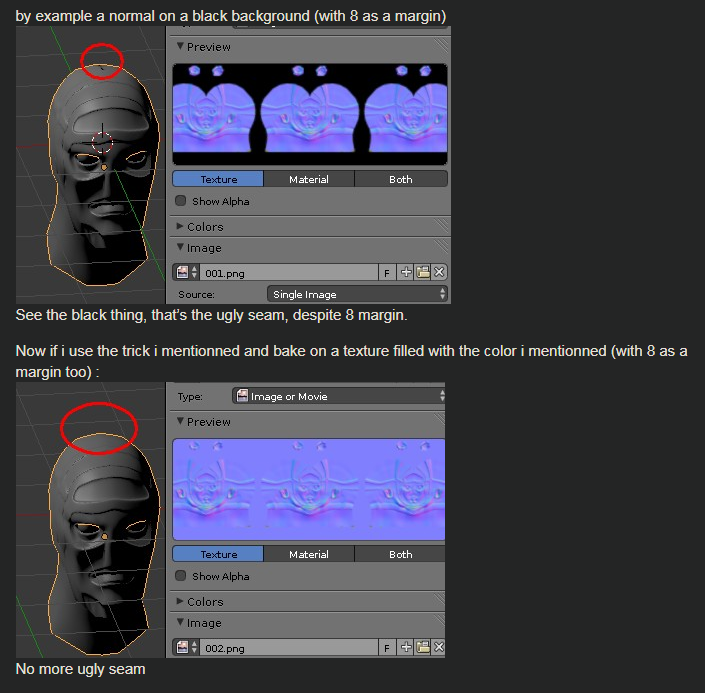
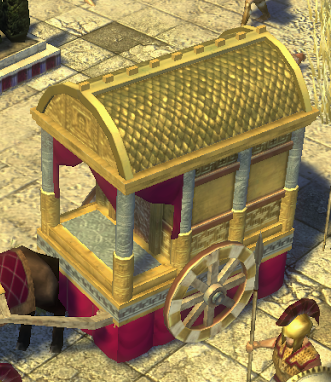
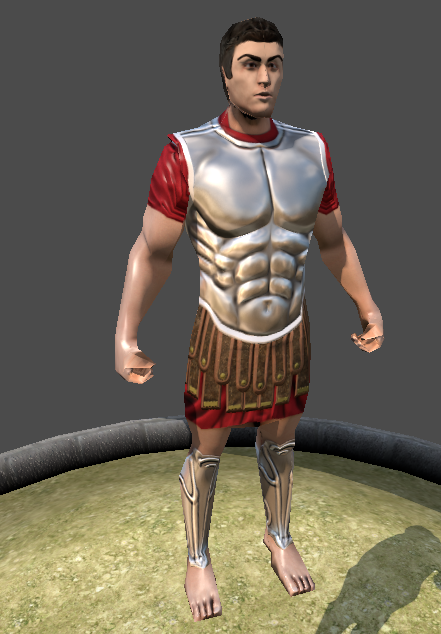
The only instance when I was able to replicate the normal seam issue was when I baked from the highpoly when the mirror modifier on the lowpoly was set to not render-able (the one you call "reflectividad") - If you bake with that modifier to not affect the render/bake - you'll get the seam. Some other suggestions: 1.- Extend the baking margin. (also called bleeding margin) You can find it on the "Output" submenu of the baking. This thing is super-useful when baking to avoid unwanted parts of texture bleeding through the seam. This issue makes that the parts of the texture outside of the UV islands "bleed" inside them and when you zoom out enough, you can see the seams. This affects all kind of maps (normal, color, spec...) and it is specially present on RTS due to the mipmaps since the camera is often very zoomed away. The more margin you give (surround the UV islands with the same color as the edges of the UV islands), the harder will be that the surrounding colors "get into" the UV map when zooming out. Here's a example: 2.- Use the standard "Principled BSDF" shader instead of the "PBR Dielectric" shader. I made that shader long ago on blender's first implementations of PBR, when the Principled BSDF wasn't there. I became crazy making it, but I learned a lot about how PBR works. However, the Principled shader now is the standard, which is much more complete and tremendously more optimized than my "hack" . 3.- Consider adding reflections to all your metallic bakes. I started to do this on my lastests works here when I baked any texture that was metallic. I think it turned out decent. The roof of the relic cart was baked with some reflections in it, and I think it looks much more metallic than other stuff I made. (The specular highlights end up selling the whole metallic feel too). The armor for the guy texture had a generic HDRI for the environment, which provides with a pretty generic reflection which sells better the metallic feel. I could elaborate on this technique if you're interested. You can even add just a simple matcap to the shader when baking, so you don't even have to extend the rendertimes. Here's a sample setup: Simple diffuse -> matcap "add" to the diffuse with the below setup -> result of the diffuse bake I hope you can find anything useful in it! Cheers!

-
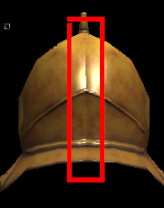
Hmmm... I've seen that normal seam in some other helmets in this thread too. There may be something on the baking setup that is causing this. Hard to know without a blendfile. If you want I could take a look at it.
-
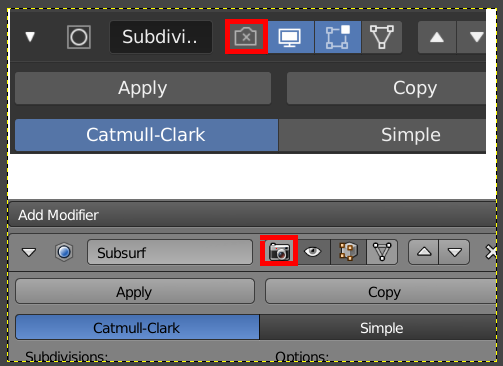
Don't worry, baking is the correct way to do it Just wondering about the middle seams showing in the normals, but not in the colormaps: Make sure that when you bake them, the lowpoly object does not have subdivision surface applied (making the modifier not-visible won't make it, since when you bake it "renders", you have to disable the render-ability of the modifier with the camera icon) Here's what I mean in both 2.8 and 2.7x Otherwise, it would bake the normals taking into account the subsurf, making the normals look a bit incorrect when the modifier is removed, which I think it may be what it is happening here. Please disregard if it is not the case. Just trying to diagnose based on the normal seam observation. Cheers!
-
Do you manually paint the normals? Or do you bake them from highres meshes?
-
@wowgetoffyourcellphone Looking awesome man. Did you change the speed of the skirmisher jog? they look much more natural now than the "quick jumpy" effect that I remembered. I think you should also touch the animation speed for the archers jog to something similar.
-
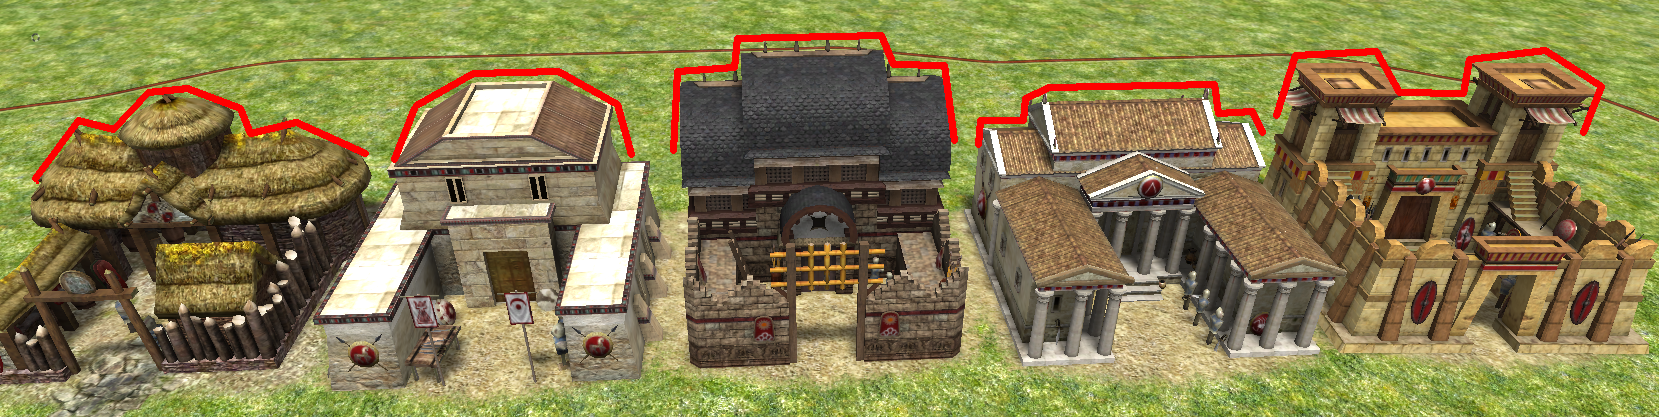
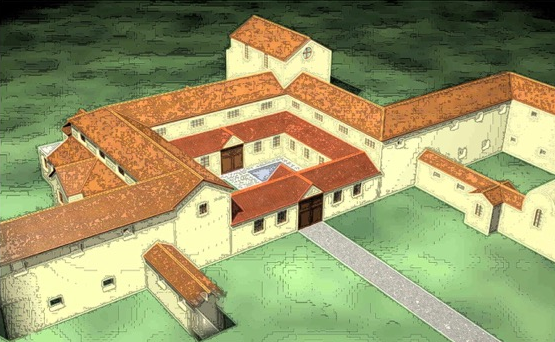
Lol, I made 10 of those + the textures When I said "it barely differs for any other standard roman building." I meant the following: This is a villa: This is another villa: Another villa: This is... Here's another: So what I meant is that: It may be 100% accurate a real used barracks but it doesn't communicate at all visually what is for, lacking both aesthetically pleasing design (cool) and lacks visual communication of what is used for (gameplay) I'm not saying to re-invent the design completely, but discarding artist touch on the designs (even on a blocking unfinished state) and go for 100% accuracy will reduce the final quality of the asset IMHO Let's see what Stan comes up with


-
Then we have a different interpretation of what aesthetically pleasing and not boring mean Don't get me wrong, it does fit the bill of passable barracks thanks to the similar layout but for me it barely differs for any other standard roman building. With 70% roof and 30% square courtyard, specially hard to see if you're going to roof the whole perimeter with barely space to show eyecandy or columns under it (because of footprint size restrictions of the barracks template). And the only interesting variation of the roof is in the back of the building. But just my opinion, maybe Stan can make it work after all.
-
Those layouts are general guidelines. They could perfectly be done within two storeys. I don't think there would be an issue anyway with a 3rd story if the overall height do not surpass too much the standard barracks scale. From your references, I can already see quite some structural combinations that are quite similar to the example layouts/structure forms, don't you think? There has to be always a balance between aesthetic (not boring), accurracy (not too "fantastic") and gameplay (follow the layout guidelines of the barracks)

-
Some shapes for inspiration and/or layout ideas:

-
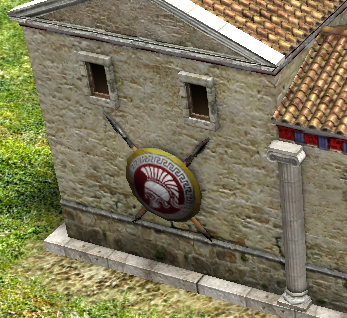
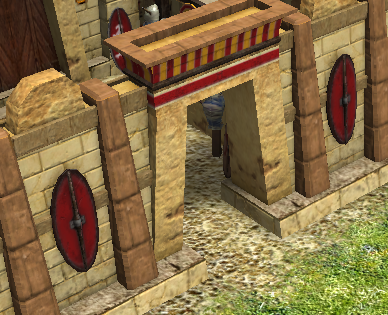
Despite of the direction you end up following with the layout, here are some suggestions with the structural parts: Use thicker wall wood beams. The wood beams on the walls are currently too thin. Making them thicker will provide a sturdier feel. Also use the "X" pattern which is very characteristic of romans: For the "boringness" of the walls, you can throw some "indent" arches. I think Pureon also used them in some roman houses. Banners and shields hanging on walls: I think it is a great eye-candy catcher to spice up walls and give the military feel. It is a decoration element used in several of the barracks in-game that works pretty well. Investigate adding different roofing levels: -Except few exceptions (Persians and Seleucids) the barracks often have roof elevation variations to spice up the shilouette, while keeping the "U" shape layout: For further structural inspiration, you could take a look at AC:Origins and AC:Odissey cities screenshots, or fire up the game if you have them. You can get very nice ideas and keep the historical accurracy. cheers!

-
Hi @Alexandermb ! Glad to see new talented faces in the art department ! Sadly, I'm back just as a lurker (until the end of september or so) and perhaps I can provide art tech support or similar, but no manpower yet. I've seen you guys have been very busy! Really nice work around the art dept forums Hello Feneur! Happy to se you around here still!
-
Age of Empires 2 Definitive Edition
Enrique replied to Lion.Kanzen's topic in Introductions & Off-Topic Discussion
It would have been quite risky to heavily alter civ set colour pallette. Specially between old-school "purists" gamers, since this is an original Ensemble Studios designed civ. Civs that were later added on by Forgotten Empires on the expansions (like the slavic architecture and the mediterranean/italian set) had a very good redesign. Also hard to make a good balance between very coloured buildings (like the aztecs had) and playercolor readability. This is for gameplay readability too. That's also why same units between different civs look the same. 35 civs with different looking units (even with the same stats between them) would be entirely impossible to distinguish during gameplay for unit countering-decision making. -
I won't have much time (at least until September or so). However, you can find the starting pose on the blendfile of the unit animations that I posted here. Just need some arm movement and back to original pose What is the issue?
-
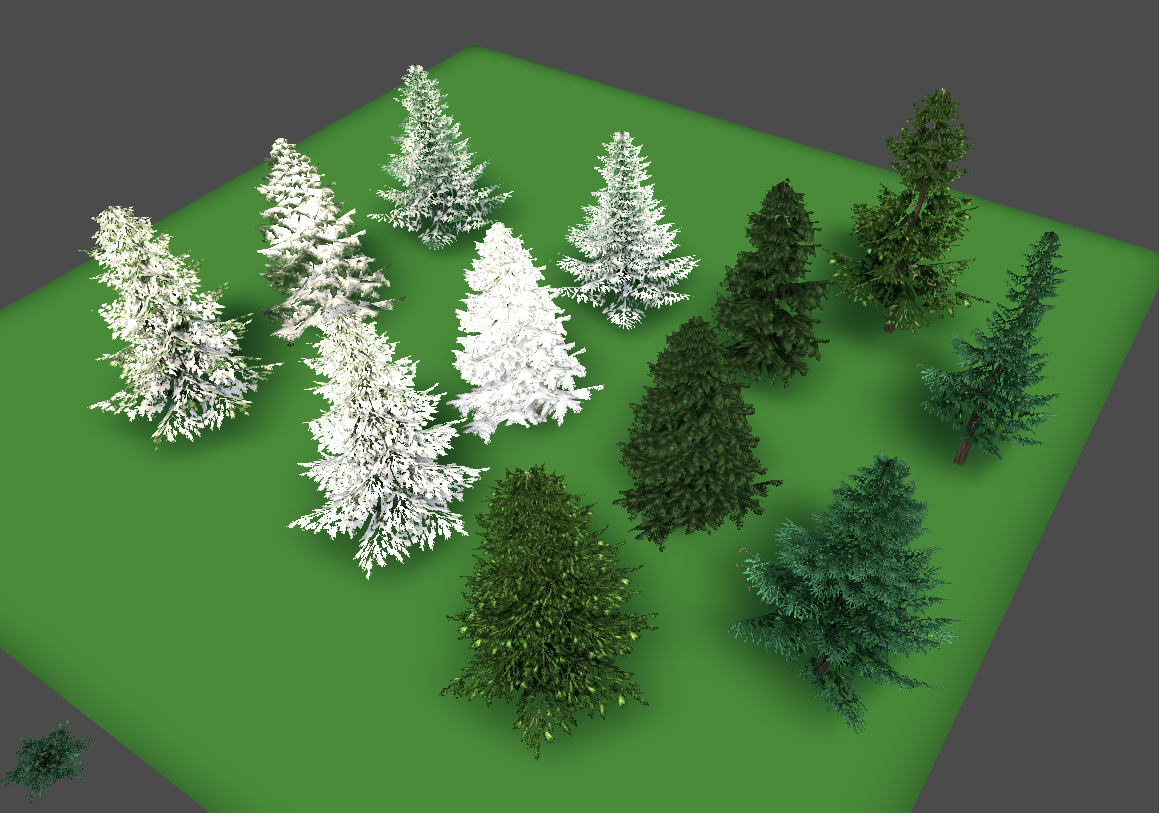
Wonderful work on the trees... I have these pines which I think I never ended uploading them... they're using the old pine textures. If I did just ignore the post Just in case you can reuse them somehow. cheers! pines.rar

- 348 replies
-
- 10
-

-

-
Here's the cavalry animations... I know it is quite late, but better than nothing: https://a.uguu.se/IP7Ov5YBmDhO_cavalryanimations.rar (seems it expires in 24h), I could upload somewhere else. Also attaching a .blendfile with a setup to record cavalry (and unit) deaths using ragdolls, in case you want to investigate further into simulation (can be recorded in bones animation). avalry ragdoll.rar cheers! IP7Ov5YBmDhO_cavalryanimations.rar
-
unit anims.rar Hi @fatherbushido ! long time no see Attached is the .blendfile I used for the unit animations... I'm trying to upload the cavalry animations too, but seems the blend is too big (compressed gets up to 32 mb)
-
Hey, I may have some .blend files that may be useful... I'll take a look and post them here
-
The mesh is full with NGons. Collada and game engines doesn't like NGons. Solution: Triangulate the mesh before exporting. -Select the object -Go to edit mode with TAB -Go to face mode select with Ctrl+TAB, choose face selection from the pop-up menu -Press "A" to select all the faces -Press Ctrl+F to open face specials menu, choose "triangulate faces" Ngons should be replaced by triangles now and is safe to export. ---------------------------------- El objeto está lleno de NGons. (NGons son polígonos con más de 4 vertices). Al formato collada y a los motores de juegos no les gustan estos polígonos (no son compatibles). La solución es convertir los NGons en triángulos antes de exportar el objeto. -Seleccionar el objeto -Ir al modo edición con la tecla TAB -Presionar Ctrl+TAB y elegir el modo de selección de caras/polígonos. -Presionar "A" para seleccionar todos los polígonos. -Presionar Ctrl+F y seleccionar "triangulate faces" en el menu que aparece. Ahora los NGons deberían haber sido reemplazados por triángulos y debería funcionar al exportar. Recuerda quitarle cualquier material asociado y borrar todos los objetos salvo el que quieres exportar de la escena como ya comentó Lion.
-
Here's the link to the online SVN repository. -> http://svn.wildfiregames.com/public/ps/trunk/ It's like 0AD folders and files, just navigate to the folder you need the file from, then rightclick, save as and boom, you have the dae file without copying/pasting the whole code. http://svn.wildfiregames.com/public/ps/trunk/binaries/data/mods/public/art/animation/biped/new/ That would be the folder with all the new animations for the new meshes. New animations can be done with the blendfile of the animation template. Just create a new action, animate the stuff, and export it. All new meshes (like your new tunic variation) can use those new animations.
-
You don't need to go through each bone, you only need to do it for the new vertices you created for the tunic, the rest of the mesh maintain its bone weights, so only the few new vertices you created need weight painting. Glad it worked. Please take a look to the new meshes actors, the prop-bones have different names than the old meshes ones.
-
What process did you follow to get there?. Are you re-rigging the whole thing with automatic weights? If you do so, you'll need to uncheck "deform" in the bone options tab for every bone that is not used in deformation, like the knees target, elbows target and all the prop-bones. Otherwise blender may assign weights to bones that are there only to help animating, not deformation thus the game thinks that there should be more bones to do the animation. Ideally you should: -Import the mesh that you want to modify. -Erase the armature that comes with it, then modify the mesh as desired. -Once you got your tunic variation, append the armature from the blendfile provided earlier. -Add an armature modifier to the mesh and choose the appended armature. -Move the bones to see your new vertices are assigned to any vertex group, and if not, do it manually (the changes are not big, so you won't have to spend much time with it) If you do automatic rigging, you may add vertex groups of bones that are not declared to deform the mesh and errors will occur. -Export.
-
If you want to do your model from the new unit models that will debut in the next alpha, you can grab the animation template at the end of the following post: Use the same process as the previous post, but with this blendfile. If you prefer to start modifying from a different (longer tunic) variation than the one on that blendfile, you can choose from the following (they're named the same as the old variations): http://svn.wildfiregames.com/public/ps/trunk/binaries/data/mods/public/art/meshes/skeletal/new/ Just remember to rig it to use the armature from the blendfile, not the one that gets imported from the collada files and it should work.
-
There are some steps there that may generate the issues. Specially importing the used armature from a collada file to export it back (bones are often broken) If you have the mesh already done, rig it to the following armature in the blendfile that you can find in this post: This way you have the armature "as it was created in blender" without importing it. Just assign the vertex groups (do the rigging) of your mesh to the armature found in that blend file and export. Let me know if the issue persists. EDIT: Keep in mind that modifying the hero mesh for your longer tunic variation will make only compatible with the hero UV textures (heroes have different UV layouts than the standard unit) That's the reason why in your image (although it is broken due to the collada export) you can clearly see that one foot is correctly mapped, but the other is not.
-
Wtf Lion you've seen how the engine has been developed from different people and how art has evolved over time to get advantage of the changes. It was built from scratch. Also it was already pointed that the aoe engines were propietary so it isn't even possible to take stuff from it. I don't see any other similarities it could have other than art style legacy and rts camera. Almost all 3d games use dynamic lighting for example and that doesn't mean that one game is similar to another.