Enrique
WFG Retired-
Posts
2.338 -
Joined
-
Last visited
-
Days Won
96
Everything posted by Enrique
-
The texture is not in the blend file. It would also be great to have the animation data without being baked. The topology is not ideal for animation, but I guess we'll stick to it unless someone wants to upgrade the model.
-
In my opinion this prop needs two things: -more geometry in some variations (check the variation on the far right and far left, it's just weird) -shadow painted in the texture Why shadow painted in the texture? basically, all the "layers" of leaves added to the fir will have another layer on top of it, except obviously the top one, so every layer but the top one can benefit of some "manual painted AO" in there. With the white of the snow will be noticeable enough to look good. Noisy specular for the snow would also benefit the model, specially if there's going to be specularity Yes, AO is only casted by geometry, alpha planes cannot alter how the ao will be produced. So in this case painted AO in the texture is the way to go IMO
-
Nice, looking good. Now we need death animation, and some idles.
-
How to export animations from Blender3D to 0AD
Enrique replied to Enrique's topic in Tutorials, references and art help
- Edited and added some new Blender features as well as pyrogenesis annotations: - Blender collada export now works better and there's no need to bake the animations even if using IK setups. This reduces considerably the size of the animation collada file. - In order to get clean loops in pyrogenesis, you have to export including the first and last keyframe of the loop. In theory, it is the same keyframe and should be avoided, but the engine needs this duplicated keyframe. In resume: export the first and last keyframe in the animation loop to get a clean looping animation. - Blender now supports "clean channels" option when selecting keyframe channels and deletes the keyframes that do not add anything new to the animation. This reduces the size of the animation file without altering the animation at all. Just select all keyframes in the action editor, hit "X" and select "clean channels" -
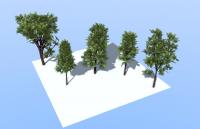
Hello! I'm back with a quick tutorial on how to make lowpoly trees taking advantage of Blender's 3D add-on "sapling tree generator" in less than 10 minutes! Here's a video tutorial from BlenderGuru with more in-depth information about how sapling add-on works: http://www.blenderguru.com/tutorials/how-to-make-a-christmas-tree/#
- 28 replies
-
- 10
-

-
My idea: Two "requests" of pause available: one of 5min max and other of 10min max. When a player requests to pause, there should be a small pop-up for each player to accept or decline the pause request (with a timer of 1 or 2 mins to vote). The game is paused when at least one player of each team in the match agrees the request (if theres a 1vs1vs1 all players should accept) While on pause, there's a window where you can click a checkbox if you're ready to unpause the game and see if the rest of players are ready (plus a small portion of the window for a chat). All players must accept to resume and the game is resumed after a 5 sec countdown. After you have requested a pause, you can't request another if it has been declined in the next 5 minutes. And you can't request a pause after 10-15 mins if it has been accepted (counting sice the resume)
-
Another death variation. I made two since I thought that dogs may be produced in high numbers and death repetition would be very noticeable. Tried my best at death anims since I didn't want to search for reference material lol. http://gifmaker.cc/PlayFrameAnimation.php?folder=2015042909PvTaP1UwgUqlTWTSGNRAXa
-
Hmmm that's quite a lot of work for an idle... my idea for idles was scratching, shaking the head and body (like drying), sitting, laying down, smelling the ground, sporadic hunters pose (lifting one paw). Finishing now one of the two death animations: http://gifmaker.cc/PlayFrameAnimation.php?folder=2015042903FLeV2KsJTqdVXT4VCsR6rG
-
After several attempts and lots of time wasted in making a decent shaking and tearing animation attack without looking weird/dumb I went with this standard attack animation. http://gifmaker.cc/PlayFrameAnimation.php?folder=2015042720Mm3hy9DxflipT2D7ol1AfL
-
I haven't test to import it into the game, but I'll put my money on the root identifier. Use the bone (or joint) that you use as "main joint" or "root bone" when defining the root (in your case is "joint1"). You used the name of the armature object, and I think that might be causing the problem. Also try to avoid uppercase characters when naming bones, just in case (when importing the collada file into blender the bone names are all in lowercase) like this: <skeletons> <standard_skeleton title="Custom Armature" id="my_armature"> <bone name="joint1"> <bone name="joint2"></bone> </bone> </standard_skeleton> <skeleton title="Custom Armature" target="my_armature"> <identifier> <root>joint1</root> </identifier> <bone name="joint1"><target>joint1</target> <bone name="joint2"><target>joint2</target></bone> </bone> </skeleton></skeletons>On a side note, when I imported the collada file of the animation into blender, it had keyframes but the bones didn't move. Not sure if that's your "idle" animation or something is wrong there.
-
Try with the roman sandbox, there's an army camp just outside the territory which is decaying, if it's below 100% capture points you can't garrison there.
-
I tested it a bit. Worked fine so far. The only thing I noticed was playing romans (I tried them to see how would the army camp outside territory would react) and the army camp loses capture points over time (as I guess it should) but when it reaches zero, it converts to gaia and attacks friendly and enemy units. Another thing I noticed is that the capture points decreases faster than 3 units capturing (it loses capture points faster than 3 units can increase its points) The same if the units are garrisoned. But garrisoning several units will make the camp to never lose its owner (unless it is attacked) since the garrisoned units are constantly recovering its capture points. Also units can't be garrisoned unless the building is 100% owned by the player, but the already-garrisoned units can stay inside the building until the loyalty reaches 0
-
The only useful thing I can think of to try to help is directing you to the export animation tutorial. Check if you're missing any step, like creating an .xml that defines all the bones in the armature and its hierarchy, and assigning the animations to the unit actor: http://wildfiregames.com/forum/index.php?showtopic=17842 Check out the introduction, rig setup, and step 3. Basically, the ones that aren't blender-specific
-
I'm not into maya, but I found some stuff that may help: http://vandaengine.org/exporting-from-maya-opencollada-collada/ Another way: Export to FBX and convert to COLLADA:
-
I agree. The more choices the better. I guess Ctrl+right click for capture, simple right click for attacking. It makes sense since for allied buildings is garrisoning, and it's more or less representative of how the building is captured (by trying to go inside)
-
You're refering to columns, right? look too cartoony even with the rest of the texture, isn't it?
-
-
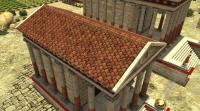
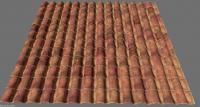
I can use the geometry for any civ roof (and it will be used for seleucids). I have setup the color of the tiles so it's super easy to customize the hue/saturation/value it varies on a small range randomly on each tile. In resume, I can go any color needed with some little range variation in the color to break repetition. I'm currently working on a nice parallax map which is harder to do than normalmap since the texture render is made "from an angle" to see better the tiles and the displacement bake can't be done without some tickery. EDIT: Here's a test in blender, left is with parallax, right with only normalmap. The texture is still quite high-res so expect less quality. I'm also making the concave tiles a little brighter in GIMP, making the effect of worn and differentiate the tile columns from far away. (Also parallax works differently in blender than in-game, that's why I think it's so dark in blender) http://i.imgur.com/VdIGQYR.jpg
-
Man, rooftops looks so much cleaner... I'm not sure if the roof texture I'm making is going to look as good as this.
-
I made it from scratch using Gimp and sculpting 6 highpoly variations. No photos used.
-
Example: (it's lit for showcase purposes, the baking is only calculating AO for shadows between the tiles)
-
I could try rendering a new normalmap based from real geometry placing the tiles following the texture, do you think that may help? or just actually render the geometry to get a new un-shadowed roof texture? (the biggest problem with generating the geometry for the roof is that the parallax/heightmap is quite difficult to achieve when baking) By the way, there's a better way to make the roof without mirroring, since the roof texture tiles, it's just a matter of getting the correct column of tiles where the left-side roof ends.
-
This is great Micket. I know it's a lot of tedious work, but you did it quite well. Now we should also alter the specularmap to give some shininess to some of them. The drawback are the older computers who can't manage the normalmap shading where may look better with shadowed roofs, but it enhaces for the rest of users.
-
Tower range from up there? full map?
-
Feel free to zip it up or upload it elsewhere and I'll commit both. I've checked the one you posted and it helps on the seams of the parts of the texture that are being used tiling.


