Leaderboard
Popular Content
Showing content with the highest reputation on 2022-08-10 in all areas
-
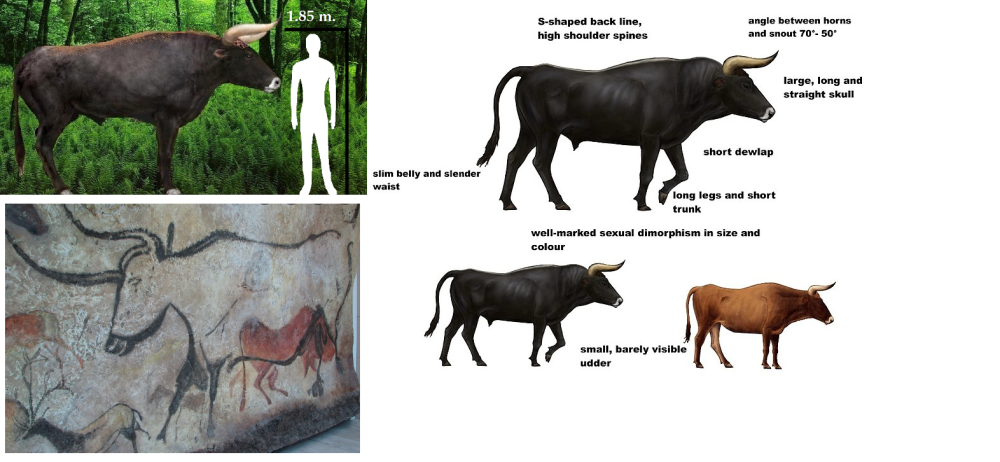
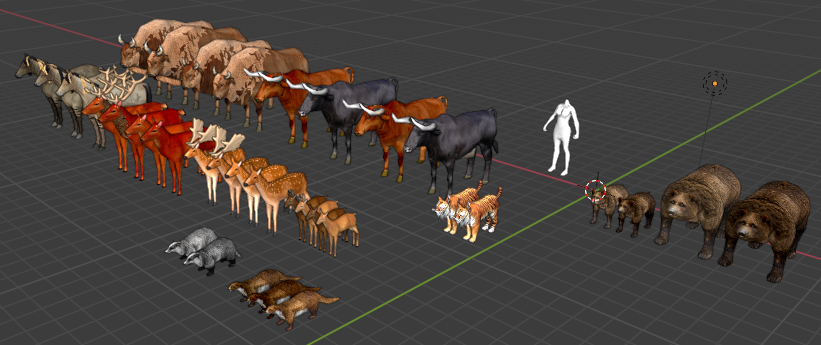
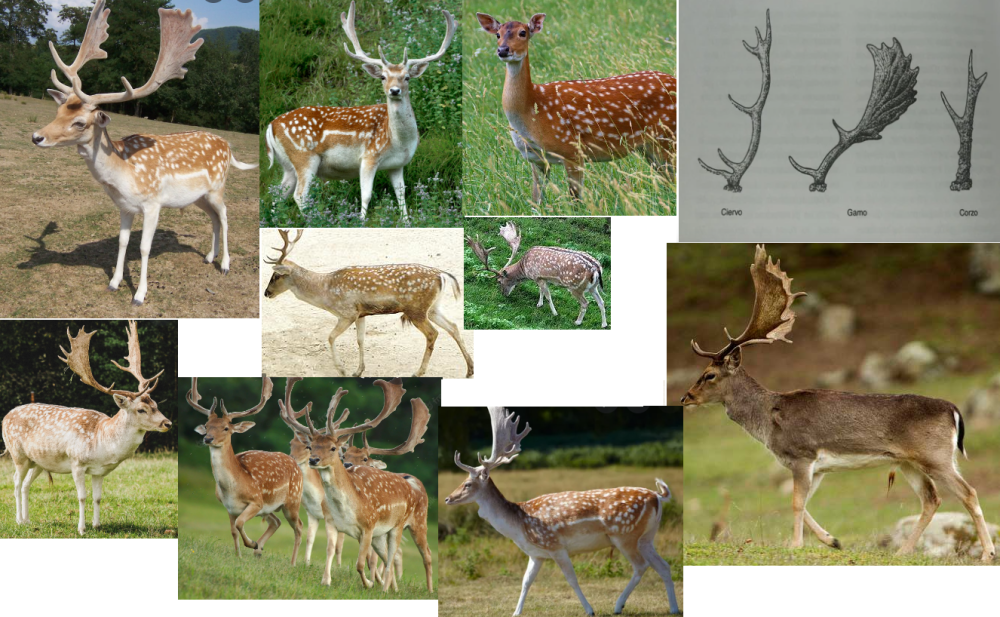
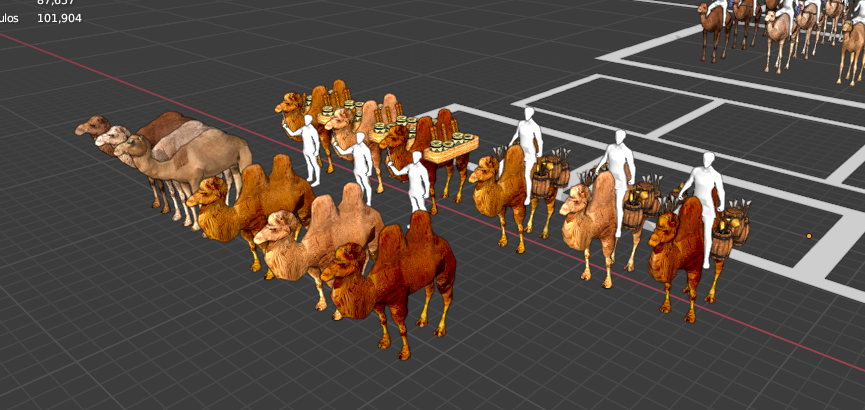
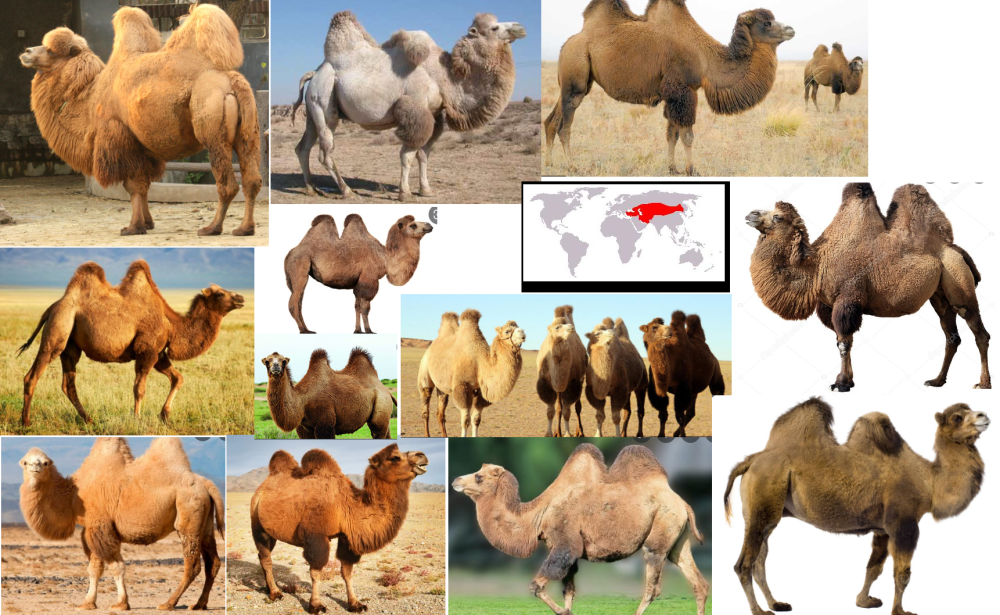
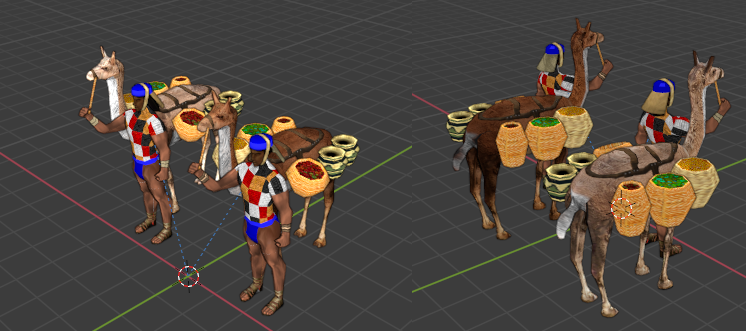
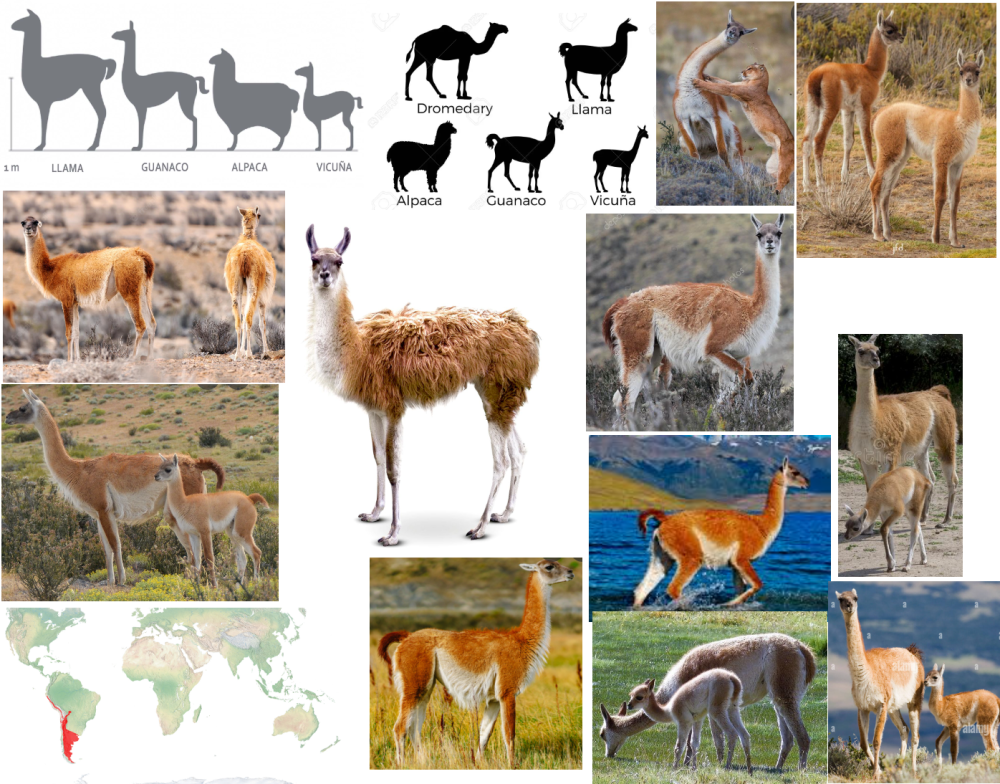
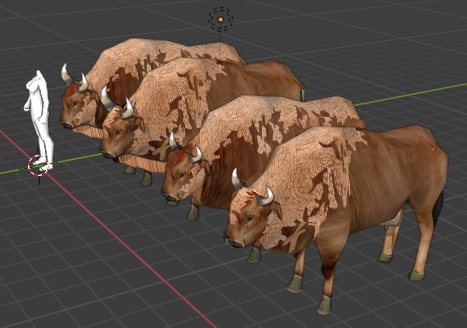
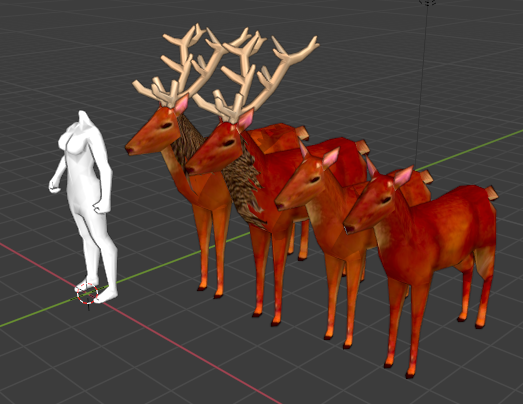
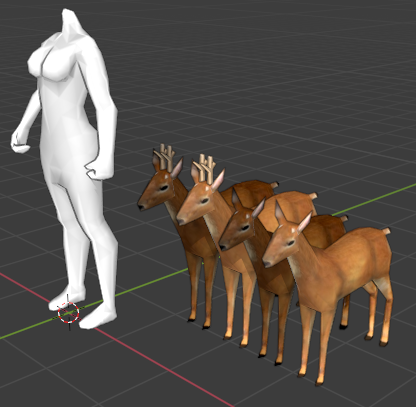
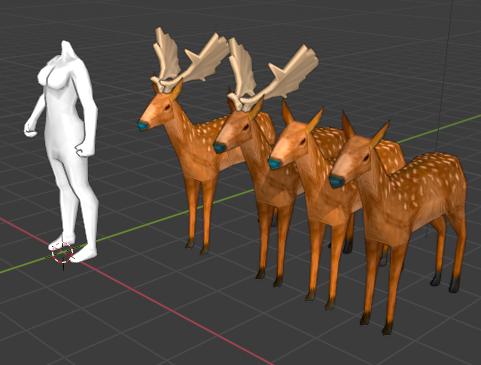
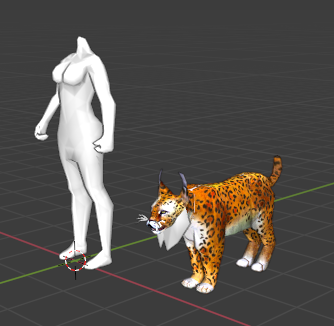
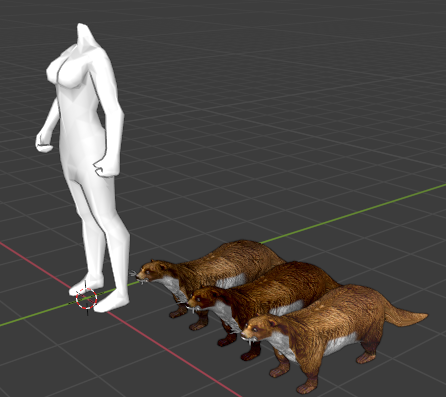
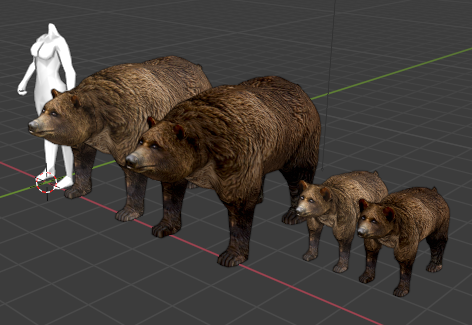
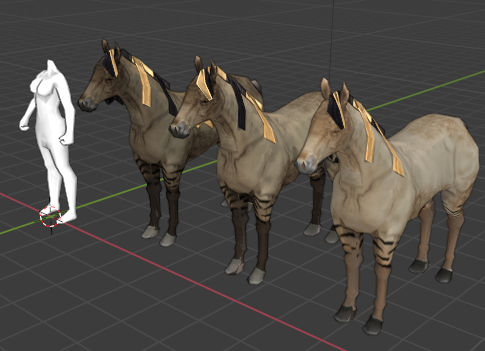
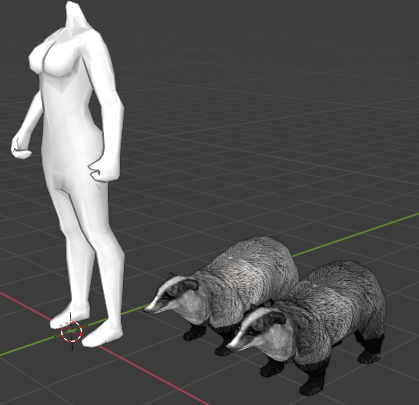
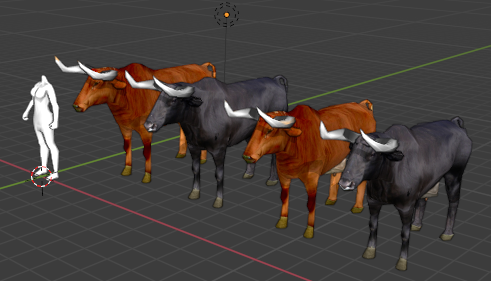
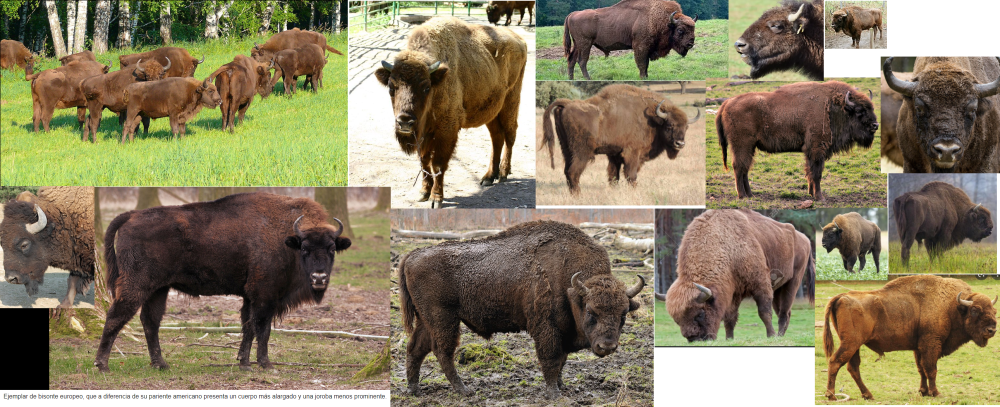
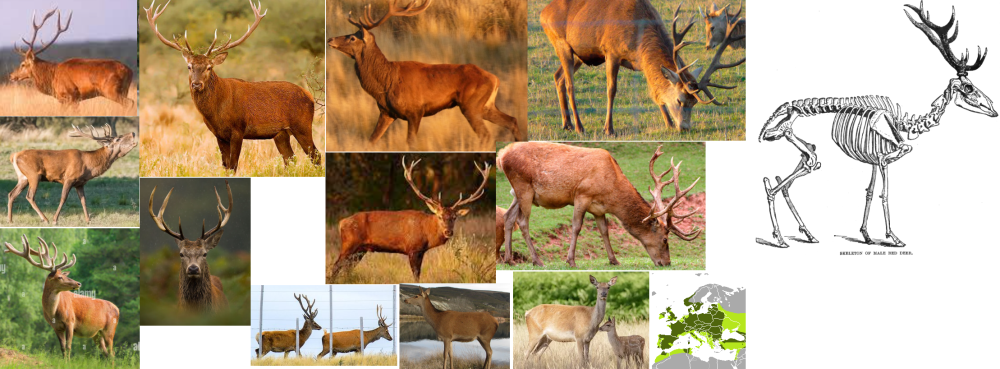
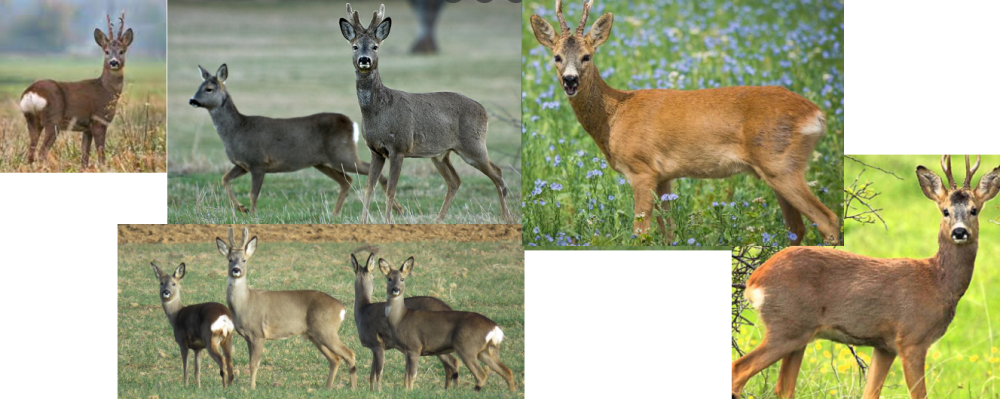
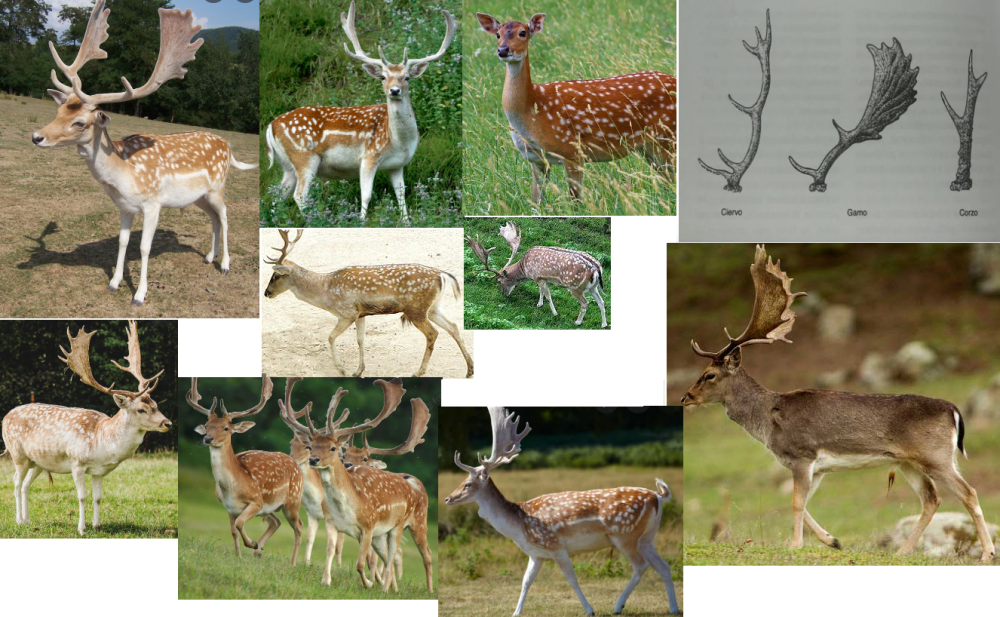
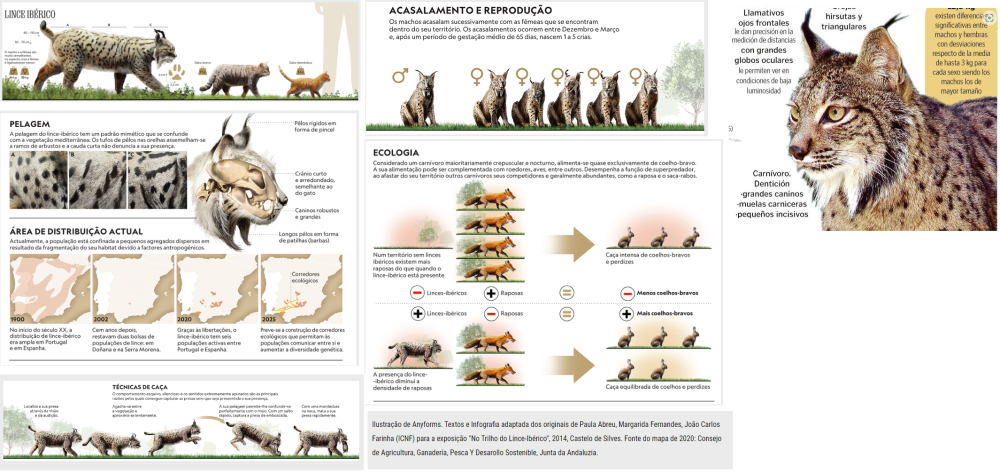
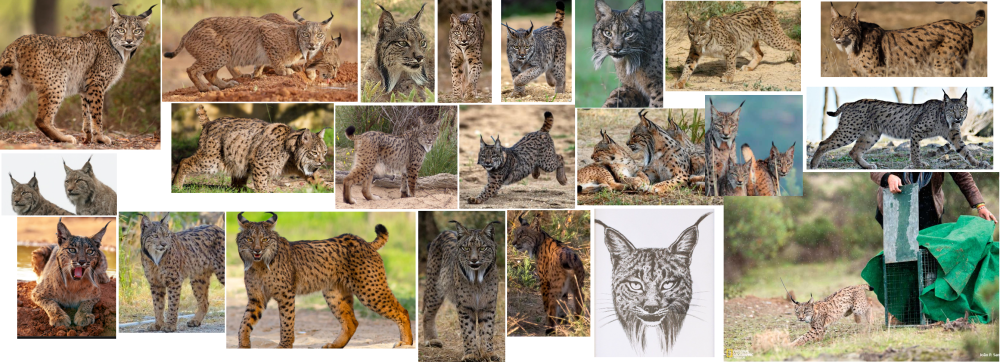
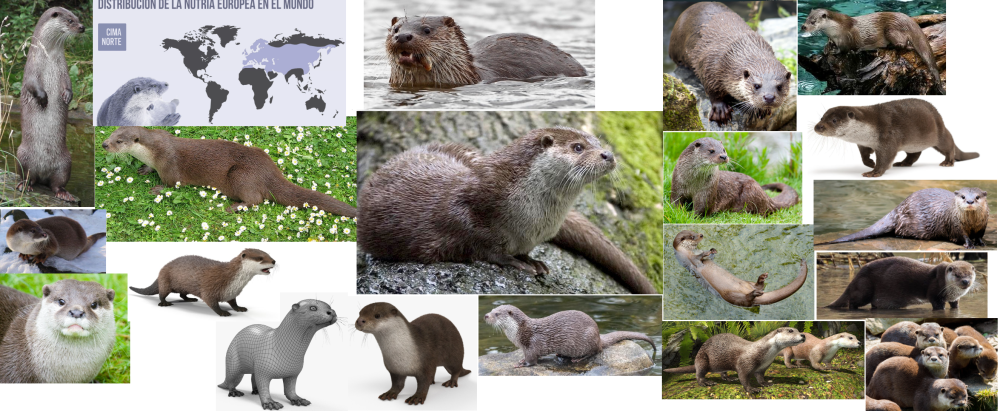
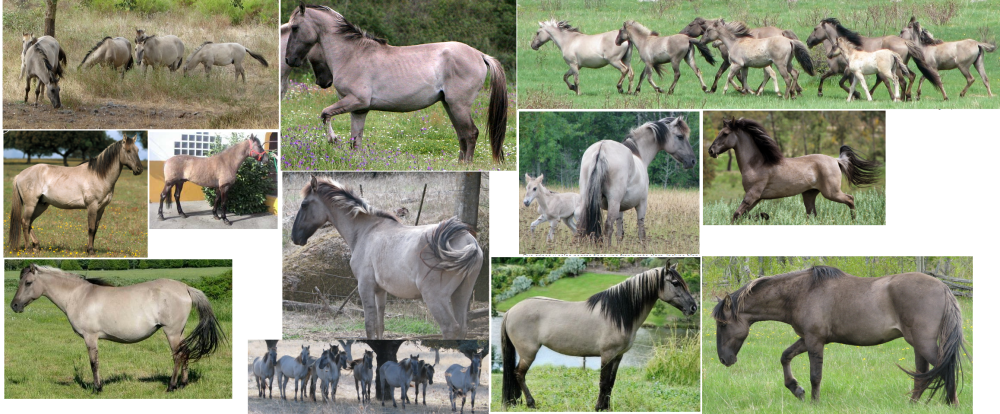
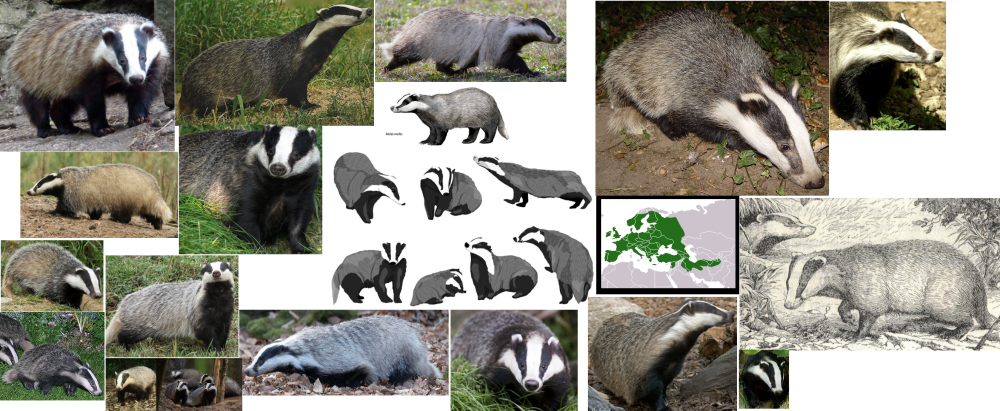
Buenos días o tardes; -No le entendí @LordStark, pero estos son los animales que , de momento , tengo casi acabados (algún desajuste con las texturas solo); 1-Camello bactriano; (Junto al Dromedario arábigo) referencias; 2-"Guanaco" ( junto a comerciante Mochica) referencias ; -3 Bisontes europeos; (los machos tienen barba y las hembras ubres) (En peligro extremo de extinción) referencia; 4-Ciervo rojo (ciervo común europeo); (los machos tienen cornamenta) referencia; 5-Corzo; (los machos tienen cornamenta) referencia; 6-Gamo; (los machos tienen cornamenta) referencia; 7-lince "ibérico"; (no conseguí crear una textura para el lince ) (En peligro extremo de extinción) referencia; 8-Nutrias europeas; referencia; 9-oso y oseznos 10-"Sorraia";(caballo salvaje lusitano); referencia; (Tiene el cabello de la Crin y la cola Bicroma o de dos colores o color "Bayo") (tamaño más pequeño que otros caballos europeos) (orejas grandes) (ligeras marcas de Cebra en las patas) 11-tejones europeos referencia; 12-uros; (toro salvaje euroasiático) (Extinguido) referencia; -Primero terminaré la fauna lusitana y después me pondré con la fauna Mesoamericana , concretamente la de el "Mundo Maya". Para la fauna lusitana aún me quedan crear Liebres , Zebros , Ánades y poco más .Añadido a los ya existentes Lobos , conejos , zorros , cabras y jabalíes (que no necesitan remodelarse) , tendríamos toda la fauna característica de Lusitania y parte del resto de la Península Ibérica e incluso , del Magreb. Casi 20 animales diferentes . -Los mapas del último alfa se ven muy bien , pero en muchos mapas hay poca diversidad de fauna y por eso intento aportar algunos modelos. -¿Qué opinan? @Lopess @Stan`@Lion.Kanzen @Ultimate Aurelian @wowgetoffyourcellphone @soloooy0 @Genava55 Disculpen las molestias*5 points
-
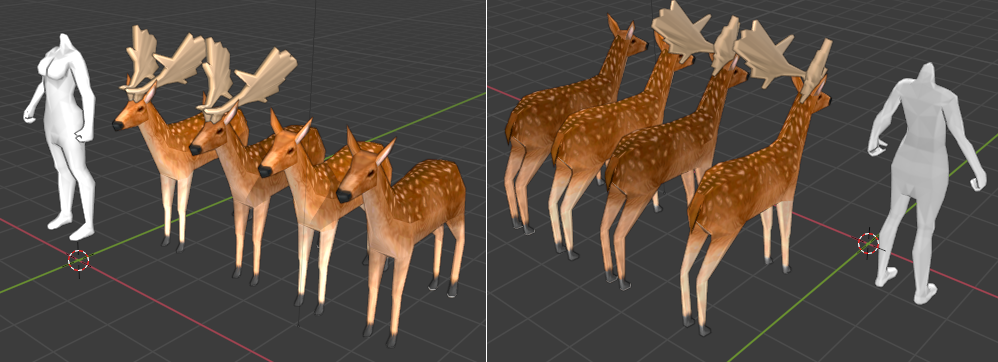
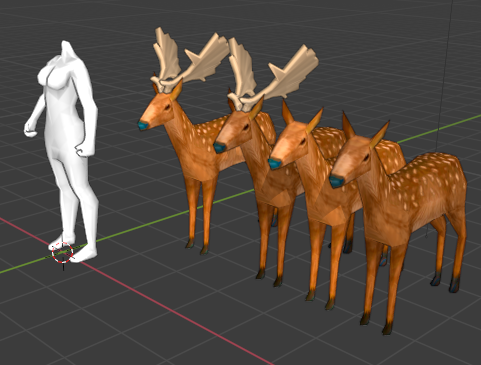
-Acabo de ajustar la textura del Gamo (ciervo moteado); Comparación; 1.Antes; 2.Ahora; referencia; Alargué el rostro. Puse más claras las patas y el vientre. Coloreé las orejas . Recoloqué los cuernos. Catálogo de fauna lusitana; Bisonte europeo. Uro (antiguo toro salvaje). Oso y oseznos. Sorraia (caballo salvaje lusitano). Ciervo rojo . Gamo. Corzo. Lince ibérico. Tejón . Nutria. Disculpen las molestias*2 points
-
Because it's not that obvious? No need to unzip, unless there is a parent folder inside that zip.2 points
-
Long Walls "Allow the Athenians to build their Stone Walls in neutral territory." This is spicier^2 points
-
1 point
-
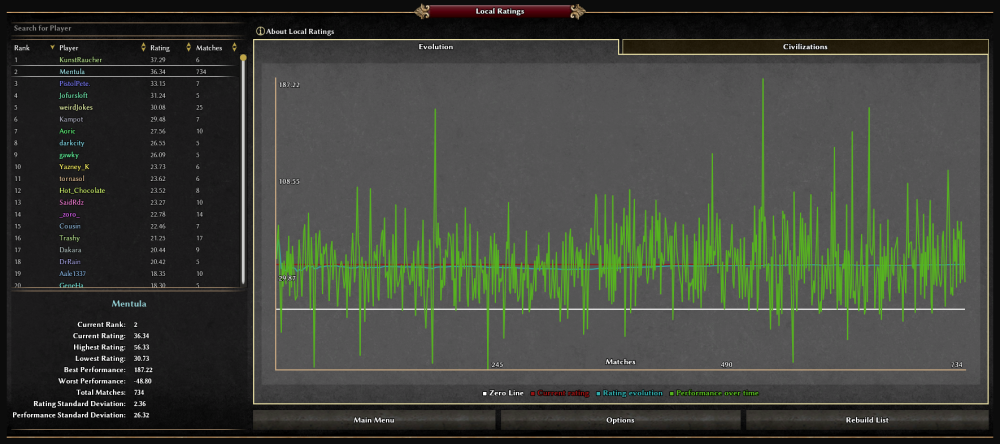
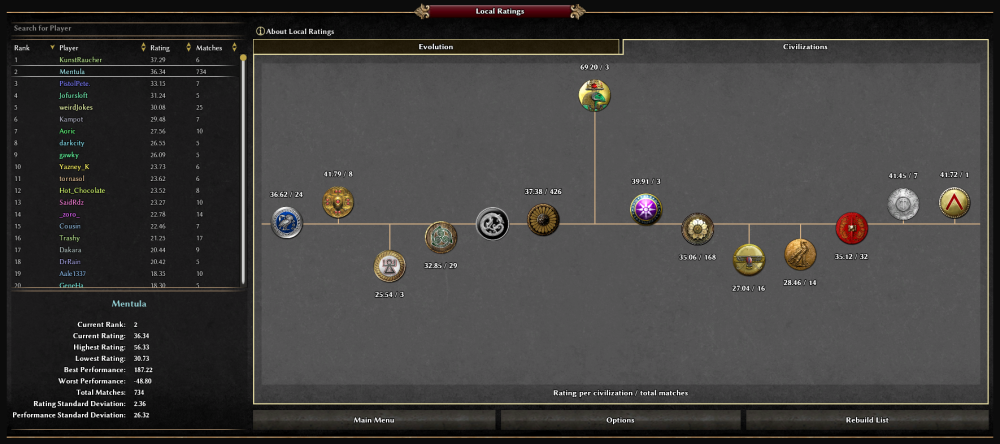
Hello everyone! I hereby present a 0 A.D. mod aimed at evaluating the rating of players. Official mod page on GitLab here. Introduction Before diving into the description, let me introduce the problem this mod aims to solve. In 0 A.D., the ELO system is used to rank players in the lobby. This is good; but is it representative of the players' skills? As you know, the rating system in 0 A.D. only takes into account 1v1 rated games. Team games do not contribute to the ELO score of a player, as well as 1v1 unrated games. Also, the scoring system only takes into account the outcome of a game (victory/defeat) and not the "performance" during the game. Can we do better? This mod uses statistics. It extracts data from all the replays of games you (the mod user) have played. So, if you have played 20 games (1v1s, team games, other..) with a player in the lobby whose name is (for example) strangeJokes, the mod will assign a rating to strangeJokes based on the 20 games you've played with them. The rating system The functioning of the rating system is described in detail here, but in short what it does is: it considers the average performance of the player during the entire game (and not only at game's end). the rating assigned to a player is a percentage: for example, a player with a rating of 5.00 performs a 5% better than other players on average, while a player with a rating of -5.00 performs a 5% worse than other players on average. you can customize the rating system by giving more importance to military, economy, exploration or other factors to the aim of calculating ratings. Keep in mind that this mod is based on statistics; data are taken from your (the mod user) replays. Statistics might not be fully representative of reality; therefore, a player's rating could be inaccurate, especially if you have played few games with that player. The more you play with a player, the more accurate the rating of that player is. Installation ‣Recommended: LocalRatings can be downloaded from the game menu: Settings > Mod Selection > Download Mods. ‣Alternatively: Click here to download the latest release. Install following the official 0 A.D. guide: How to install mods? Alternative downloads: Latest Release (.pyromod) | Latest Release (.zip) | Older Releases Latest version announcement Explanatory pictures Contribute The public repository is at this page. Everybody is very welcome to contribute, suggest, fork or simply give feedback. Have fun!1 point
-
No it makes it faster on disks because the data is in one place of memory so faster to access. Just like it's slower to copy 1000 files than an archive of the same size.1 point
-
They delete all the existing files in the loaded mods, other than the one you are using. You can use them to disable files or folders. For instance lots of mods use them to replace backgrounds.1 point
-
Current wolves are fine but in my game the Lord can have a loyal wolf and it would be cool to have an extra high quality one (as there would be only one in the game). The wolves look a little dog like in the hips when you zoom in.1 point
-
Wonder why everyone unzips folder while you can use file associations with pyromod and drag and drop either on the app or the actual window.1 point
-
1 point
-
They are all new animals, soon he will send the prints here. (I don't see problems in the current wolves).1 point
-
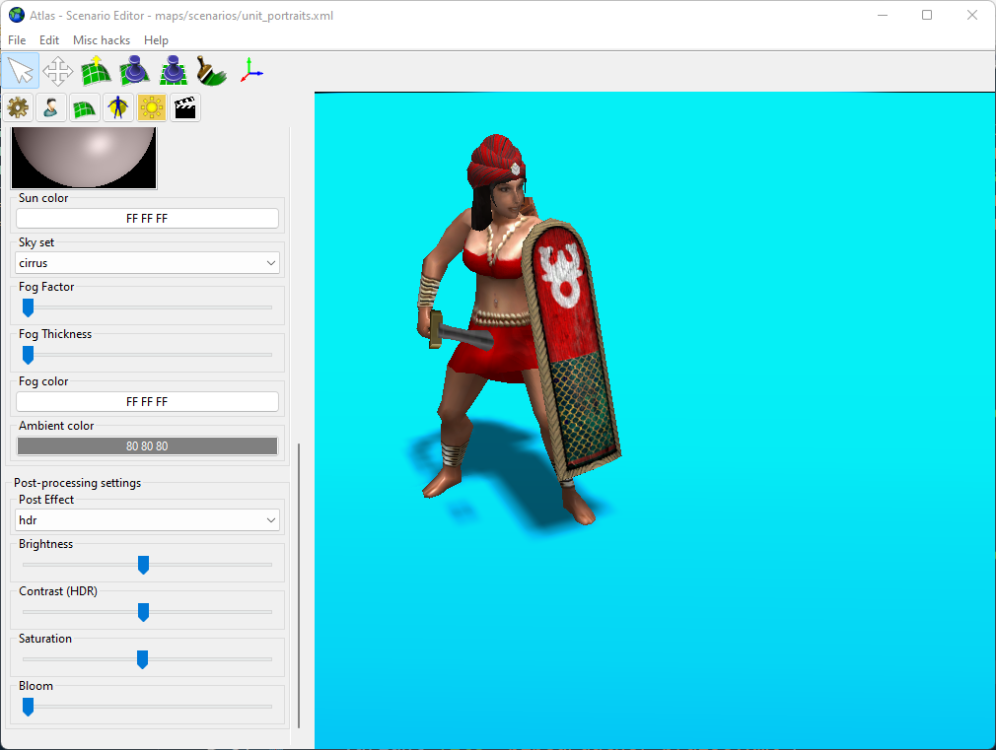
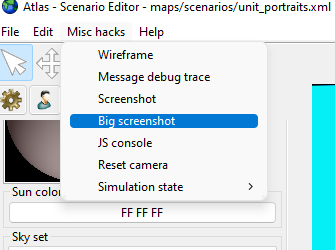
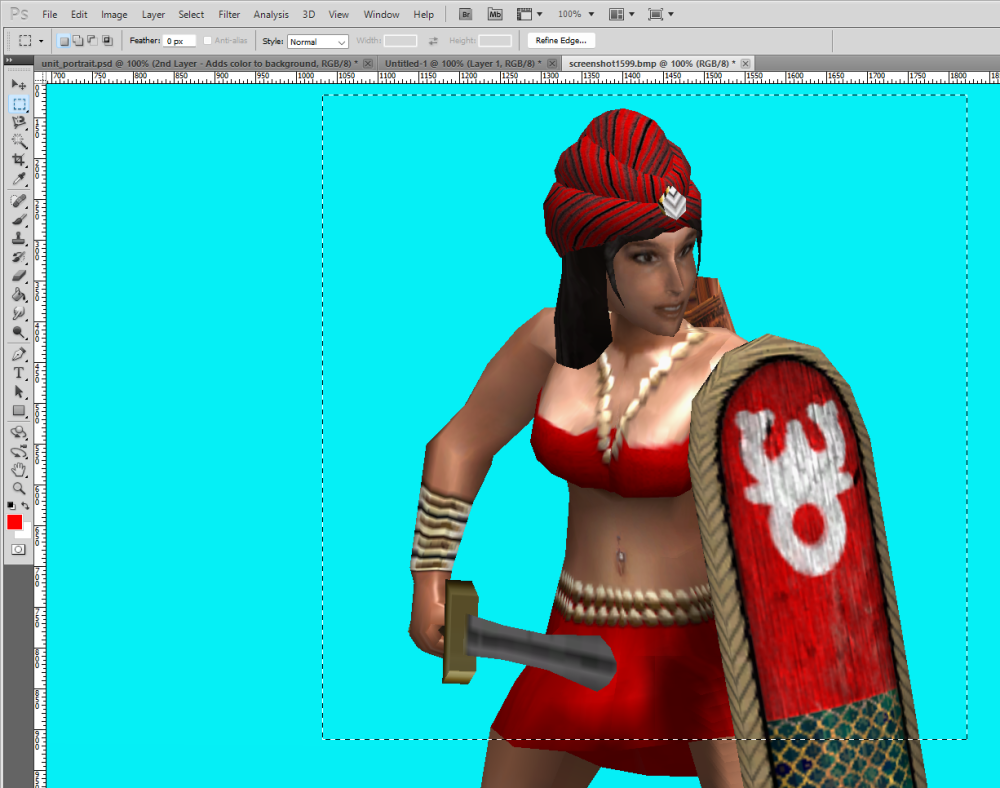
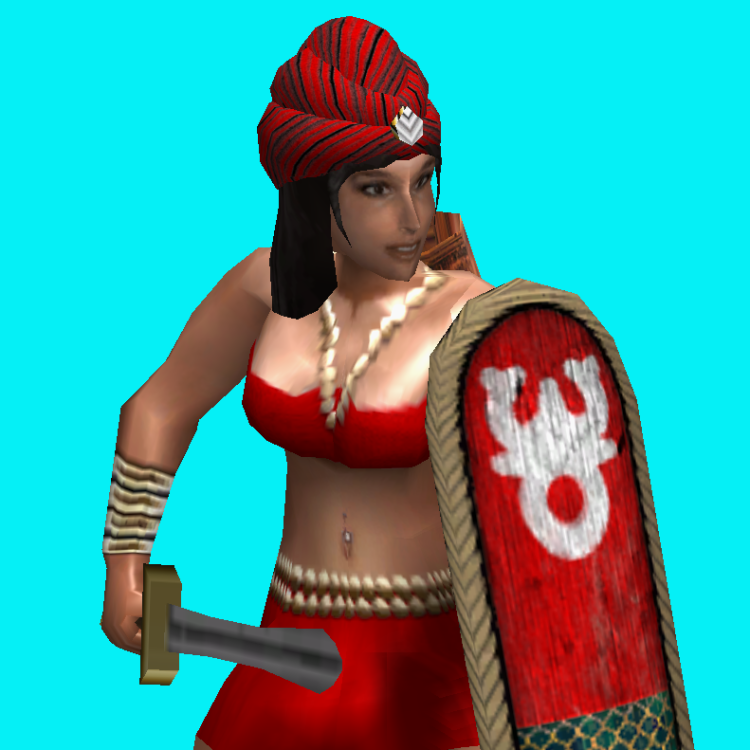
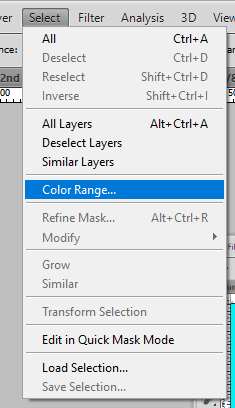
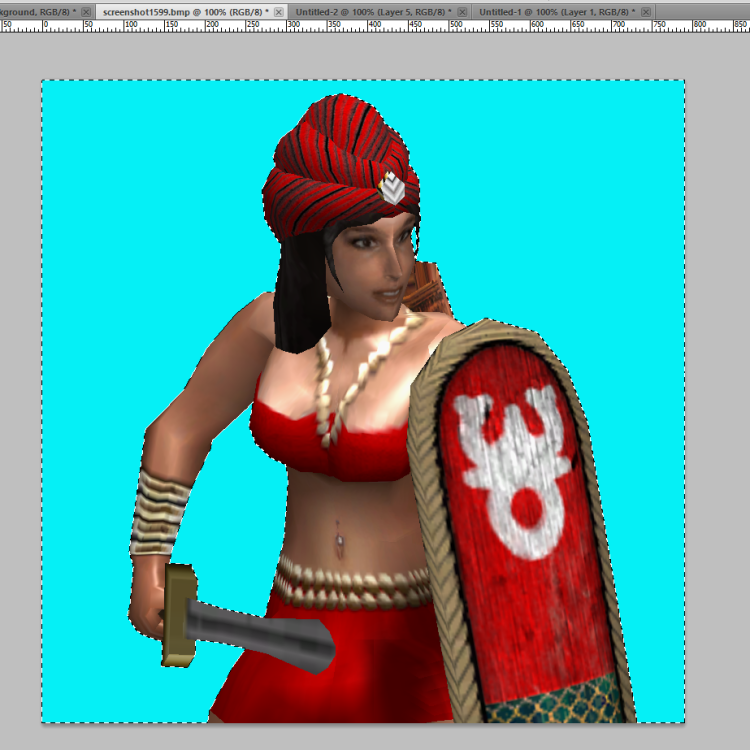
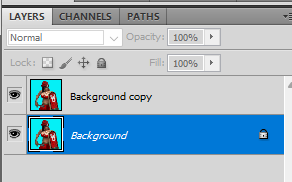
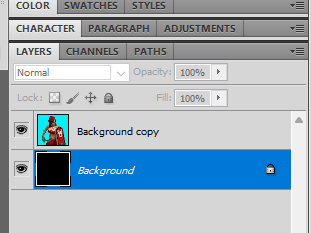
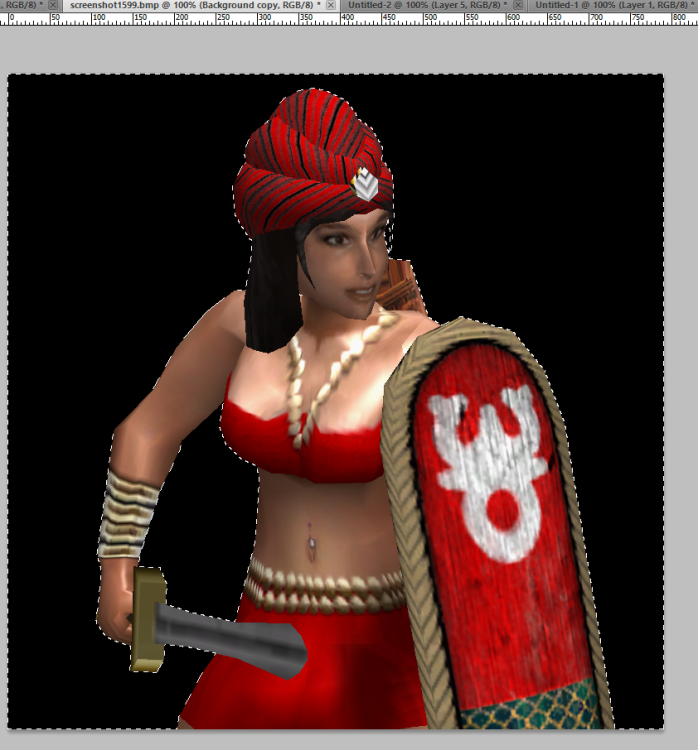
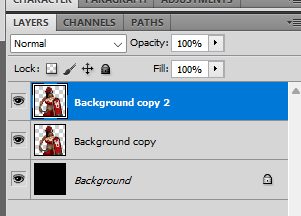
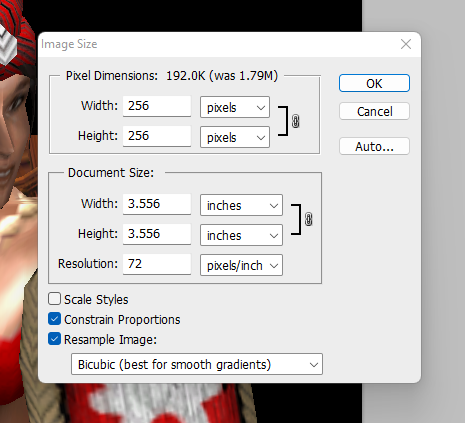
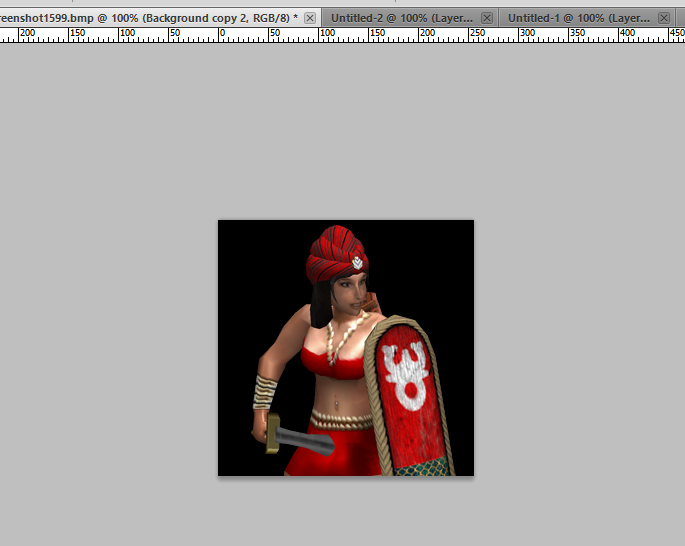
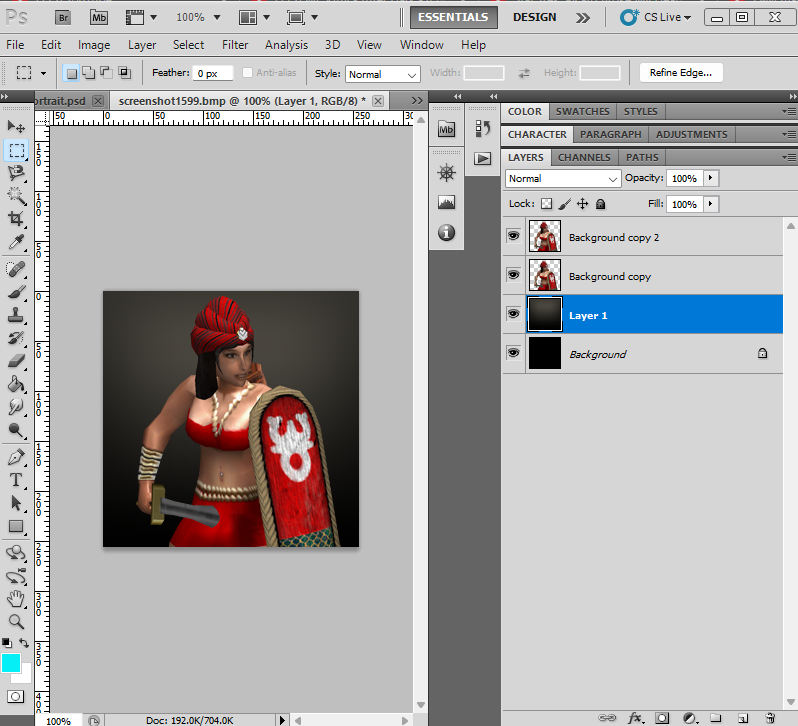
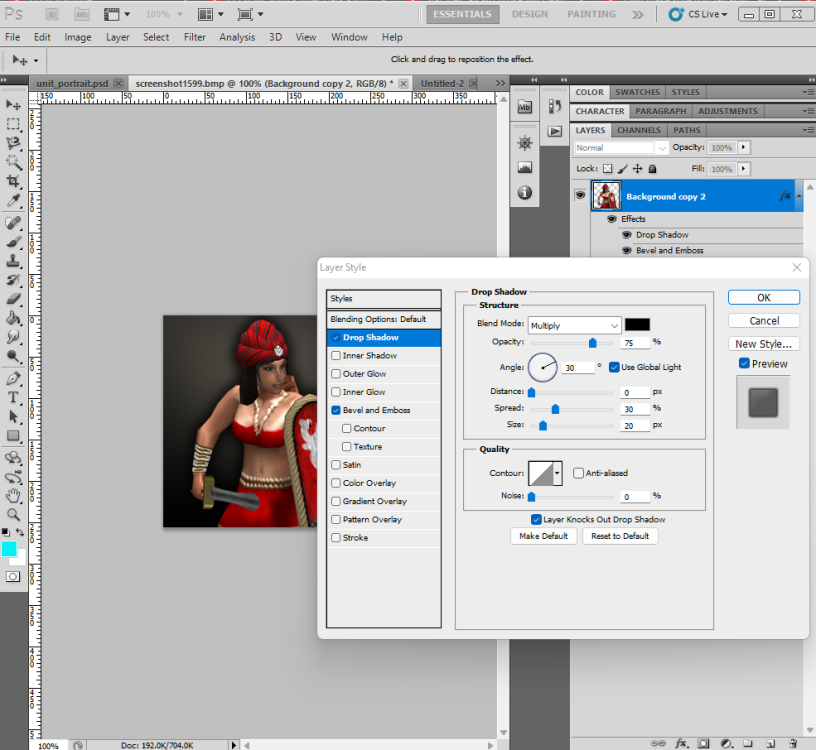
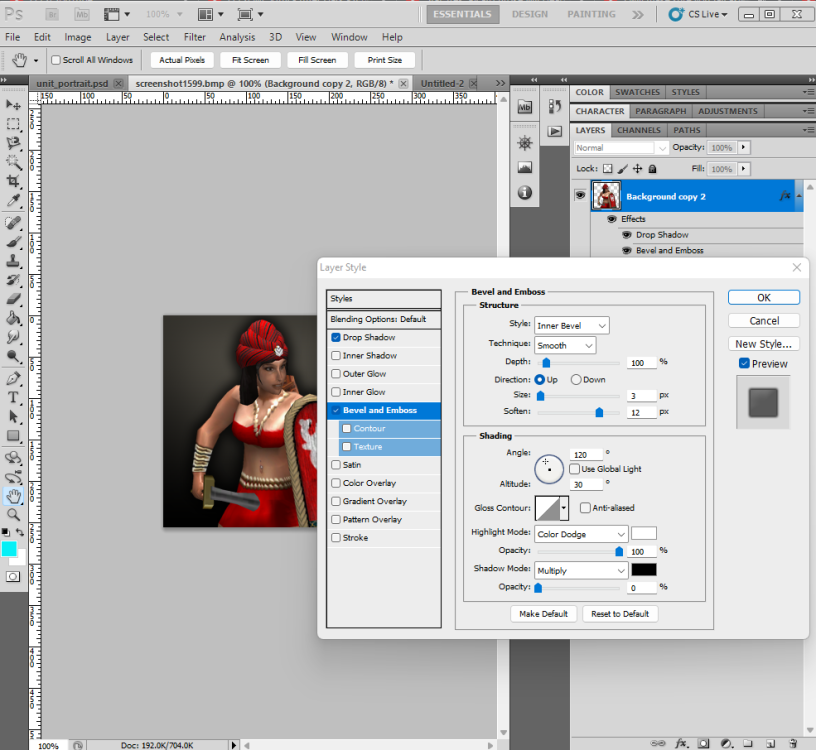
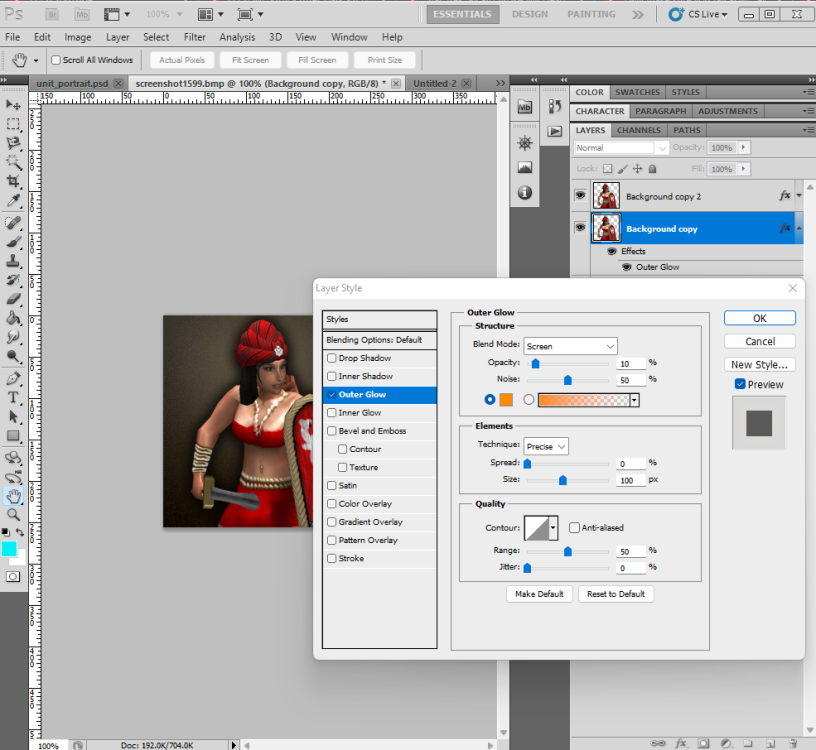
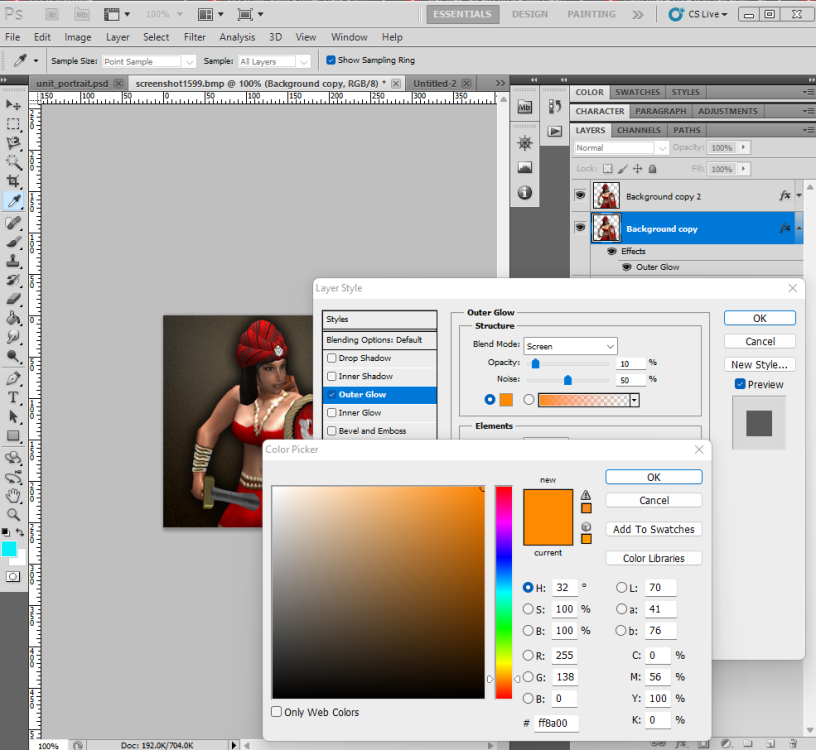
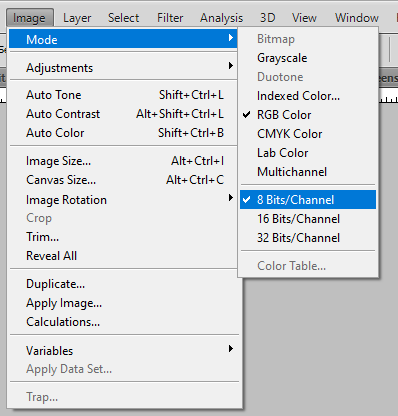
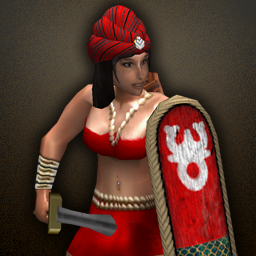
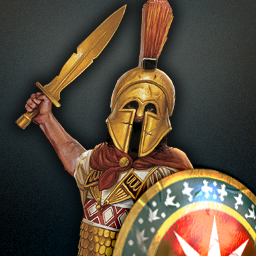
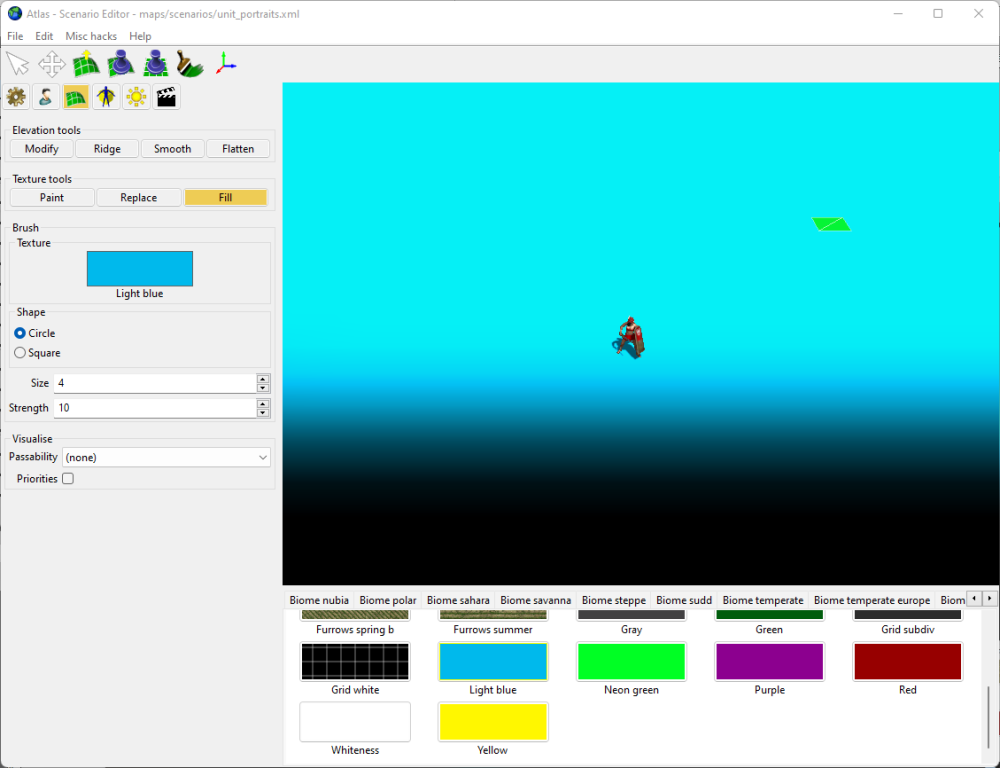
1. So, in Atlas I create a map and use one of the 'Special' terrains, such as purple, cyan, or green as the default terrain. These colors are easy to select and cut out in your image editing software (Photoshop, Gimp, Photopea, whatever) and just like when filming FX for movies, the right (contrasting) background color can ensure that you get a clean mask. Very important to turn off distance fog and bloom. I also turn off anti-aliasing, so that you get a nice crisp edge when selecting the background from the unit (or vice versa). 2. Zoom in on the unit, but not so close as to start getting foreshortening effects. You want the unit to appear relatively flattish. 3. Once I've setup the scene and get the camera and lighting I want, I use the Big Screenshot option to make a nice big detailed screenshot. The Big Screenshot option gives you a nice big 4K screenshot with which to cut out your unit. Import that screenshot into your image editing software and you are ready to start making your portrait. Make sure to set the image mode to RGB 8 bits per channel. 4. With the Rectangular Marquee tool, select a good position for the unit. Make sure that the marquee is SQUARE SHAPED. In Photoshop, the SHIFT hotkey makes the marquee perfectly square. 5. Now crop the image. 6. Then duplicate the background or first layer so that there are 2 of them. And make the bottom one all black. 7. With the top layer selected (the layer with the unit) use either the Magic Wand tool, or the Select -> Color Range tool (Magic Wand may use more clicks, but either works). We are going to select all of the CYAN (light blue) sections of the image. So, since I have a nice even-colored background that contrasts nicely with the foreground unit, and since I turned my Anti-Aliasing off, there is a nice crisp edge that will help me select only the background with either of the afore-mentioned selection tools. Once the cyan sections are selected, DELETE them. Since you made that black background layer, you will be able to see what cyan parts you missed. Now you have a nicely cut out unit layer. Now duplicate this layer. 8. And now we will resize the image to 256 x 256, the resolution of the unit portraits in-game. (can you see how sizing down the image as "anti-aliased" the edges for you?) 9. Now, add this image as another layer, just below the 2 unit layers: Almost there. To add the finishing touches we are going to add layer effects or "Layer Styles" (in Photoshop) to each of the unit layers. 10. Top layer always gets a Drop Shadow. With an OPTIONAL Bevel and Emboss. The Bevel and Emboss is only added to help dark areas, such a black hair or black horses, stand out from the drop shadow. 11. Almost there. Next is how we achieve the nice brown, noisy background color. Select the 2nd unit layer down. Add an "Outer Glow." Outer glow values are as follows -- Land Units RGB Color: 255, 138, 0 Opacity: 10% Noise: 50% Size: 100 px Naval/Water Units: RGB Color: 0, 255, 255 Opacity: 20% Noise: 20% Size: 200 px Technologies: RGB Color: 0, 168, 255 Opacity: 10% Noise: 50% Size: 100 px 12. From here, the last step is to go ahead and save your new portrait in the correct mod folder for portraits. Make sure to save it in the PNG format, non-interlaced. The cool thing is, once you've done one portrait to your liking you can save that project file for future reference. In Photoshop you can just copy all of the layer styles over to any new portrait you're working on. Attached is the file for the image I just created: unit_portrait_01.psd1 point
-
0 points


.thumb.png.f3f47d08fd1bf1063ea4b371390681b4.png)

.thumb.png.10fed2874a4e6ab62c84dc2fdb416b26.png)
