Enrique
WFG Retired-
Posts
2.338 -
Joined
-
Last visited
-
Days Won
96
Everything posted by Enrique
-
Thanks. Fixed.
-
I don't understand the helmet_obj.obj files. Oh you mean in SVN. Helmets are already updated. They'll be there until they're commited, same with the elephant howdah. It doesn't matter the name that's there as long as people know which tasks are being worked on. already
-
Animation in 3dsmax to be imported in 0.A.D
Enrique replied to Stan`'s topic in Game Development & Technical Discussion
Could you post those please? -
===[COMMITTED]=== Ptolemaic Elephant Tower
Enrique replied to Sighvatr's topic in Completed Art Tasks
Leather version found at the bottom of the first page: http://www.wildfiregames.com/forum/index.php?showtopic=17757&p=279861 I think they're game-ready unless there is any objection? -
Fix for our skeletons in the upcoming Blender?
Enrique replied to wraitii's topic in Art Development
Ehmm I may be missing something, but I'm talking about .3DS files (or .MAX files, can't remember) containing the scenes of the rigs that were exported and converted to PMD, so the job would be opening tose files in MAX, and then exporting to .DAE to read in blender. -
Fix for our skeletons in the upcoming Blender?
Enrique replied to wraitii's topic in Art Development
I was going to post here a zip with some max files that are in the art SVN, but IDK why it doesn't let me enter in trac from work... =/ However I think you should try to export the armatures to .dae with the latest MAX and collada exporter you could find. -
===[COMMITTED]=== Ptolemaic/Seleucid Helmet Props
Enrique replied to Sighvatr's topic in Completed Art Tasks
They look good enough, I may make some changes if you don't mind. Zip'em up! -
===[COMMITTED]=== Ptolemaic Elephant Tower
Enrique replied to Sighvatr's topic in Completed Art Tasks
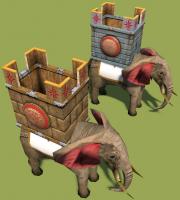
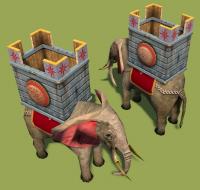
Made it a little bigger to fit 2 units. Textured following the first page reference, may have another variation in wood. -
===[COMMITTED]=== Ptolemaic/Seleucid Helmet Props
Enrique replied to Sighvatr's topic in Completed Art Tasks
Really hard to tell from that shot... Also seeing the wireframe would help a lot -
===[COMMITTED]=== Ptolemaic/Seleucid Helmet Props
Enrique replied to Sighvatr's topic in Completed Art Tasks
I think there's no need to start them from scratch, Sighvatr will post them soon. There are still some helmets to model though, you could try with these: http://trac.wildfiregames.com/ticket/2286 http://trac.wildfiregames.com/ticket/2290 http://trac.wildfiregames.com/ticket/2289 http://trac.wildfiregames.com/ticket/2287 http://trac.wildfiregames.com/ticket/2288 -
===[COMMITTED]=== Ptolemaic/Seleucid Helmet Props
Enrique replied to Sighvatr's topic in Completed Art Tasks
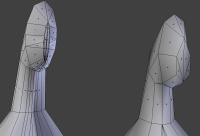
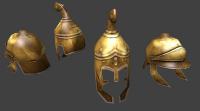
Both helmets textured. Texture and form variations soon. I removed quite a lot of unnecessary tris on the Thracian one. We should avoid as much unneeded tris as possible, specially on unit props that may be a lot of them on-screen at once: @Sighvatr: please zip your helmets and post them here, let's get them in game -
===[COMMITTED]=== Ptolemaic/Seleucid Helmet Props
Enrique replied to Sighvatr's topic in Completed Art Tasks
Only lowpoly. And yes, I'll finish whatever is left to do. -
===[COMMITTED]=== Ptolemaic/Seleucid Helmet Props
Enrique replied to Sighvatr's topic in Completed Art Tasks
Guys, let's post all the helmets files here, I'll take care of the texturing, let's get all of them in before A16 -
no problem. I do it because it's much smaller url than a google search. We're lucky about ancient cranes, there are several references compared with other ancient topics...
-
http://lmgtfy.com/?q=ancient+crane
-
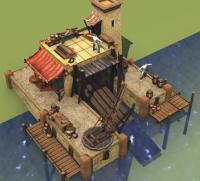
Alrighty then, I'll add the standard variation to the stalls. Since they don't have even topology, it may look a little warped, but I'll try my best. Here's a docks draft:
-
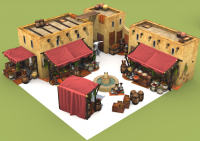
I'd prefer changing the cloth in other buildings (since there's not overused except in the blacksmith) to these new ones, which IMO look much better.
-
===[COMMITTED]=== Iberian Tower Crenelation + Foundations
Enrique replied to Stan`'s topic in Completed Art Tasks
Done. -
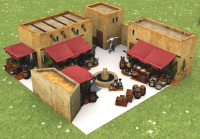
It's a custom material that an old contributor added. It needs two UV coordinates: the first is the texture (which scrolls in the Y direction) and the second one determines the blending opacity (full transparency to the left, zero transparency to the right). The Aura visualization test I made was also with the same technique. I tried with the pathway like in the previous screenshot but it looked too busy and the standard "dirt" made all the composition too yellow, so I opted for the gravel. Easy to change though
-
===[COMMITTED]=== Iberian Tower Crenelation + Foundations
Enrique replied to Stan`'s topic in Completed Art Tasks
I'll add it soon, don't worry. -
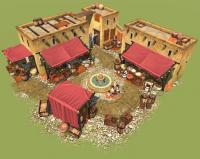
Yes, It was done with cloth simulation, then I sculpted some cute wrinkles by hand and made stronger the ones created with the cloth, then simplified the mesh to be lowpoly, then baked the normals from the hi-res to the lowpoly and finally the textures. I made a bunch of texture variations, you can see them in the stalls that are already in atlas, this red cloth is just for visualization. I tried with a custom decal, if it's too intrusive I'll simply go with the standard sand-dirt with the carpets baked so they do not clip in uneven terrain. EDIT: changed the screenshot
-
Demonstration, there's a special material for water in the game, but it has no reflections. There are buckets with water in almost evert blacksmith and a lot of it around the Gardens. However, I'm not sure how accurate that fountain is... it seems they had fountains, but there aren't much references except a lion head.
-
-
-
Hi, I'm going to share my workflow for texture creation within blender. I developed this technique while working in WFG and the need to make custom textures by myself in a reasonable timeframe. (This is a How-to post not a tutorial ) This may be helpful if you're a better modeler than a texture painter like me. The process is like this: I made a .blend file which is basically a camera in orthographic view mode (without perspective) that is pointing down, a plane which is exactly the same size as the camera and a sun lamp to get some shadows in the texture. With this setup, when you make a render, the square plane will fill all the render image. Once you have modeled whatever you want to be the texture, you can use the plane that fills the whole camera view to bake normals, ambient occlusion, displacements... whatever. You need to have some basic knowledge in blender to know how to apply textures, modifiers, etc.. so you create the scene textured, and you render to get the texture that will be used (preferably for 0AD lol) In this video I show the final scene of how I made a test texture for an elephant howdah. The bricks are just cubes that have two subsurf modifiers (that makes them smooth), displacement modifiers (that makes them bumpy) a desaturated leather texture that makes them grey and a rusty metal texture that makes them dirty. The wood is a single plane with a wood texture, and little details are modeled with a metal material. After rendering the scene and check the texture, I use the plane to bake the normals selecting all the geometry I want to bake, select the plane last, create a new image to bake the normals, and baking them with "selection to active" checked. Since the plane has the same ratio as the camera, the normal texture matches the rendered texture. Here's some links to pages with licenses compatible with 0 A.D: http://www.texturemate.com http://agf81.deviantart.com/gallery/ http://opengameart.org/users/yughues I also used this technique for creating textures for units. The trick for units is using a background image with an existing unit texture, and modelling only the "new parts" placing them following the background image as reference. Then make the render with transparent background, and use GIMP or photoshop to add the resulting rendered texture in top of the base texture. Here's an example of the blendfile I used to create Ashoka's texture. I used Cycles renderer instead of blender internal because it works better for metallic reflections (but is harder to make a good light setup). Here's the blendfile ready to model the contents of the texture and render it. Blender texture creator.zip

