-
Who's Online 7 Members, 2 Anonymous, 926 Guests (See full list)
-
Topics
-
-
Posts
-
 My last batch of suggestions to be ignored, just because I had them written down already. From simple to controversial, the last ones mostly intended for some crazy mod and blah blah: 61) Redundant Options could be avoided. I pointed out some before, but there are also repeated items between Settings > Options > Graphics (general) and (advanced), for example. 62) Sourced Quotes (like the ones I tend to use in my historical posts) at the bottom of Information panels would be useful not only to suggest bibliography to people and show the work done, but to stabilise it, since anyone coming up with alternative proposals should properly justify them in the same manner. 63) AI Difficulty and Behaviour could be shown straight away in Match Set-up, and not be treated so differently than the other selectables (could have been useful for me a few times). 64) Icon schemes seem random, like regarding portrait background colours, maybe it would be nice if techs, buildings, units, champions, heroes, etc, have each a given corresponding background colour. Marginally related, it would be nice to represent if a building, tech, or whatever, appears later or earlier for a civilisation in comparison with the norm, maybe colouring its border (green earlier, red later, whatever). And something to indicate which building trains Heroes (and maybe Champions). 65) Tips and tricks tree thematically organised could be useful for those looking for something in particular. 66) Observer hotkeys could be useful to have when choosing a player to view. 67) Unit scan with TAB (seems unused, otherwise another key) to cycle among units, ordered from last produced (maybe also for structures with some modifier). Combined with the previous point, this could help in cases like someone posted not long ago, who missed an enemy unit still alive in the replay. 68) Self-Destroy queue by making each Self-Destroy order take a bit of time (depending on target HP) and work in two queues, one for buildings and another for units. This would improve immersion and SP experience since the AI abuses destroying everything instantly (apparently doesn't happen much in MP). This wouldn't really change present gameplay, unless a lot is deleted at once. 69) A Resource trickle counter could be added somewhere, for example in parenthesis besides the number indicating how many gatherers a given resource has. 70) Notification positioning could be improved and victory conditions could be displayed. My attempt, based on @manowar's work: https://wildfiregames.com/forum/topic/169086-top-panel-ui-opinion/page/2/#comment-761666. 71) Lock buttons with CTRL modifier could be useful to automate things like weapon switching (depending on predetermined situations like enemy distance), auto-queue specific units (currently panel button does it for all units in a building) or keep researching techs appearing in that slot. Of course this is meant to eventually reduce micro in these areas to focus that on eventually more interesting tasks. 72) Solid walls should prevent attacks and not just movement, particularly melee ones. 73) Gendered Healers for certain civs, just like with Workers now, since it was an important role women could have. 74) Champion ships and engines seem appropriate for some civs. While all of these should have garrison slots, champion versions would have none, their default operators being always maxed up. 75) Champion/Rank rename since the "champion" term is not appropriate for the time period, "elite", and the XP ranks "recruit", "seasoned" and "veteran" are terms that do appear in the relevant literature. 76) Special units with a limit for each civ, preferably non-combatants, seems a nice idea for civ differentiation (their role should vary). The Han have Ministers, and I've proposed Ephors for Spartans, Philosophers for Athenians, and Musicians for the coming Thebans. Always something characteristic for each civ. 77) Spies and engineers have been discussed. Spies would be visible only by the owner in most situations, could be revealed by Lookouts, maybe Towers, or after performing some action. These actions could be bribing, revealing hidden information, assassination, Hero detection, infiltration (climbing walls and palisades) and opening gates, among others things. All these could be made easier or unlocked with experience. Engineers have been floated around many times. The Arsenal, which should be called (Siege) Workshop should produce them instead of the largest slowest engines. Then Engineers would be able to lay their "foundations" anywhere (any worker would be able to build it up from there), same with some very advanced buildings, particularly Wonders. Engineers' build rate (if that's a thing) should be high. These two units seem relatively important and general to be among the special units mentioned in the previous point. 78) Market mechanics could be more interesting. I proposed the basis of a scheme in https://wildfiregames.com/forum/topic/137856-multiple-markets-for-trade-routes/page/2/#comment-763248. Bartering mechanics could be different since doing it instantaneously for any amount like it's Wall Street in the digital age cheapens resource differentiation. If I remember correctly, the first Empire Earth only has that for the United States in the Atomic Age, and StarCraft doesn't have such things. Bartering ends being more efficient than actual trade, the opposite of reality. Along (or as part) of Traders and Merchantmen gains, they could continuously barter any surplus: one could set minimum values for each resource (for example, 4000 Food, 3000 Wood, 2000 Stone, 1000 Metal), and the resource with more surplus would be traded for the one farther removed to meet their intended proportion (4:3:2:1 in this example). Setting 0 would remove that resource from the bartering. Relative "prices" would still automatically vary. This would be more interesting and realistic, while simple and automatic, than smashing a button at any time. 79) Resource subdivision could be interesting, to have small bonuses like Rise of Nations. For example, Gold and Iron (specific resources) would give Metal (main resource), Fish and Grain would give Food, etc, with the specific resources being actually gathered giving some small bonus (rewarding diversification but penalising overexploitation). This could even be combined with the proposed Market mechanics from the previous point, adding a bonus to Local Trade if a Market has certain specific resource in its Eco Zone (rewarding generalisation), and a bonus to Route Trade if the involved Markets have different specific resources in their Eco Zones (rewarding specialisation). 80) Religion and culture aspects could be added since their lack has been mentioned, so maybe units could have allegiance (similar to capture points), and priest/religion and bribe mechanics could play into this (along a morale system). Reputation could also be a thing, I've read about Philip V gaining enemies by attacking allies or directing "his rage to the temples and sanctuaries of the gods, bringing shame (...) on himself". This could influence plenty of things like AI behaviour, Diplomacy options available, or Market ones.
 -
 I bet the regret is mostly that you realized you cannot make the last point, and probably never will on any subjects, even something you know better about.
 -

By guerringuerrin · Posted
You didn't do anything wrong. Everyone shares your wishes, and your proposals are welcome. Just to be clear, nothing I said was directed at you. Sorry for bringing conflict into your thread. I get annoyed by the attitude of certain people who point fingers and look for someone to blame. That attitude contributes absolutely nothing. But I should have kept quiet. -
@Stan` seems like some other mods have mismatch : "name": "xiiiad", "label": "XXI Century AD" https://mod.io/g/0ad/m/xiii-century-ad But isn't the file creation something we control and could make more flexible in the engine? Or we just want to enforce the rule anyway for other reasons?
-
.thumb.jpeg.67ef5b5dc6d918163efa04cd5336830d.jpeg)
By Nicolaus_von_Kues · Posted
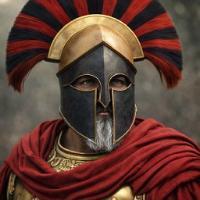
The problem is that the results aren't very different. I suppose AI lacks training. And perhaps the ability to distinguish between fantasy and historically accurate designs.
-