Search the Community
Showing results for tags 'Helmet'.
-
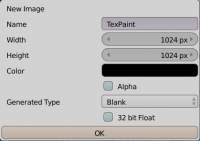
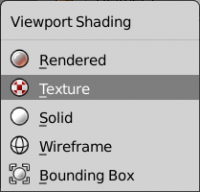
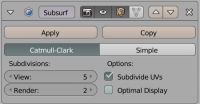
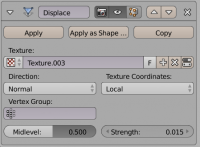
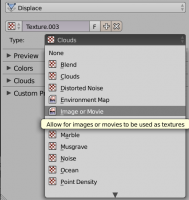
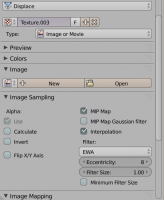
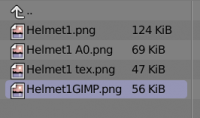
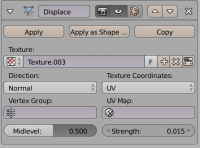
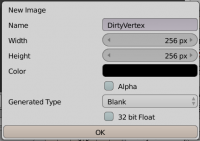
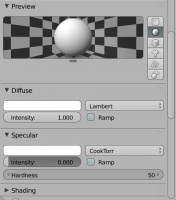
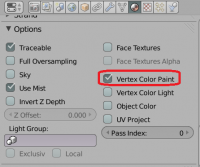
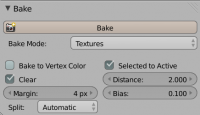
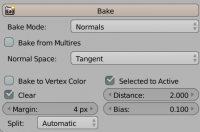
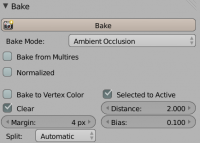
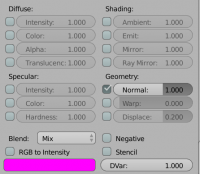
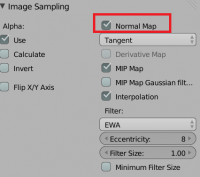
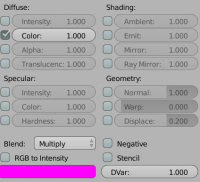
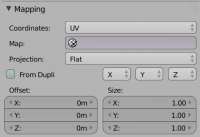
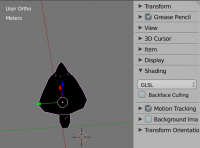
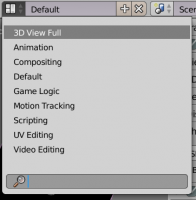
Disclaimer : This is not the only way to do them, there are faster ways. The tutorials I made is Enrique's workflow for generating textures with good detail level (there is always time to shrink the texture if desired). I tried to make this as much complete as possible, if you don't succeed at something, because you lack informations or because it isn't clear for you, ask me and I'll be glad to complete this tutorial. This was made for BLENDER users. TIP : To be a little more fast you can separate you window in two, to have the UV window, and the 3D view-port at the same time. First of all you need to make the helmets according to the reference they gave you. Then, create a scene in which you will import the reference models, to compare them with the size of the models. Scale them down to fit all the areas. Once it's fitted this is were the real part begins. First unwrap you model. Generally if you work with symmetry, tapping U, and selecting unwrap is enough. Make sure to use most of the space. You need to make a new texture to continue. Select you mesh, and enter "Edit Mode". Press the little cross on the bottom in the UV window, and enter the following parameters : NOTE : Remember your texture must always be power of two (e.g. : 128x128 256x256 512x512... ) You can also make something more rectangular (e.g. : 1024x256) But most of the time a square one will be better. Your model should be black now. If it is not, make sure to have deleted any material, and that you are in "Texture Viewport Shading" and not "Solid ViewportShading" : Switch to Texture Paint. Paint the edges of the helmet. What you are trying to do is to make the small details on the helmet, for instance if the helmet has a small cambered area on the top, that will help you to have it with the bump map without having to model it, and therefore saving some polygons and some time. When you're done export the vertex paint image you made into png format. Now duplicate the helmet. Why ? Because you will need an highly detailed helmet to apply the texture you created. You need to keep the older one to make the AO (Ambient Occlusion). NOTE : If you try to do vertex painting in low-poly objects, you'll get ultra-low resolution results due to the low density of the mesh: you need several vertices in order to use vertex painting with more detail. Like it is said in the video, the texture needs to be blurred in order to be cleaner and to have a triangular/rounded shape instead of a rectangular one. Open a program like GIMP or Photoshop, and start editing the texture. Since it can be hard to have a clean trail on the details you wanted to add, you can fix them in GIMP. NOTE : You can also make all from scratch there, and skip the Texture Paint step. To do that, go in the UV menu and select "Export UV Layout". Now you can use it as a layer, and paint over it. That can be faster and cleaner, but you will lose the immediate render you have in blender. Moreover, if the UV is not flat, and/or proportional, your texture might not be applied correctly. That's why we don't do it here. Once in your editing software, You can blur the texture , but that will make the modification you make less linked to the rest (You will have full lines in middle of blurred ones) Remember that if you want some parts not to be smooth you have to make sure they aren't blurred. Go back to Blender and return to object mode. Select the duplicated mesh. Apply the symmetry modifier, and add a "Subdivision Surface" modifier. Use those parameters : Now add a Displacement Modifier with those parameters (Usually 0.015 is fine, you can add a little more but starting at 0.030 it gets really weird). INFO : For a quick view on what you can do with a displacement modifier you can have a look here : If you don't have the texture in the list (that's generally the case) you will need to add it. Click on the that will open this submenu : Change the type to "Image or Movie" You have now those sub-menus : Click on open and select your GIMP Texture Paint modified Image : Go back the Modifier Tab And make sure the Texture Coordinates is set to UV and not local like this: So now you have a High Poly mesh with the displacement map. You can go back to the low poly model to edit the texture as much as you want since you kept it. Once you are happy with your result you can proceed to the next step. BAKING NOTE : It's better if your low-poly is triangulated for the next steps. TIP : To fast triangulate your mesh, go to edit mode (TAB), select all your faces, and press Ctrl + T. 1) Dirty Vertex Texture INFO : If you want to have some information about the dirty vertex feature you can check the link below. The second one is if you want to get even more in depth (Courtesy of Enrique) It's time to bake the textures ! Select the High Poly Mesh and then Shift + Select the Low-poly one. Make a new texture with the parameters below . NOTE : 1024x1024 is good but too much for such small pieces in the game. This texture will be used to bake the Dirty Vertex Texture. Apply all the modifiers on the High Poly Mesh. Switch to Vertex Paint mode then press space and type "Dirty Vertex Colors" without quotes. Click on the "face selection masking for painting" () icon if it is on since you have a high poly mesh you will hardly see anything. Go to the material tab and create a new one for both the High and Low Poly. Set the diffuse intensity to 1.000 and the specular intensity to 0.000. Scroll down and tick vertex colour paint. Switch back to object mode after that. Go to the render tab and make sure bake mode is "Textures", and that the following parameters are on : Make sure both are selected, and that the low poly is active. Then click on bake. INFO : If you don't remember or simply don't know what is an active or just selected object I suggest you read this : Finally apply the texture to the low-poly. Don't forget to save it somewhere you will need it . 2) Normal Map Texture Then make the bump (Change the textures drop box to Normal). Make sure you kept the same selection as the previous step (low-poly active and high poly selected) If the bump doesn't look good try to play around with the bias. NOTE : You can also make all from GIMP, using the normal map plugin that you can find on my other tutorial here (http://www.wildfiregames.com/forum/index.php?showtopic=18514). I really depends on how you want it to be. This is easier that way, but it can be sometimes really bad. You can also as it is mentionned there use software like Crazy Bump. If you choose that way, you'll have to do the Normal after the AO. INFO : For a better comprehension on bump maps I suggest you read that : 3) Ambient Occlusion Texture Then go to the world tab and tick the Ambient Occlusion Checkbox : Go back to the render Tab Hide the High Poly (Shortcut : H) and select only the Low-Poly, then click on bake : Save the AO texture. You the hardest part ! 4) Diffuse Texture So now you have two textures and a bump (but we won't use it here) you need a metal texture, and for that our friend Enrique made a really nice one ! So why do you need those textures you may ask ? Well you will need them to add the remaining details in the helmet. How ? 1) Open this File in Gimp 2) Open the AO as a layer, and use the multiply parameter 3) Repeat step 2) with the dirty vertex You will get something like this : It's not bad but it's too dark. TIP : Play with the levels Tool on the Dirty Vertex layer since it's the one that darkens everything. You'll eventually get something like this which is a bit overbright, but not that much. TIP : Hey but It's a bronze texture, how do i do If I need Iron ? Easy : Desaturate. And you'll get this : 5) Optional : Preview In Blender You can apply all those textures to see how it will look like in game. Import them all tint the AO to look like a metal texture, and since Blender is using GLSL to render you will have something close. Then go to the Texture tab add a new texture, select image or movie like you did for the Displacement Map, then add the Bump, You will have to set the following parameters : Finally add the AO With those params : Go to the 3D viewport and press N to make the side panel appear. Set Shading to GLSL. The helmet will turn black. Don't panic. Create two hemispheric lights, (Shift + A) and your helmet will shine ! Now set the layout to 3D View Full, take a screenshot, then crop it and upload it to the forums !









.thumb.png.ce58cea22940c255f5b0a735d5abee36.png)
