Leaderboard


Popular Content
Showing content with the highest reputation on 2016-06-17 in all areas
-
Heavy warships/quinquiremes/Juggernauts are ships that deal 30 crush + 30 hack damage per shot, which increases if you garrison catapults. The problem is, they are useless. I was recently in a game that proved how weak the heavy warship is - at huge expense I produced a heavy warship with 6 catapults in it, which was able to destroy only a couple of docks before the enemy chariots arrived and forced it to retreat. It was not able to kill any towers or fortresses, which was my intended purpose of making the catapults and warship. Here are the stats for Seleucid trireme: 1400 HP, 35 pierce damage per 2 seconds per arrow, armor: 5 hack, 10 pierce, 5 crush, range 55 For a Seleucid heavy warship: 2000 HP, 30 hack + 30 crush per 5 seconds per shot, armor: 5/10/5, range 65 Without garrison, they are useless in ship-to-ship combat. If you garrison a trireme-class ship with 10 civilian soldiers - which you can do in age II, as soon as you make a trireme - it will destroy an empty heavy warship. Producing a garrisoned heavy warship is an incredibly expensive late game luxury. For Seleucids, 1 heavy warship with 5 catapults in it costs 1950 wood 1750 stone 200 metal. It is more expensive than two fortresses - approaching the cost of three fortresses - and occupies 18 population. Plus, catapults require fortresses to produce them. For ship-to-ship combat, a garrisoned heavy warship will not necessarily beat a garrisoned trireme, in addition to the crazy expense. The trireme with 10 citizen-soldiers deals 35/2*13 = 227 pierce damage per second, which is 80 damage per second after ship armor. The heavy warship with 5 catapults deals 30/5*6 = 36 hack plus 36 crush damage per second, which is 43 damage per second after ship armor. Even though the garrisoned heavy warship has more HP, it only deals about half as much damage. Against buildings, pierce damage is negligible due to armor. That 36 hack + 36 crush damage per second, reduced by a fortress's 15 hack armor and 2 crush armor, comes out to 36.5 damage per second. At this rate it would take about 2 minutes to take down a 4200 HP fortress with the heavy warship. This rate is comparable to two single catapults not on a ship. It is very slow, giving the opponent plenty of time to react, or simply to repair the fortress. At 4.2 HP/second/worker, nine repairing workers would be sufficient to prevent the fortress from losing HP. Now consider, as another form of naval siege, a Briton medium warship with 5 battering rams in it. They could unload on the shore and kill the same fortress in roughly 10 seconds (4200 damage / 500 damage per second), plus the time it takes the rams to maneuver into position, which doesn't take long if the fortress is on the shore. Cost: 1900 wood 1150 metal. So what change could balance the heavy warship? Let's operate under the premise that it ought to be at least good for naval siege. For this, have 100 crush damage per shot instead of 30, and have 10 pierce damage instead of 30 hack damage. The catapults do 100 crush and 10 pierce damage while not in the ship if they aren't upgraded, so shouldn't they do the same damage while in the ship? At this rate, it would take about 43 seconds to destroy the fortress. That's still slower than unloading rams, but it's maybe in the right area. I calculate that if the heavy warship has both armor upgrades (so 16 pierce armor) and the fortress is shooting 23 arrows, it would kill the heavy warship in about 48 seconds, which is good because it means the garrisoned heavy warship would kill the fortress before the fortress kills the garrisoned heavy warship.1 point
-
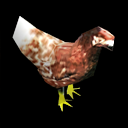
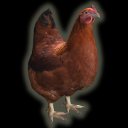
Hello everybody! I have been following the 0 AD development for a while and I find this project just absolutly amazing! The other day while playing I saw something, that I thought I could improve. So I gave it a shot. The current portrait for the chicken, is just a render of the low poly chicken model. The model works really well in the game, but the image looks a bit too low poly for a close up image. This is what the current portrait looks like: I wanted to replace the image with a nicer looking one. Since I am not a very skilled painter, I simply took an available chicken model in a higher resolution under CC0 license (http://opengameart.org/content/chicken-animated), rendered it and edited it with GIMP. The result looks like this: Since this is my first contribution I don't really know the whole process of adding things to the repository (I hope this is even the right thread...). But before I get into all that, I wanted to get some feedback on whether it looks good or not. And maybe some advice on how to continue to get this submitted. Thanks in advance, Foaly
 1 point
 -
@wowgetoffyourcellphone, but could you upload the commands.txt (and tell which SVN revision you used and what version of your mod)?1 point
-
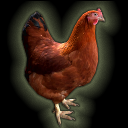
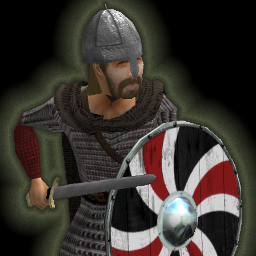
Yeah I totally agree. It looks fine on its own, but next to the other portraits it looks kinda faint and dim. I went ahead an redid the lighting in the original blender model and also adjusted the brightness and contrast in the final rendered image. I also increased the glow size a bit. Here is the result: If the normal process is that a team member commits the image, then I guess there is not much else to do for me Unless somebody suggests some more improvments. If my name is included in the credits (Foaly), I think it would be fair when the creator of the original chicken model (CDmir - Čestmír Dammer) would be included as well. Even though it is under CC0, it feels kinda wrong to take all the credit if somebody else has done 80% of the work. Or do you have a different policy for derived work?
 1 point
 -
Oh, I was asked to link to this topic too1 point
-
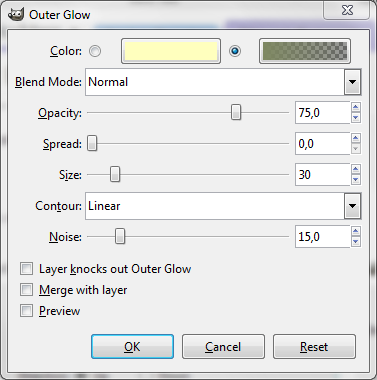
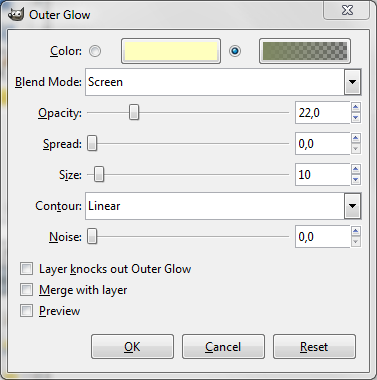
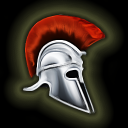
Alright. Normally portraits consist of 5 different layers. I assume that you've installed the LayerFX plugin from here: http://registry.gimp.org/node/186 (make sure you install the layerfx.2.8.py and not one of the others). I apply the effects on 256x256 and then size the image down to 128x128 afterwards. The bottom layer is just straight black. Nothing special here. Now starts the fun. The second bottom layer is an Noisy Outer Glow effect. The color used is 7e8862. The exact glow size can be varied depending on the shown object but here are the parameters that work in almost all occassions: Above it is a small Smooth Outer Glow layer. Last effect is a Drop Shadow. This is to create a sense of 3D in the image: Then on top comes the portrait itself. Always make sure that the FX are applied to this layer. Also when resizing the layers, make sure that do a 'resize layer to image' action on the FX layers. Here are a few examples on what the final portrait could look like (the bottom two aren't sized down, and these also used exact the same parameters as listed above. The others have slightly different sizes / colors / noise amounts): I hope this helps!


 1 point